Manual clock adjustment by setting o4-17 to 1, I.6 start-up programming and operation – Yaskawa iQpump Micro Quick Start User Manual
Page 63
Changing Settings
• Changing YYYY/MM/DD HH:MM: Pressing the up arrow key will increase the number selected by the cursor from 0 to
9. Pressing the down arrow key will decrease the number selected by the cursor from 0 to 9.
• Setting the Seconds per Month: This setting does not need to be adjusted. Pressing the up arrow key will increase the
number selected by the cursor from -504 to +488 in increments of 8. Pressing the down arrow key will decrease the number
selected by the cursor from -504 to +488 in increments of 8.
The feature is used to keep the RTC in sync with an external device clock, like a PLC or BAS system, and will adjust the
clock by a set amount of seconds every month.
n
Real-Time Clock Setting at Initial Power-up of a New Drive
Setting the Real-time clock is required at power-up of a new HOA operator or after digital operator battery replacement.
illustrates how to set the Real-Time Clock at initial power-up of a new drive.
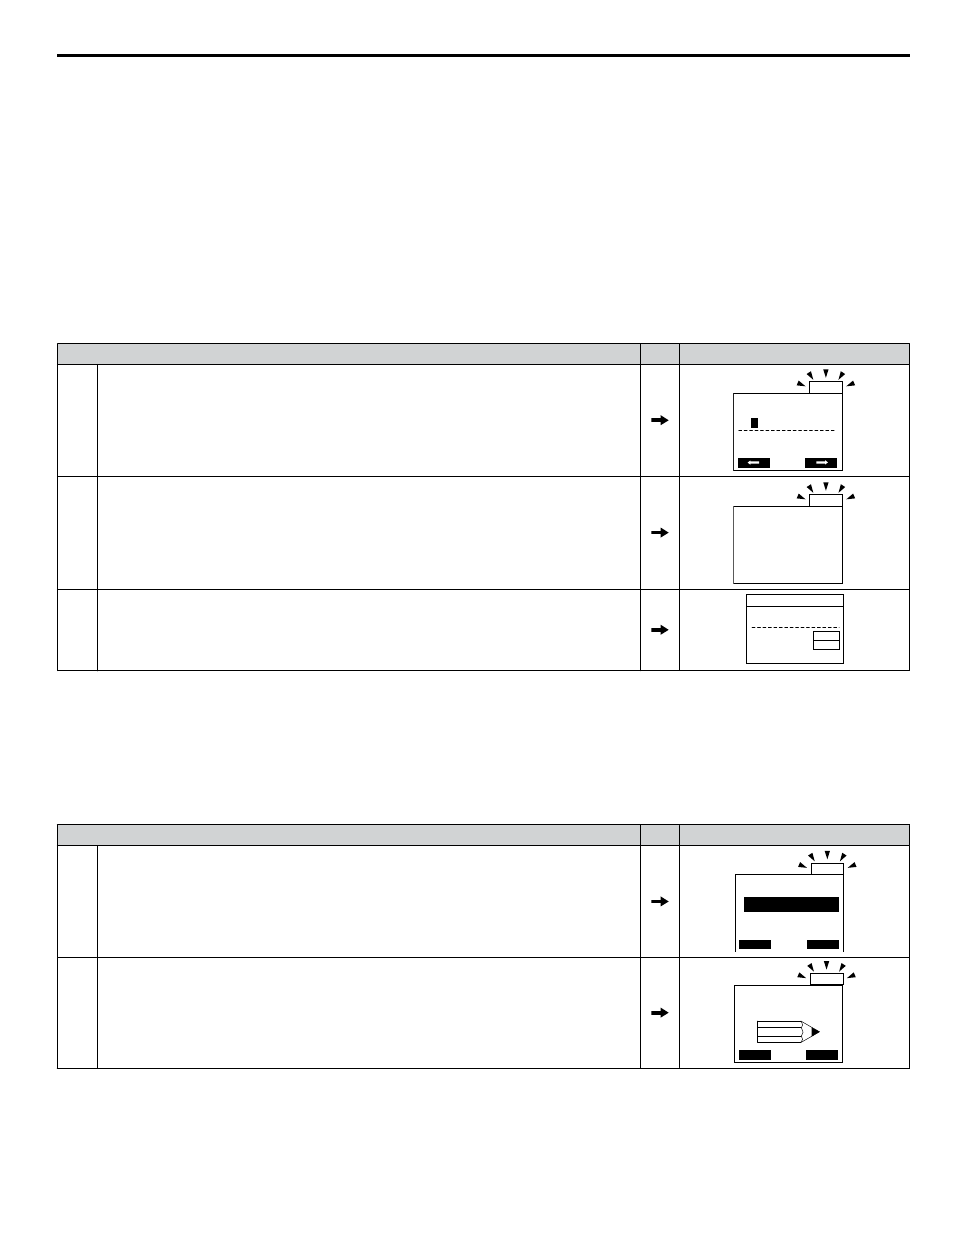
Table i.18 Clock Adjustment Procedure at Power-up of a New Drive
Procedure
Display
1
Turn the power on. The Real Time Clock Adjustment Display will appear. Use the right arrow
key to select the desired digit, then set the correct date and 24-hour clock time using the up and
down arrow keys.
ALM
20
1
0/01/01 00:00
Second per month
+ 0 sec
YYYY/MM/DD HH:MM
ALM
2
After entering the Real-Time Clock data, press the ENTER key to save the changes.
The display will indicate “Entry Accepted” and return to the initial display in step 3 and the alarm
LED will be OFF.
ALM
Entry accepted
3
Initial display.
- MODE -
U5-99= 0.0PSI
U1-02= 0.00Hz
U1-91= 0.0PSI
DRV
Auto Setpoint
Rdy
<-MONITOR->
LSEQ
LREF
n
Manual Clock Adjustment by Setting o4-17 to 1
The following actions are possible in the Clock Adjustment Mode:
• Set the current time
• Check the time set to the drive Real-Time Clock
illustrates how to set the Real-Time Clock manually.
Table i.19 Manual Clock Adjustment Procedure by Setting o4-17 to 1
Procedure
Display
1
The “Clock Not Set” display will appear if the Real-Time Clock data is not entered within 30
seconds of power-up of a drive with an HOA operator that has not yet been set.
- MODE -
DATA
DRV Rdy
ALM
FWD
ALM
Clock Not Set
Press F2 to Set
2
Use the up and down arrow keys to scroll through display menu until the screen shows
“Programming”.
- MODE -
HOME
PRG
ALM
Programming
FWD
i.6 Start-Up Programming and Operation
YASKAWA TOEP YAIQPM 02B YASKAWA AC Drive - iQpump Micro Quick Start Guide
63