Exporting files – Exacq exacqVision Pro User Manual User Manual
Page 120
120
Exporting Files
NOTE: For information about the Quick Export button, see the beginning of the “Search Page Overview”chapter.
The Export buttons allow you to save a picture or video, print a picture, or save files to a CD or DVD (including DVD+R and
DVD+RW). Left to right, the icons are Save Picture, Save Video, Print Picture, and Burn Saved Files to CD or DVD:
NOTE: You can also copy a picture to a clip board and paste it into a document. When you find the image you need, right-
click anywhere in the Video Playback window and select Copy Image to Clipboard. The image will be stored, and you can
paste it into another document. (These features are also available on the Live page when you right-click a video window.)
To export video from up to 16 cameras, or from a single camera on exacqVision Start, perform a video search and
complete the following steps (note that serial data cannot be exported using this process):
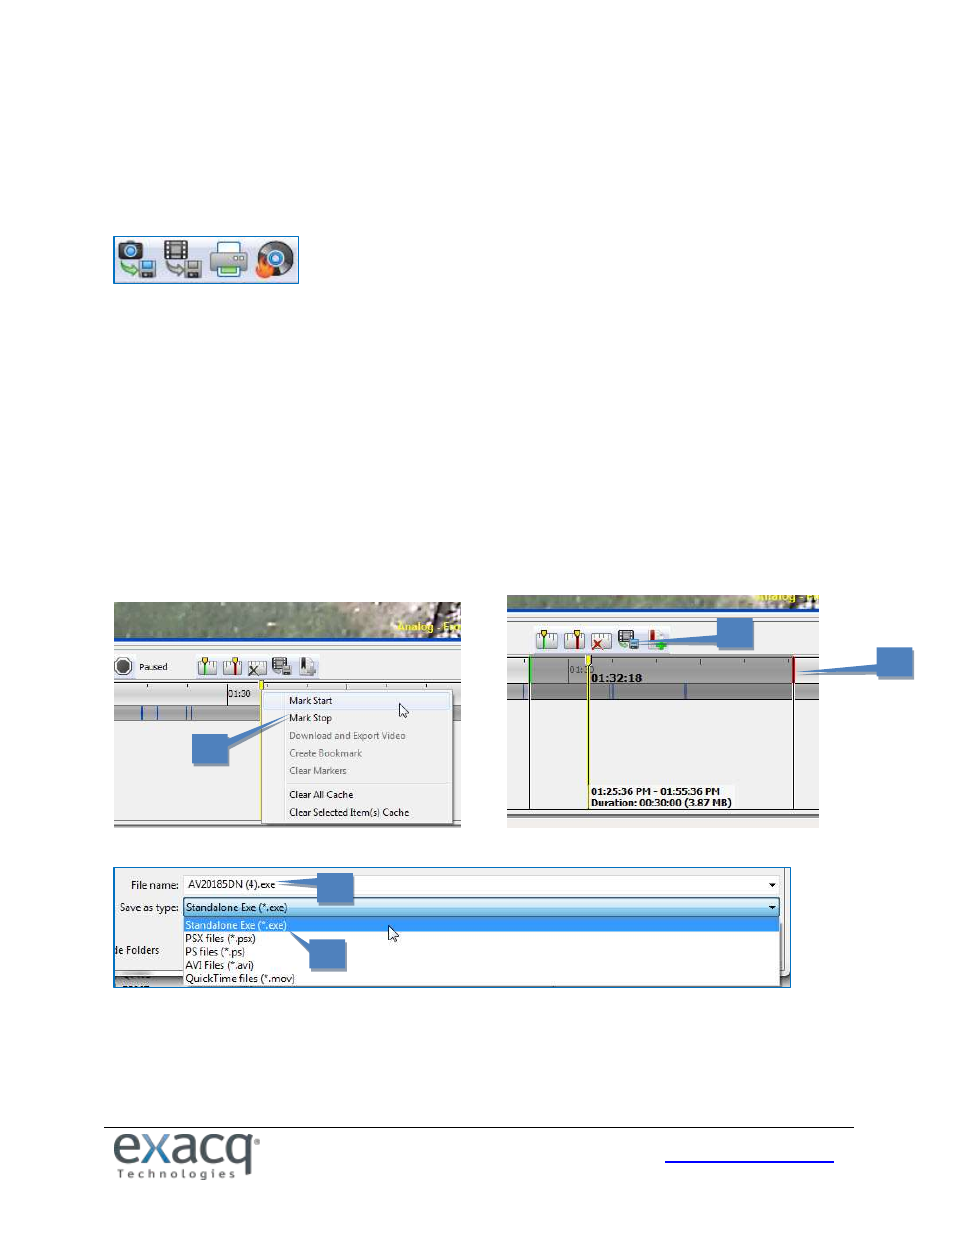
1. Locate the start of the video clip. Right-click the timeline (or right-click the video window) and select Mark Start
or Mark Stop from the pop-up menu.
2. A default export range is displayed, with the green marker indicating the start of the export clip and a red
marker indicating the end of the export clip. You can slide the start and end markers earlier or later as desired.
3. Click the Export Video button.
4. In the Export Video window, select a file name and location.
5. Select a file type.
6. Click Save (not shown).
By default, the export is saved as an *.exe file, which can be launched in its own player and run by a user who does not
have access to exacqVision Client. You can also save the clip as a *.psx file, a packaged .ps file that can be run with a
simple double-click. The *.avi, or *.mov file formats are also available if you want to email it to another exacqVision Client
user. If you are running the client on a Linux or Mac operating system, you should save the clip as a *.psx file unless you
are emailing it to a Windows user.
1
2
=
2
3
=
2
4
=
2
5
=
2