Groups – Exacq exacqVision Pro User Manual User Manual
Page 84
84
Groups
NOTE: The Groups page is not available in exacqVision Start.
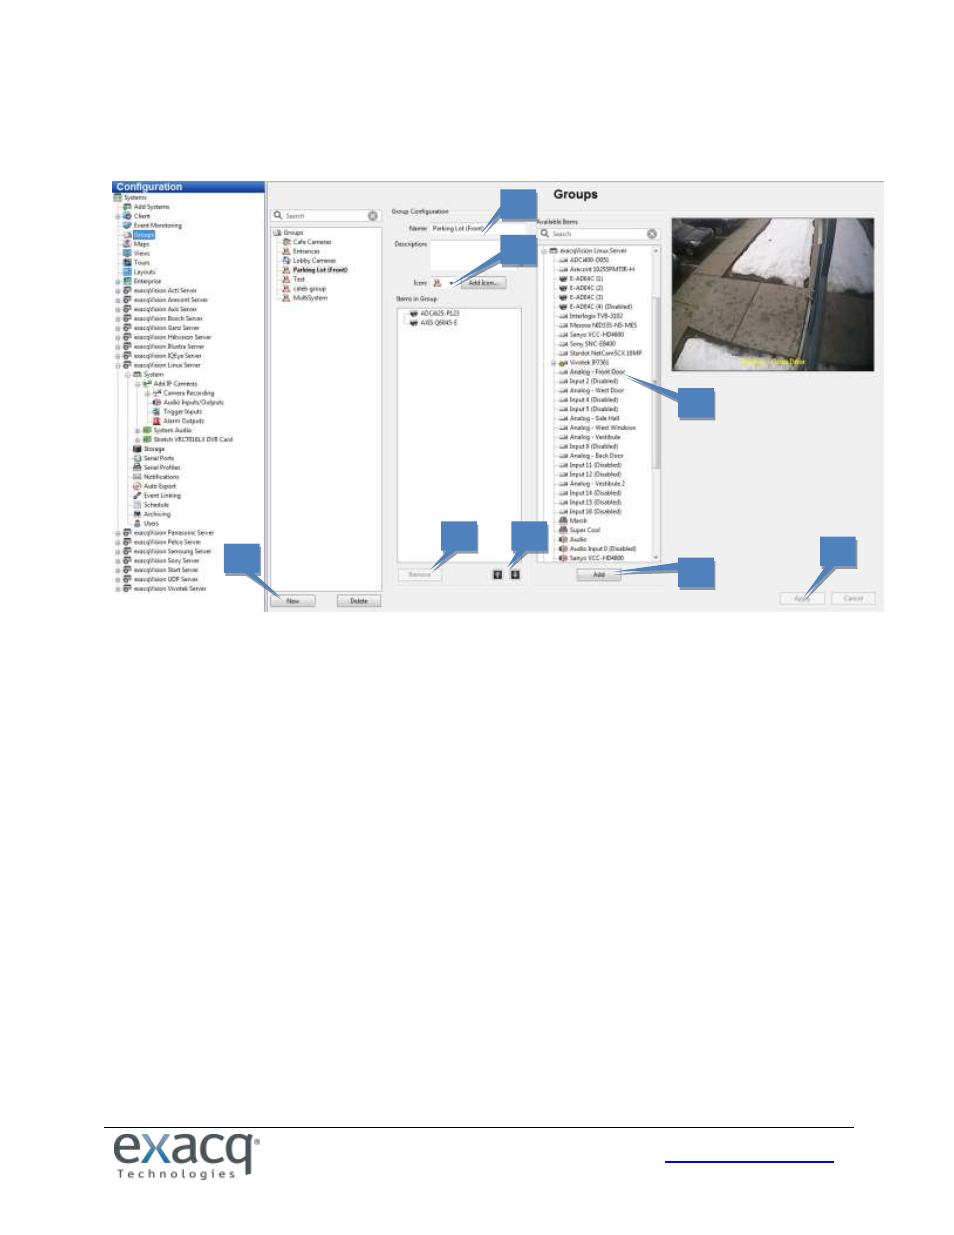
The Groups page allows you to create logical groups of cameras and other items connected to one or more systems. This
is a useful when you have multiple systems with a large number of cameras spread across a large building or campus, and
you would like to place cameras in logically named groups such as First Floor, Second Floor instead of viewing your
cameras in default groups based on their connection to the systems. You can also search for video and data from entire
groups instead of adding each item individually during the search.
1. To create a new group, click New.
2. In the Group Configuration section, enter a name and description for the group.
3. Select an icon from the drop-down list to represent the group in the Live and Search site trees. Alternatively, you
can select a custom icon in a variety of file formats by clicking Add Icon… and then browsing the location of the
file.
4. Select an item from the Available Items list. Video, audio, or data associated with the item is displayed in the
video window. You can also select a system name to add all items from that server to the group.
5. Click Add to include the item name in the Items in Group section. Continue adding items until your group is
complete.
6. To remove an item from the group, select it in the group list and click Remove.
7. To change the group list order, select an item in the Items in Group list and click the up or down arrow.
8. When finished, click Apply.
These groups can now be selected in Live mode to monitor live video or search recorded video.
1
2
3
4
5
6
8
7