Client – Exacq exacqVision Pro User Manual User Manual
Page 81
81
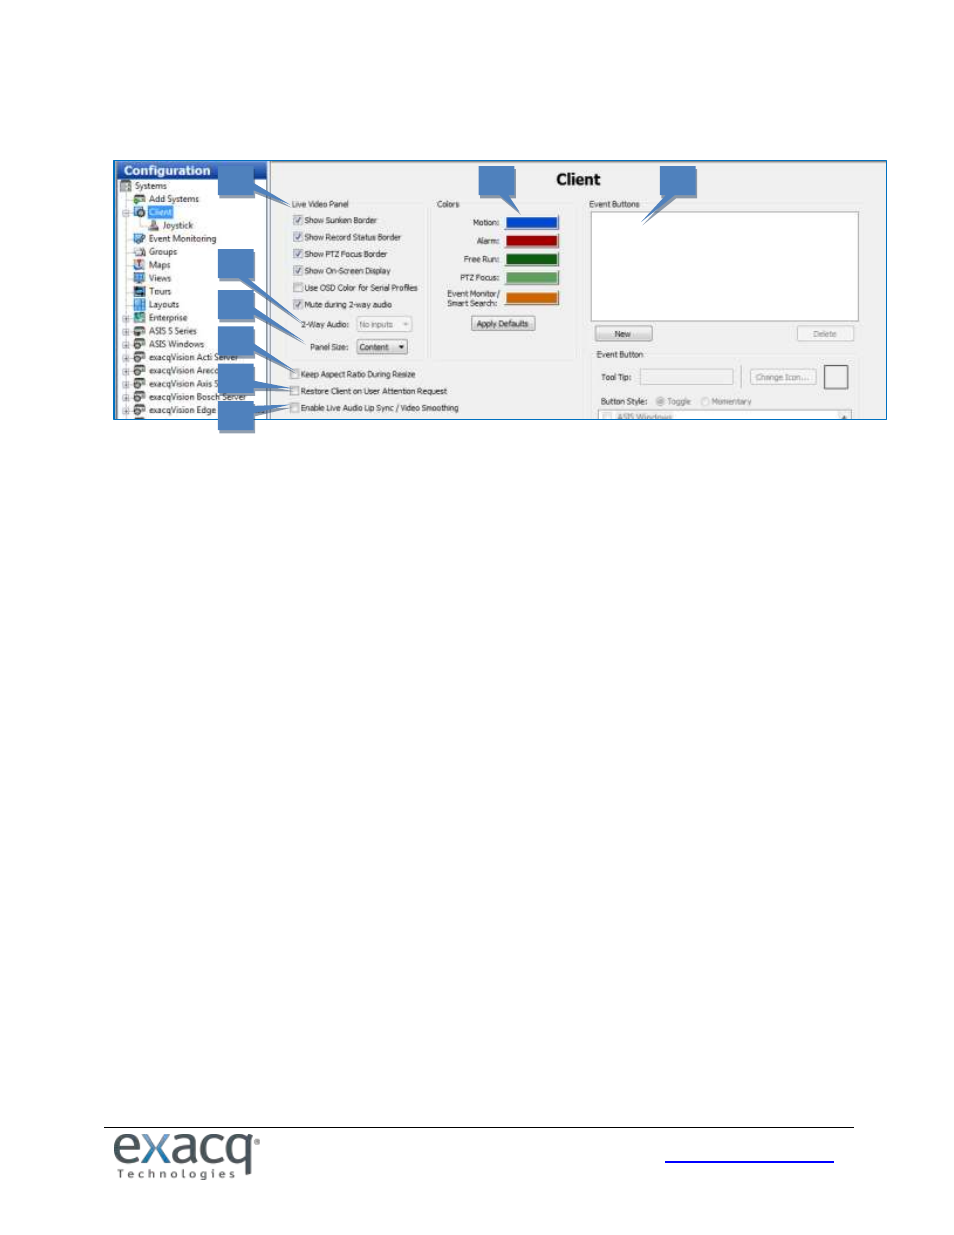
Client
The Client page allows you to customize your client based on your personal preferences.
1. The Live Video Panel section allows you to modify the way certain windows are displayed on the Live page. This
includes disabling the colored borders that indicate motion or alarm, and disabling the sunken borders to
decrease the separation between video windows (this can be useful if you want to place two separate video
streams from a single panoramic camera next to each other and view them a single, nearly seamless video
window). You can also mute all sounds while 2-way audio is active (not available in exacqVision Start).
2. The 2-Way Audio drop-down list (not available in exacqVision Start) allows you to select a microphone
connected to the client computer that can be used to send audio from the client to the server.
3. Panel Size allows you to choose the aspect ratio of live video windows. The following options are available:
Content displays the video windows in the aspect ratio of the video as it is captured. If the majority of
the displayed video is captured in 16x9, all video windows are shown 16x9.
Window uses the aspect ratio of the entire Live Page to determine the aspect ratio of the video
windows.
16x9 displays all video windows in 16x9.
4x3 displays all video windows in 4x3.
NOTE: If the video windows are shown in 16x9, wide-screen layout buttons are not available at the top of the
Live Page screen.
4. Keep Aspect Ratio During Resize maintains video aspect ratios when exacqVision Client is made larger or smaller.
5. Restore Client on User Attention Request displays a minimized client if an event occurs requiring user attention.
6. Enable Live Audio Lip Sync/Video Smoothing buffers up to five seconds of audio and video to ensure that they
play back synchronized. This option can compensate for an intermittent video stream; however, it increases
memory usage and video latency, so use it with caution.
7. The Colors section (not available in exacqVision Start) controls the default border colors for Motion, Alarm, Free
Run, PTZ Focus, and Event Monitor. To change a color, click on the colored bar of the border type, select a basic
color or create a custom color, and then click OK.
8. Event Buttons (not available in exacqVision Start) allows you to create a shortcut to any Soft Triggers you have
configured in Event Linking. To create an Event Button, click New. Enter a description in the Tool Tip field and
click Change Icon… . Select a default or custom icon and click Open. Select the Soft Trigger from the list and then
click Apply. The icons will be displayed next to the Soft Trigger icon on the Live mode toolbar. You must select a
different icon for each Soft Trigger shortcut. Buttons can be configured for toggling or momentary activation
(momentary is typically used with 2-way audio so that audio out is disabled when the button is released).
1
3
4
5
2
6
7
8