Layouts – Exacq exacqVision Pro User Manual User Manual
Page 88
88
Layouts
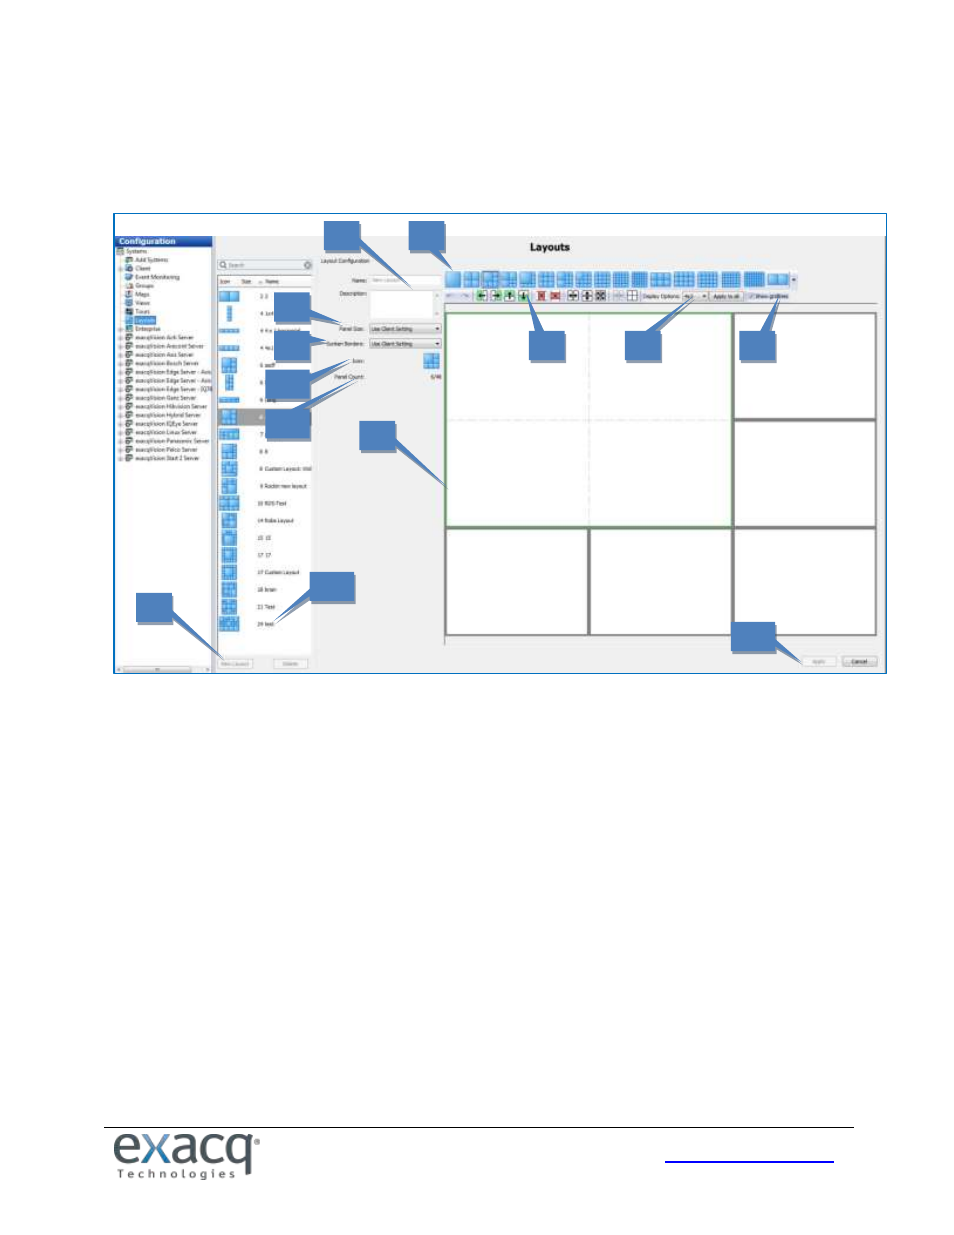
The Layouts page allows you to create custom video window layouts for use on the Live Page. Several basic layouts, such
as 1x1, 2x2, and so on, are already available by default. Layouts are limited to a maximum of 48 panels. You can save and
search camera views in a custom layout the same way as with default layouts.
To create a custom video window layout, complete the following steps:
1. Click New Layout.
2. Select the layout button that most closely resembles the custom layout that you want to create.
3. Select a video panel, or hold the Shift or Ctrl keys and select multiple video panels. Selected panels are outlined
in green.
4. Select any of the configuration buttons. (These buttons are not activated until you select one or more panels.)
Hover the cursor over each button to view a description of their functions. You can add or delete columns or
rows, merge or split panels, and more. You can also merge two windows by clicking a corner of a panel and
dragging it.
5. For each selected panel, select the display option (4x3 or 16x9) that corresponds to the type of camera that you
would normally display in the panel. To activate the selected display option on all panels, click Apply to All.
6. Select Show Gridlines to compare the size of smaller windows within a larger window.
7. Enter a name and description for the custom layout.
8. Select the size of the entire layout from the Panel Size drop-down list. You can choose 4x3, 16x9, or use the
setting automatically selected by the client based on the client window.
9. Select whether you would like to show or hide sunken borders, or automatically use the setting selected on the
Client page.
10. The Icon indicator shows what the layout icon will look like on the Live Page.
11. Panel Count shows how many panels are included in the layout out of the maximum (48).
12. Click Apply to save the layout.
13. To edit a custom layout, select it from the layout list.
1
2
3
4
5
6
7
8
9
10
11
12
13