Camera settings – Exacq exacqVision Pro User Manual User Manual
Page 29
29
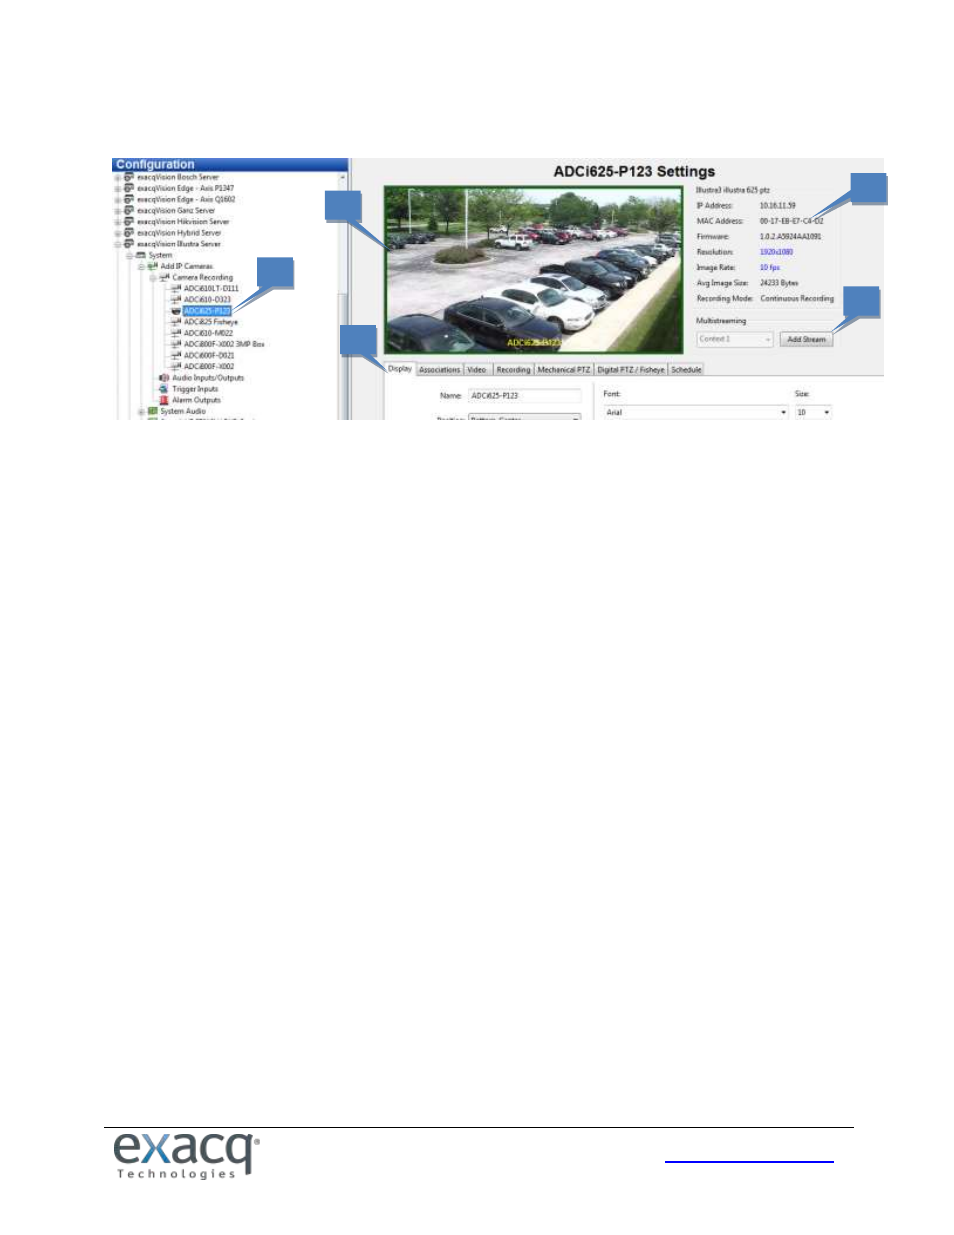
Camera Settings
The Camera Settings page is where you configure the individual IP and analog camera settings such as camera name,
onscreen display, PTZ settings, video settings, recording quality and motion and video masks. This page is similar for IP
and analog cameras, but certain features might be unavailable depending on the type of camera you are configuring. The
following features are available on the Camera Settings page:
1. Use the Configuration tree to select the camera that you want to configure.
2. A live view of the selected camera is displayed.
3. Basic information about the camera is listed.
4. The Multistreaming feature (not available in exacqVision Start) appears only for cameras that support
multistreaming. It allows you to create streams with different video settings or regions of interest from a single
camera view. For example, you might want to limit video quality for remote clients while displaying the same
camera in high quality for local clients. Each stream can have custom recording schedules, storage rules, and
event triggers.
Each camera has a different limit to the number of streams that can be added. The drop-down list shows the
next context (stream) number available; click Add Stream to name the new context. You can then adjust the
quality settings for the stream or modify the Crop Window section (explained later) to create a region of
interest.
A camera configured for multistreaming is listed with a plus button in the Configuration tree; click the plus
button to view all streams configured on the camera. In the Live site tree, a stream with a specific region of
interest is listed as a separate camera; a stream with different video settings is listed as a child, and the parent is
labeled with a yellow star (see the “Live Page Overview” chapter for an example). To delete a stream, select it in
the tree and click Delete Stream.
5. A series of tabs allows you to complete the rest of the camera’s configuration, as described in the following
sections.
2
3
1
5
4