3 fuse replacement – Flowserve MX Limitorque User Manual
Page 109
101
Limitorque MX Maintenance and Spare Parts FCD LMENIM2314-00 – 07/08
flowserve.com
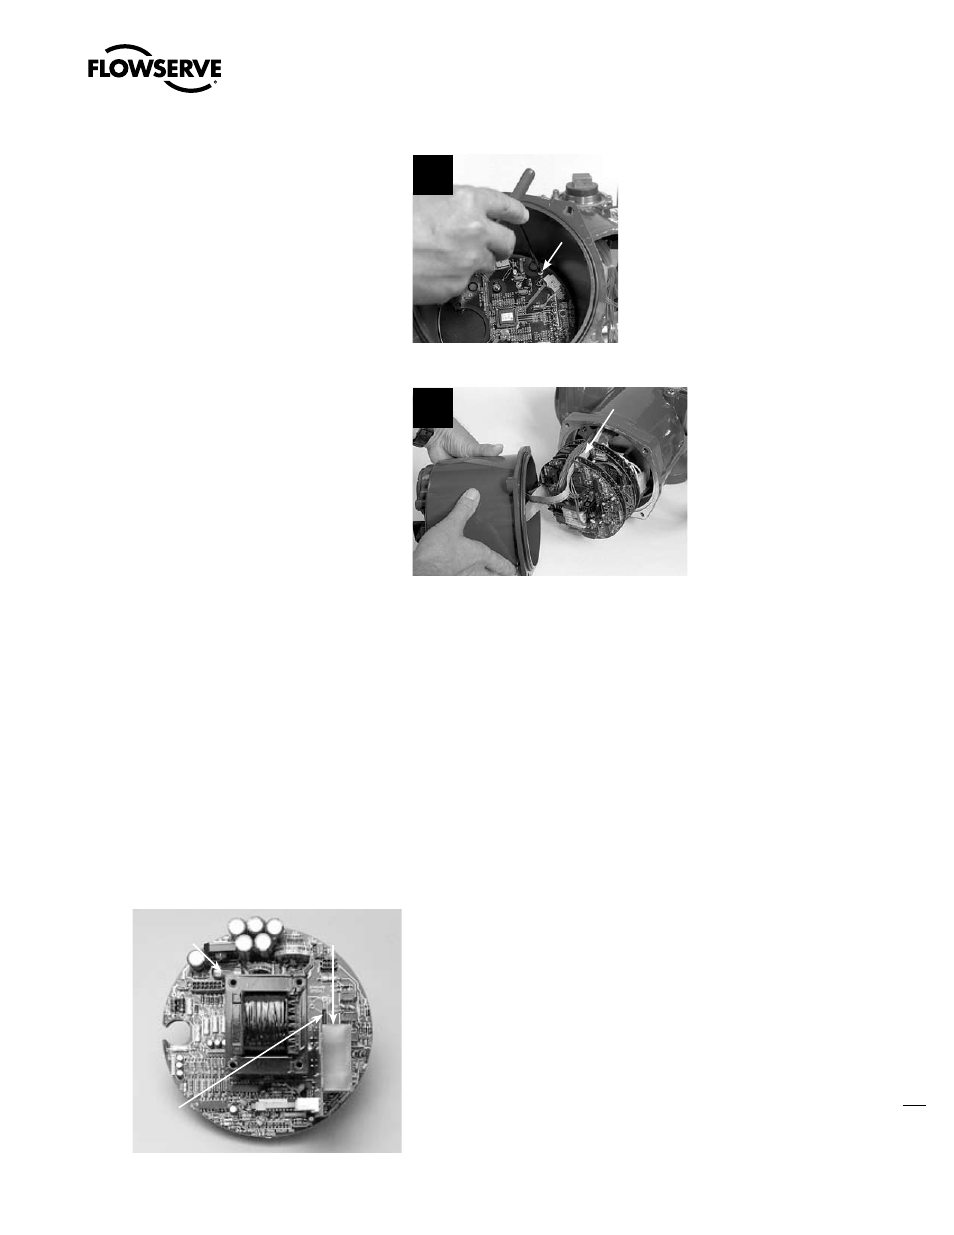
STEP 19
Using a 3 mm hex key, install the four M4
screws (#8-25) to retain the CP board inside
the CP cover.
19
8-25
STEP 20
Ensure control harness wiring bundle is routed
through the control module mounting plate
notch and along electronic board semicircular
slot. This will help prevent pinching the wiring
when the CP cover is installed.
20
Controls
Harness
Wiring
STEP 21
Reference CP (subassembly #7) to reconnect plugs and install the CP cover.
5.2.3 Fuse Replacement
NOTE: If fuses need to be replaced, they can be found on the power board (#8-3). There are two
primary fuses (1 A, 600 V) on the part of the power board that is perpendicular to the main processor
board. There is also one secondary fuse (0.1 A, 250 V) on the part of the power board that is parallel
to the main processor board. Remove plastic covers to replace the fuses. Removal of the steel chassis
assembly (#8-8) may be necessary to access the secondary fuse. The view to the right shows the
control module with the chassis assembly removed.
Figure 5.3 – Location of Fuses and Voltage Jumper
Secondary
Fuse
Primary
Fuses
Voltage
Jumper