2 remounting – Flowserve MX Limitorque User Manual
Page 97
89
Limitorque MX Maintenance and Spare Parts FCD LMENIM2314-00 – 07/08
flowserve.com
STEP 4
Remove clutch ring (#1-37).
MX-85, -140, and -150 (removing clutch ring
assembly):
While pulling up on clutch ring end with socket
head cap screw (#15-9), rotate latch 90° and
slide clutch ring over drive sleeve and out of
housing.
4
1-37
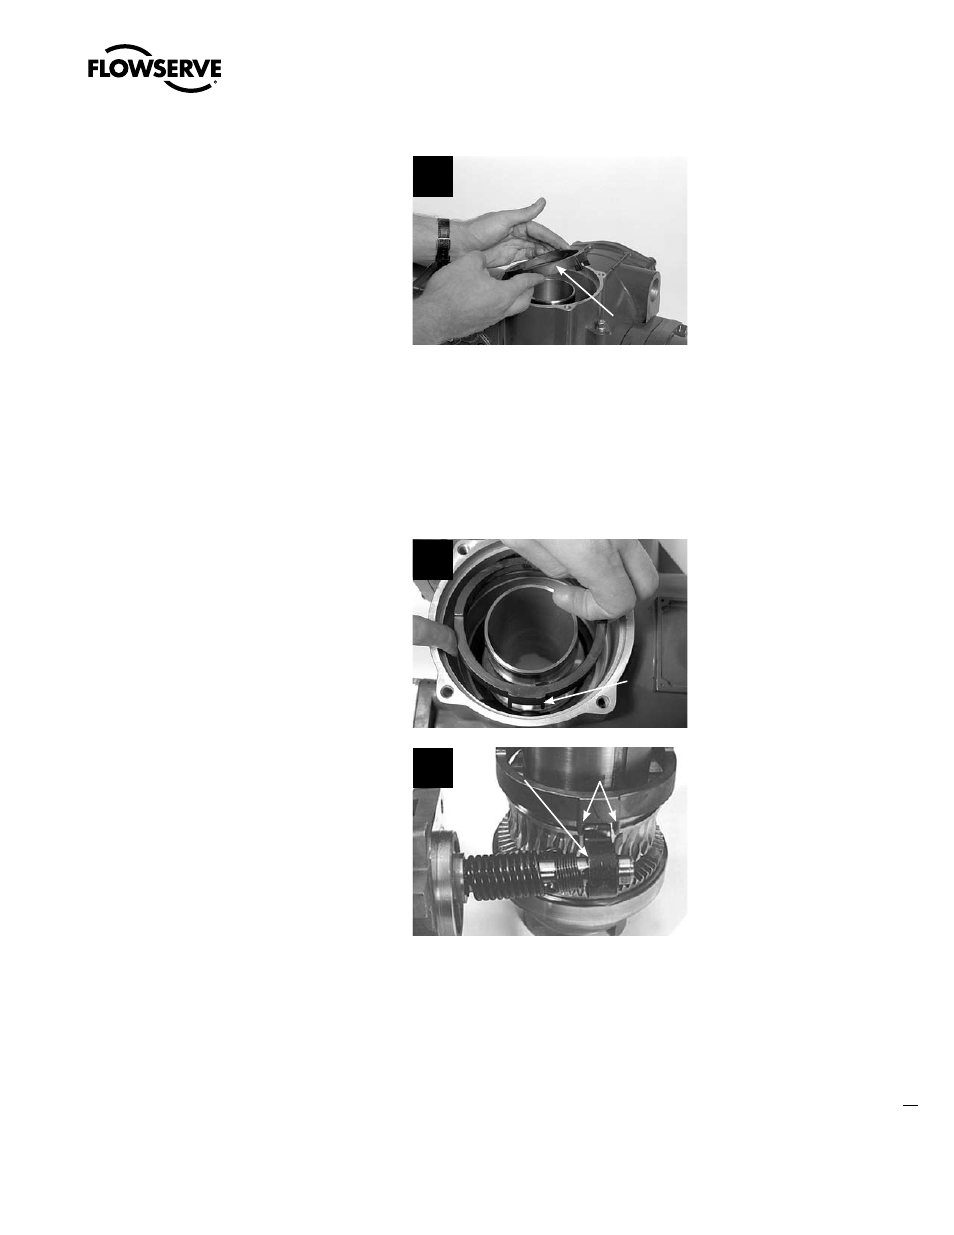
4.15.2 Remounting
c
WARNING: Potential to operate while dangerous mechanical parts are exposed during
subassembly removal. To prevent injury, turn off all power sources to actuator before
removing clutch and clutch ring components. Power sources may include main power or
control power.
STEP 5A (MX-20 AND -40 ONLY)
Remounting clutch ring
Fit the clutch ring (#1-37) over the drive sleeve
with the tangs (forked protrusion) facing down.
Seat tangs over declutch cam (see pictures 5a
and 5a1 at right). See warning note in Section
4.14.2, Step 8.
5a
Clutch
Tangs on
Clutch
Ring
(1-37)
Declutch Cam
Tangs
5a1