1 removal – Flowserve MX Limitorque User Manual
Page 72
Limitorque MX Maintenance and Spare Parts FCD LMENIM2314-00 – 07/08
64
4.10.1 Removal
First Remove
1. Remove actuator from mounting adapter.
2. Drain oil.
3. Remove motor (subassembly #4). (See Section 4.1.1.)
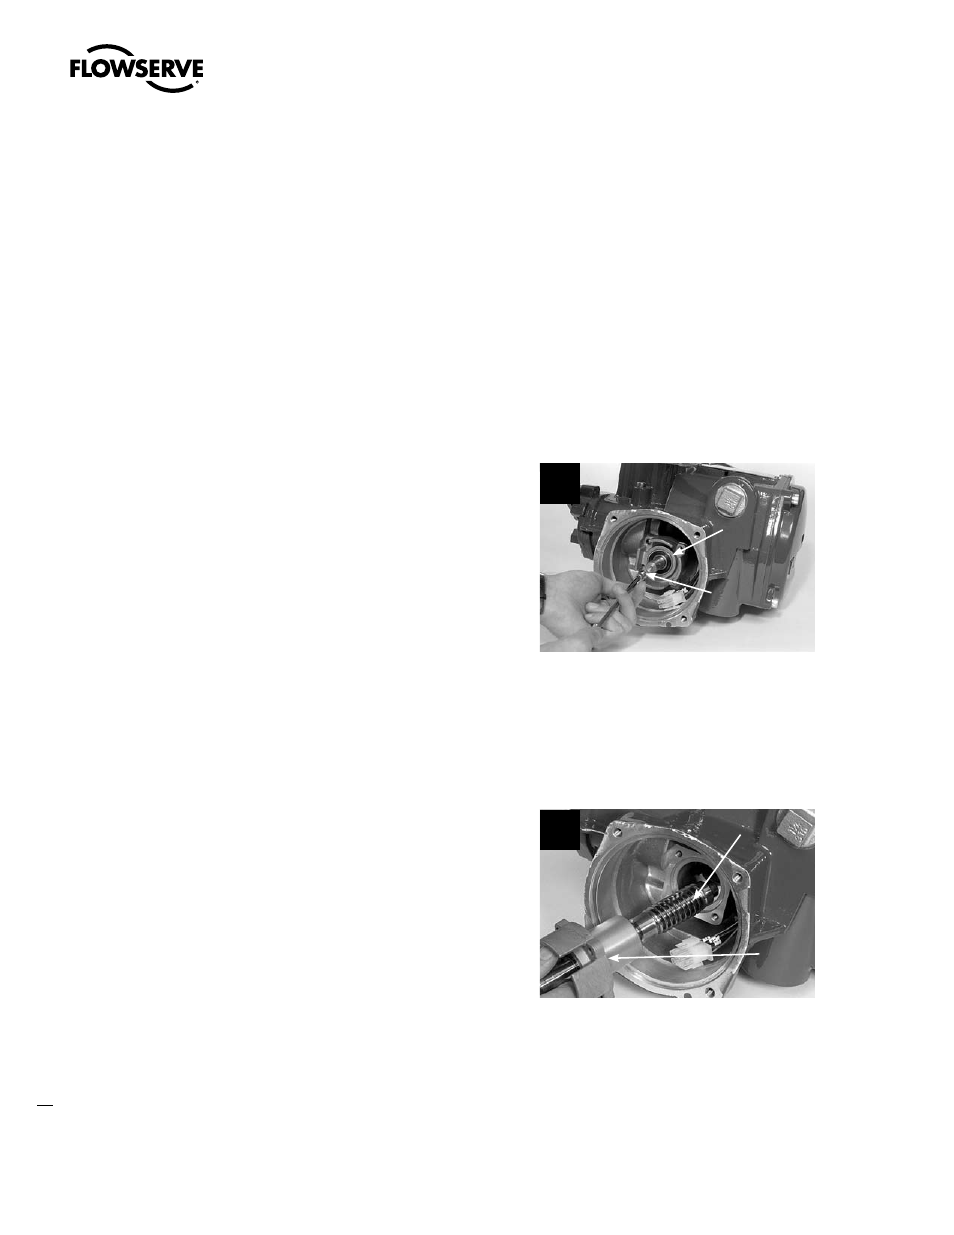
STEP 1
c
WARNING: Potential to operate while dangerous mechanical parts are exposed during
subassembly removal. To prevent injury, turn off all power sources to actuator before
removing worm shaft assembly. Power sources may include main power or control
power.
Remove the four screws (#3-9) that secure the
worm shaft cap (#3-2) to the actuator housing.
1
3-9
3-2
STEP 2
NOTE: The inboard bearing (#3-5 for MX-05, -20, -85, -140, and -150), at the end of the worm
shaft (#3-1) should remain in the actuator housing. If it falls out while removing the worm shaft
assembly, ensure it is replaced during remounting process.
Withdraw the complete worm shaft assembly
from the actuator housing, turning/rotating it
if necessary to free the worm from the worm
gear. Note the O-ring (#3-7) that is on the worm
shaft assembly. Replace at remounting.
2
3-7
(located
behind
flange)
3-1