2 − names and functions of parts, Front panel – Teac HS-2000 User Manual
Page 10
10
TASCAM HS-2000
Front panel
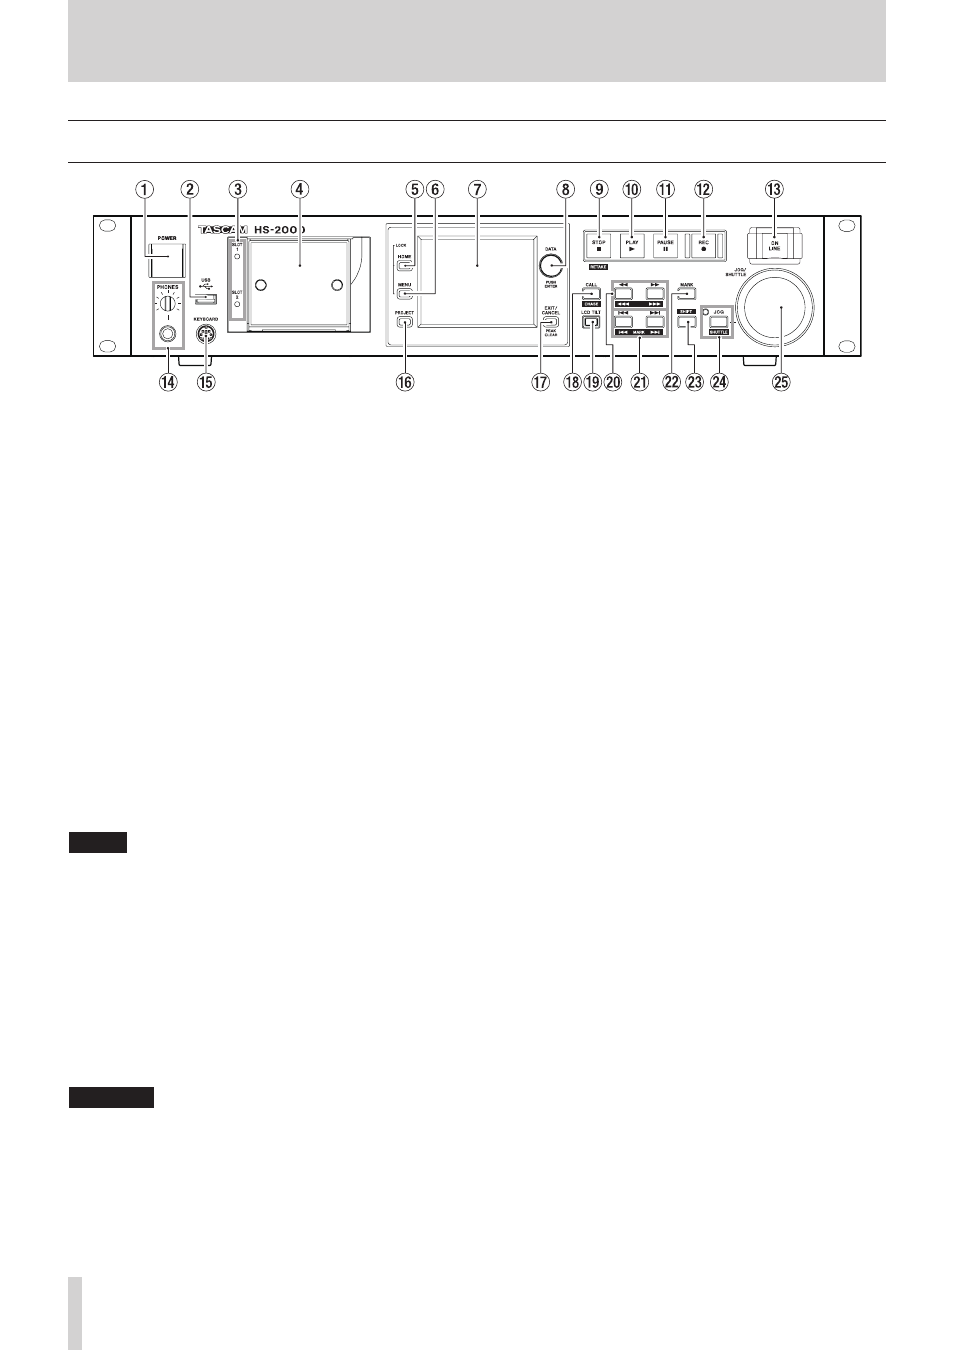
2 − Names and functions of parts
1
POWER switch
Use to turn the power on and off.
This switch has a cover to prevent accidental
operation. Lift the cover from below to access and
operate the switch.
2
USB connector
By connecting a USB flash drive, for example, you can
back up data from a CF card and transfer files from the
drive to the card. (See "Viewing and using folders and
files (BROWSE)" on page 115.) (See "Managing media
(MEDIA MANAGE)" on page 120.)
Connect a USB keyboard to input the names of
projects and sessions, for example. (See "Operation
using a computer keyboard" on page 131.)
By default, the unit is set to use Japanese keyboards,
which have a different layout from US English
keyboards. To use a US English keyboard, change the
setting on the
PREFERENCES
page of the
SYSTEM
SETUP
screen. (See "PREFERENCES page" on page
112.)
NOTE
Do not disconnect USB flash memory when
•
transfering files. You can connect and disconnect USB
flash memory at any other time.
You can connect and disconnect USB keyboards at
•
any other time.
This unit is not compatible with devices other than
•
USB flash drives and USB keyboards.
3
SLOT 1/SLOT 2 indicators
The indicator for the currently selected CF card slot
lights. When recording or copying, it blinks rapidly.
When no CF card is inserted in the current slot, it blinks
slowly.
CAUTION
Do not remove a CF card from a slot when its indicator is
blinking rapidly (because it is copying or recording).
4
CF card slots (SLOT 1/SLOT 2)
Insert CF cards here. (See "Inserting and removing CF
cards" on page 24.)
5
HOME key
Press to open the Home Screen.
Press the MENU key while pressing and holding the
HOME key to open the
LOCK SETUP
screen. (See
"Lock function" on page 27.)
Turn the DATA dial while pressing and holding the
HOME key to adjust the brightness of the color display,
the PAUSE, REC, PLAY and ON LINE keys and the JOG
[SHUTTLE], SLOT 1 and SLOT 2 indicators.
Push and turn the DATA dial while pressing and
holding the HOME key to adjust the brightness of only
the color display.
6
MENU key
Press to open the
MENU
screen.
Press the MENU key while pressing and holding the
HOME key to open the
LOCK SETUP
screen. (See
"Lock function" on page 27.)
7
Color display
This 3.5–inch TFT touchscreen color display has a 320 x
240 resolution, and shows important information. It is
also used to access and perform many operations.
8
DATA dial
Turn this to use as a DATA dial and press it to use it as
an ENTER key. When setting parameter values, press
while turning to change them in large increments
(coarse mode).
When the Home Screen is open in take mode, if
neither the number section on the
NEXT TAKE
NAME
screen nor the Flash Page knob is selected, you
can use this to select a take.
When a pop-up window is open, press this to use it as
an
OK
or
CLOSE
button.
Turn the DATA dial while pressing and holding the
HOME key to adjust the brightness of the color display,
the PAUSE, REC, PLAY and ON LINE keys and the JOG
[SHUTTLE], SLOT 1 and SLOT 2 indicators.
Push and turn the DATA dial while pressing and
holding the HOME key to adjust the brightness of only
the color display.
9
STOP [RETAKE] key
Press to stop recording or playback.
Press this while pressing and holding the SHIFT key to
retake the recording (erasing the last recorded take).