Setting the master clock, Setting inputs and outputs, Setting the inputs – Teac HS-2000 User Manual
Page 32: 4 – basic operation
32
TASCAM HS-2000
4 – Basic operation
5. After you complete making settings touch the
CREATE PROJECT
button.
NOTE
If a project with the same project name already exists,
the
CREATE PROJECT
button appears gray and you
will not be able to create a new project. If this happens,
change the project name.
6. A confirmation pop-up will appear.
Confirm the settings, and touch the
OK
button in the
pop-up window to return to the Home Screen.
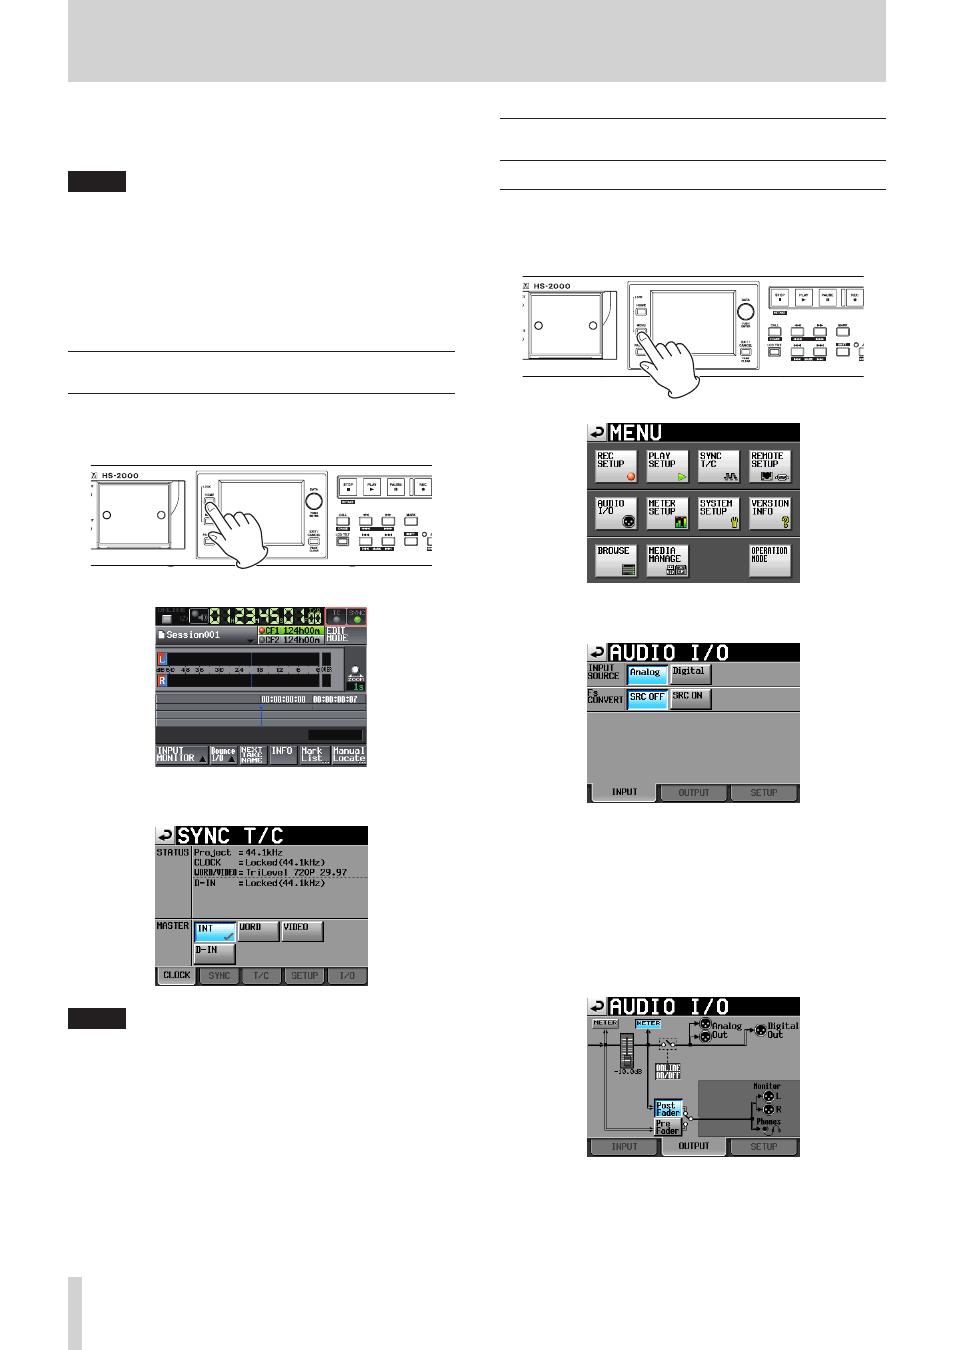
Setting the master clock
1. Press the HOME key on the front panel to open the
Home Screen.
2. Touch the
SYNC
button to open the
SYNC T/C
screen.
NOTE
You can also open the
SYNC T/C
screen by touching
the
SYNC T/C
button on the
MENU
screen.
3. Select the master clock that you want to use from the
MASTER item. (See “Sync and timecode settings (SYNC
T/C)” on page 103.)
Setting inputs and outputs
Setting the inputs
1. Press the MENU key on the front panel to open the
MENU
screen.
2. Touch the
AUDIO I/O
button to open the
AUDIO
I/O
screen.
On the
INPUT
page, make settings for each channel's
input source. For details, see “INPUT page” on page
110.
3. If necessary, touch the
OUTPUT
or
SETUP
tab to
open the corresponding page where various settings
can be made.
On the
OUTPUT
page, make settings related to
the output and signal routing. For details about this
screen, see “OUTPUT page” on page 110.