2 − names and functions of parts – Teac HS-2000 User Manual
Page 18
18
TASCAM HS-2000
2 − Names and functions of parts
w
Time display area
The timeline is automatically divided into four equal
divisions that show times according to the time display
mode.
This area scrolls horizontally to correspond with the
time counter.
e
Mark display area
Timeline marks appear here.
This area scrolls horizontally to correspond with the
time counter.
BC$CM mark
BC$END mark
BC$FILE mark
BC$PAUSE mark
BC$STANDBY mark
BC$START mark
BC$STOP mark
IN mark
OUT mark
Other types of marks
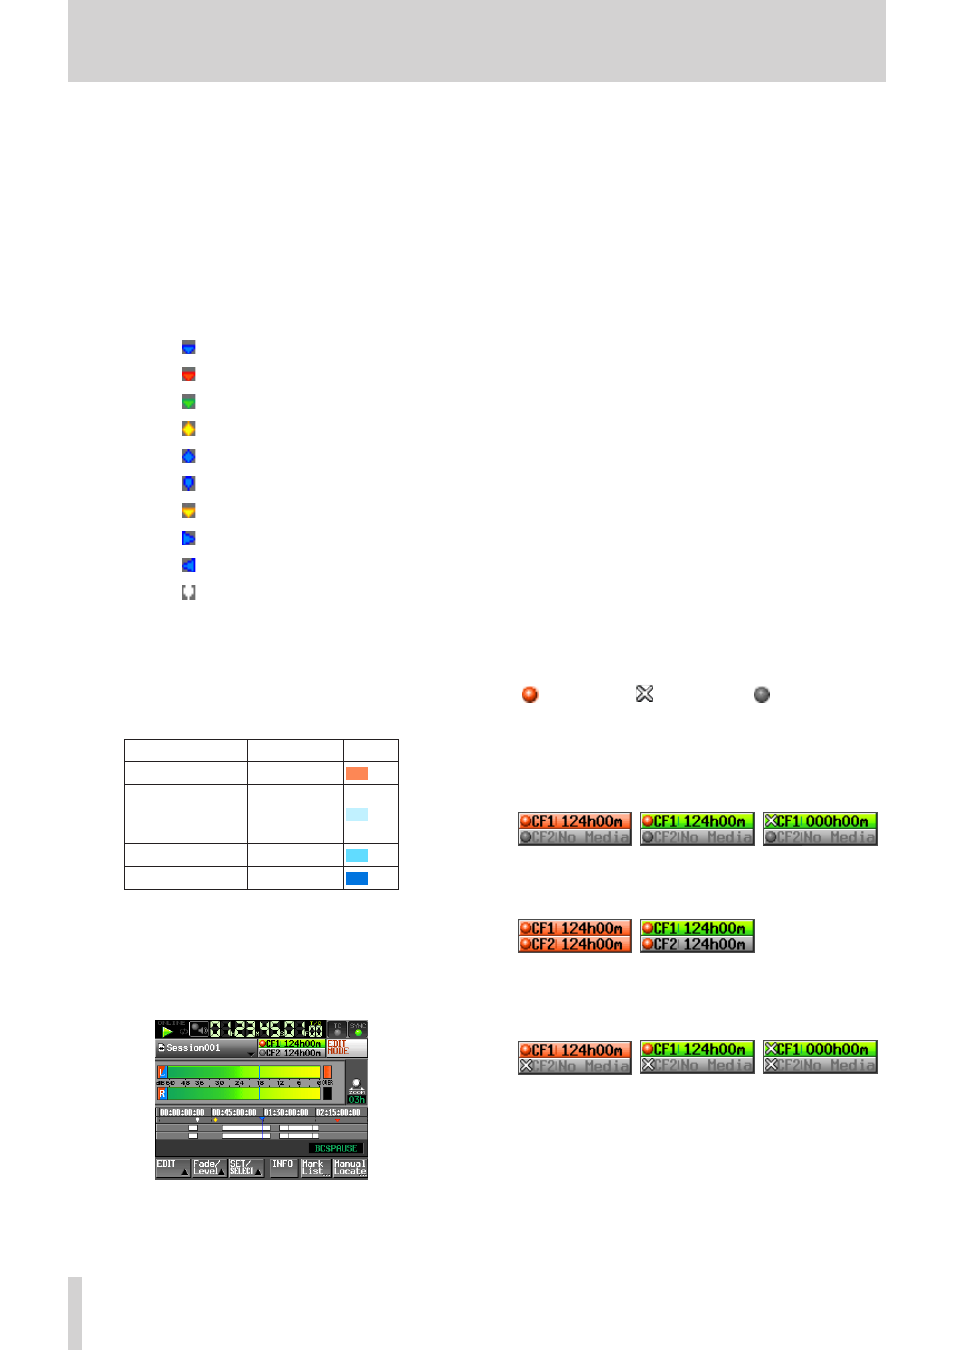
r
Track display area
The regions of each track are shown here, with the left
track above and the right track below.
Region fade-ins, fade-outs and cross-fades are shown
in light blue.
The following colors show the state of each region.
Ordinary state
White
Recording
Orange
Fade-in
Fade-out
Cross-fade area
Light blue
Selected region
Medium blue
Selected silence
Dark blue
This area scrolls horizontally to correspond with the
time counter.
t
EDIT MODE button
Touch this to enable and disable the edit mode, which
allows you to divide, erase and cut parts of regions. (See
“Timeline editing” on page 58.)
y
Recording media display (button)
This shows which CF card slot is currently in use and
remaining recording times.
The background of the media that currently in
use appears green during playback and red when
recording.
If there is no media in the CF card slot, No Media
appears on a light gray background.
If the CF card has no projects or sessions, No Project
appears. When an unformatted CF card is inserted,
UNFORMAT appears.
When a CF card is inserted in the slot that is not being
used during recording, UNMOUNT appears. When
recording stops, its remaining time will be shown
again.
If the total number of entries, including files and
subfolders, inside a session folder exceeds about
20,000, making recording impossible, Rec Limit
is shown. For details, see “Recording operation
limitations” on page 34.
Press this area to open the
MEDIA SELECT
screen.
(See “Card selection” on page 29.)
Media status indicators
These indicators show whether or not a card can be
used for recording, and is the selected media.
These appear in timeline and take modes, but not in
playlist mode.
Indicator display
•
Recordable
Not recordable
Not selected
Examples of media remaining time buttons
•
1
When REC MODE is set to Single
When recording
When not recording
When recording not
possible*
2
When REC MODE is set to Mirror
When recording
When not recording
3
When REC MODE is set to Mirror, but Mirror not enabled*
When recording
When not recording
When recording not
possible*
*For details about when recording is not possible
and when Mirror is not enabled, see “Setting button
appearance” on page 127.