Job accounting 4-5 7, Select name to display and press [change – TA Triumph-Adler DC 2060 User Manual
Page 165
Job Accounting
4-5
7
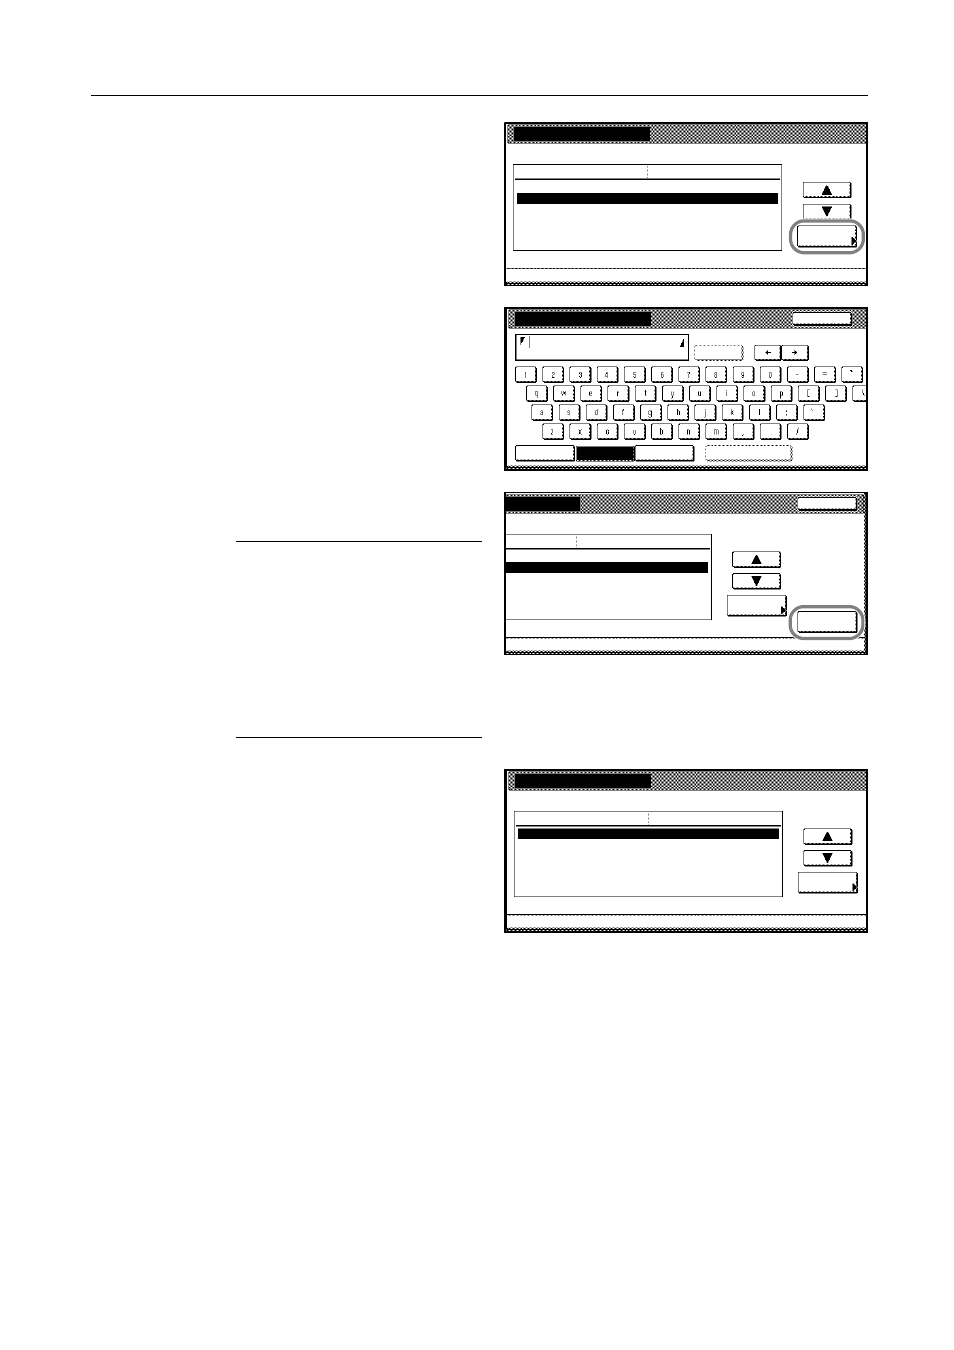
Select Name to display and press
[Change #].
8
Enter the department name and press
[End].
For instructions on entering characters,
refer to Entering Characters on Touch
Panel on page 3-55.
9
When all entries are complete, press
[Next].
IMPORTANT: An error will occur if you
do not complete Account ID and Name
to display. You will not be able to
proceed to the next screen. Be sure
that you have completed the entries.
An error will occur if you attempt to
enter an existing department ID code.
You will not be able to proceed to the
next screen. Use a different ID code or
name.
10
Specify restrictions on copying as
desired.
For instructions on restricting copier
usage, refer to Restricting Using the
Copier on page 4-6.
11
Press [Registr.] to finalize settings.
To make settings on another department, press [Register] and repeat steps 4 to 11.
12
Press [Close]. The touch panel will return to the Job Accounting screen.
System Menu
New register
Setting Item
Account ID
Name to display
Change #
Value
(No register)
Job
Management Edit
-
-
33333333
Name to display
Capital
Stop
Letter
Num./Sym.
Convert
Space
Limit:32 letters including #
AllDel.
Cancel
Job
Value
ng Item
ay
3st sales division
Management Edit
Change #
Next
-
-
Account ID
New register
System Menu
Job
Value
Setting Item
Copy
Output limitation
3st sales division
Management Edit
Change #
No limit
Permitted
Scanner transmission
No limit
Printer
Permitted
33333333
-
-