Centering originals, Centering originals -20, Copying functions 1-20 – TA Triumph-Adler DC 2060 User Manual
Page 26: Press [function, Press [margin/centering] ([margin/imag.shift]), Press [auto center] ([image shift]), Specify the orientation of the placed originals, Ready to copy
Copying Functions
1-20
Centering Originals
When you copy onto paper larger than the original size, you can center the original image on the
paper.
Follow the steps as below for centering.
1
Place the originals in the document processor or on the platen with the top edge facing either the
rear or the left side of the copier.
2
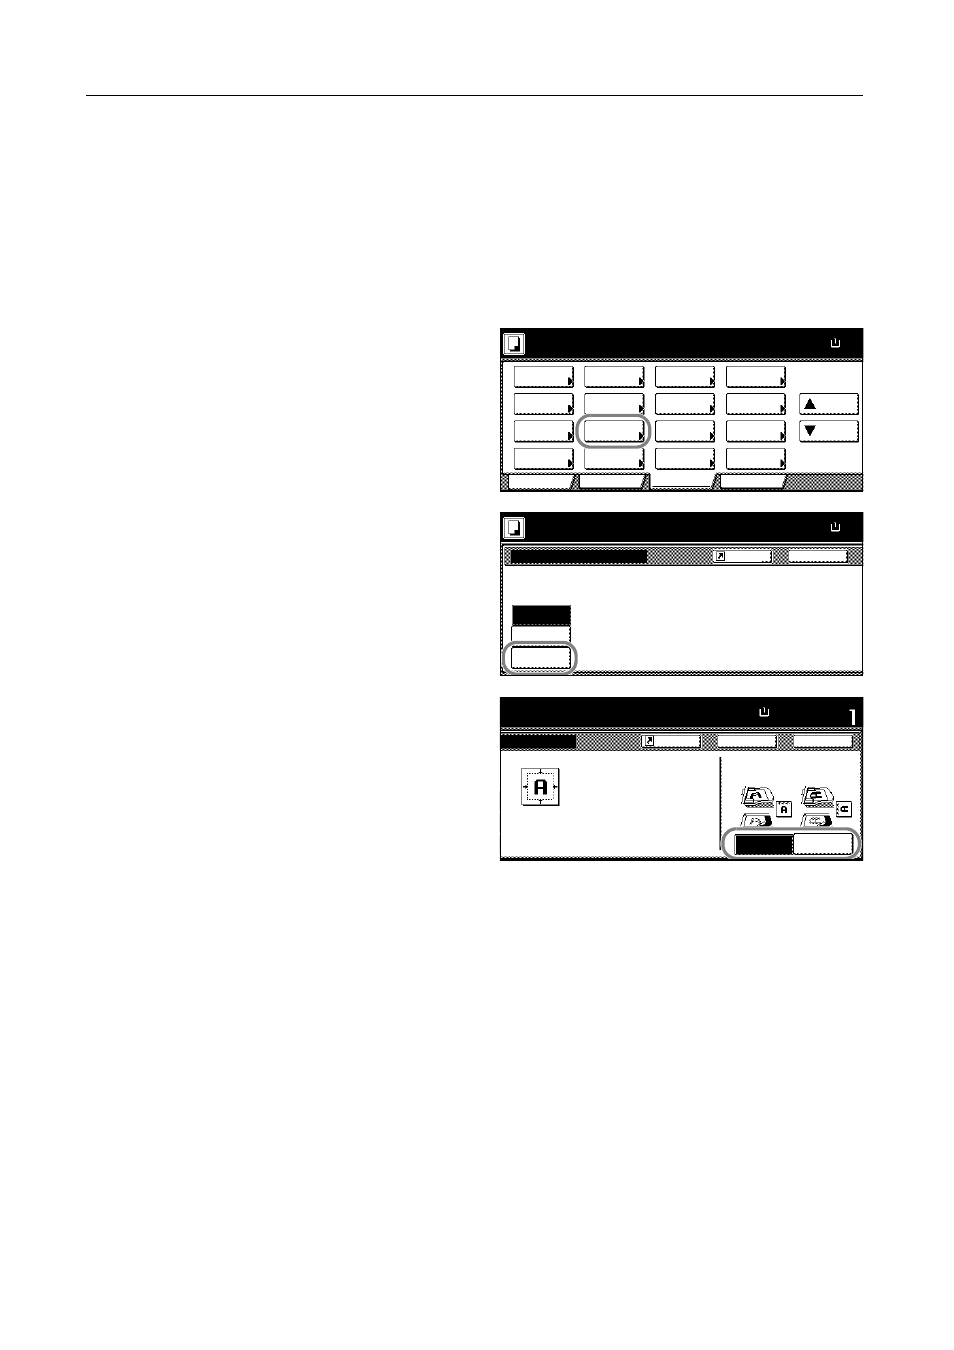
Press [Function].
3
Press [Margin/Centering]
([Margin/Imag.Shift]).
4
Press [Auto Center] ([Image shift]).
5
Specify the orientation of the placed
originals.
6
Press the Start key to start copying.
Ready to copy.
11x8½
Paper Size
Program
Function
User choice
Basic
Exposure
Reduce
Cover
Booklet
Up
Batch
Scanning
Auto
Selection
Border
Select
Orig.Image
2 sided/
Margin/
Centering
Sort/
Offset
Select
Orig.Size
Page #
Combine
Form
Overlay
Down
100%
Paper
Separation
Mode
/Enlarge
Erase
Mode
Quality
Back
Margin/Centering
Ready to copy.
None
Margin
Paper Size
11x8½
Auto
Reposition image to left/right or
top/bottom, and also center image
on paper.
100%
Shortcut
Center
Set
Back
Left Top
Select Original Image
Direction.
Top Edge
Close
ng
to copy.
Paper Size
11x8½"
Able to center scanned image on paper.
100%
Edge
Shortcut