Changing restrictions on usage, Job accounting 4-12 4, Press [close – TA Triumph-Adler DC 2060 User Manual
Page 172
Job Accounting
4-12
4
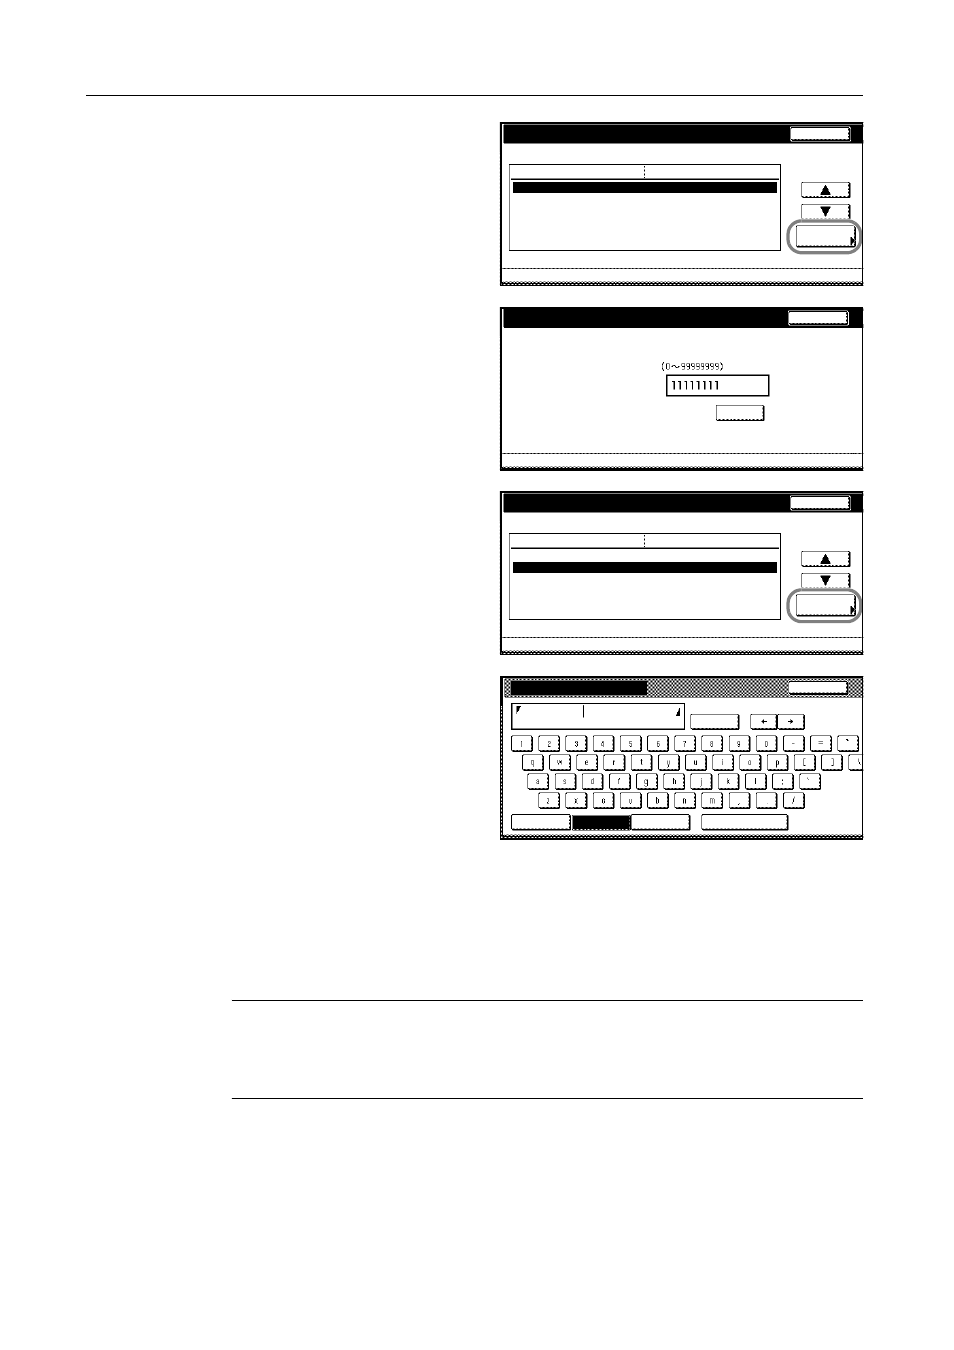
To change the ID-code, select Account
ID and press [Change #].
5
Press [Clear] to blank the current entry.
Use the numeric keys to enter the new
ID code (up to eight digits).
Press [Close].
6
To edit the department name, select
Name to display and press [Change #].
7
Press [AllDel.] to blank the current entry.
Enter the new name.
Press [End].
For instructions on entering characters,
refer to Entering Characters on Touch
Panel on page 3-55.
8
Press [Close].
9
Press [Close]. The touch panel will return to the Job Accounting screen.
Changing Restrictions on Usage
You can change the restriction on copying and printing per individual department.
IMPORTANT: To restrict the number of copies, printouts, or scanned images during job accounting,
turn Copy Job Accounting from [Off] to [On] in the job accounting default settings. Refer to Job
Accounting Default Settings on page 4-19 for details. If the copier is equipped with the optional
printer kit and/or the scanner kit, activate Printer Job Accounting and Scanner Job Accounting in the
job accounting default settings.
1
Access the Job Accounting screen. (For instructions, refer to Accessing the Job Accounting Screen
on page 4-3.)
Department inform. edit
System Menu
Job Accounting
Value
Setting Item
Account ID
Name to display
1st sales division
Management Edit
Change #
Back
-
-
11111111
Job Accounting
Account ID
Management Edit
Back
Clear
Account ID
-
Department inform. edit
System Menu
Job Accounting
Value
Setting Item
Account ID
Name to display
1st sales division
Management Edit
Change #
Back
-
11111111
-
Name to display
Capital
Stop
Letter
Num./Sym.
Space
Limit:32 letters including #
AllDel.
1st sales division