Ready to job build.(full-color), Ready to job build.(full col.), Ready to job build.(full-color) r – TA Triumph-Adler DCC 2526 User Manual
Page 117
Section 6 OTHER CONVENIENT FUNCTIONS
6-69
2
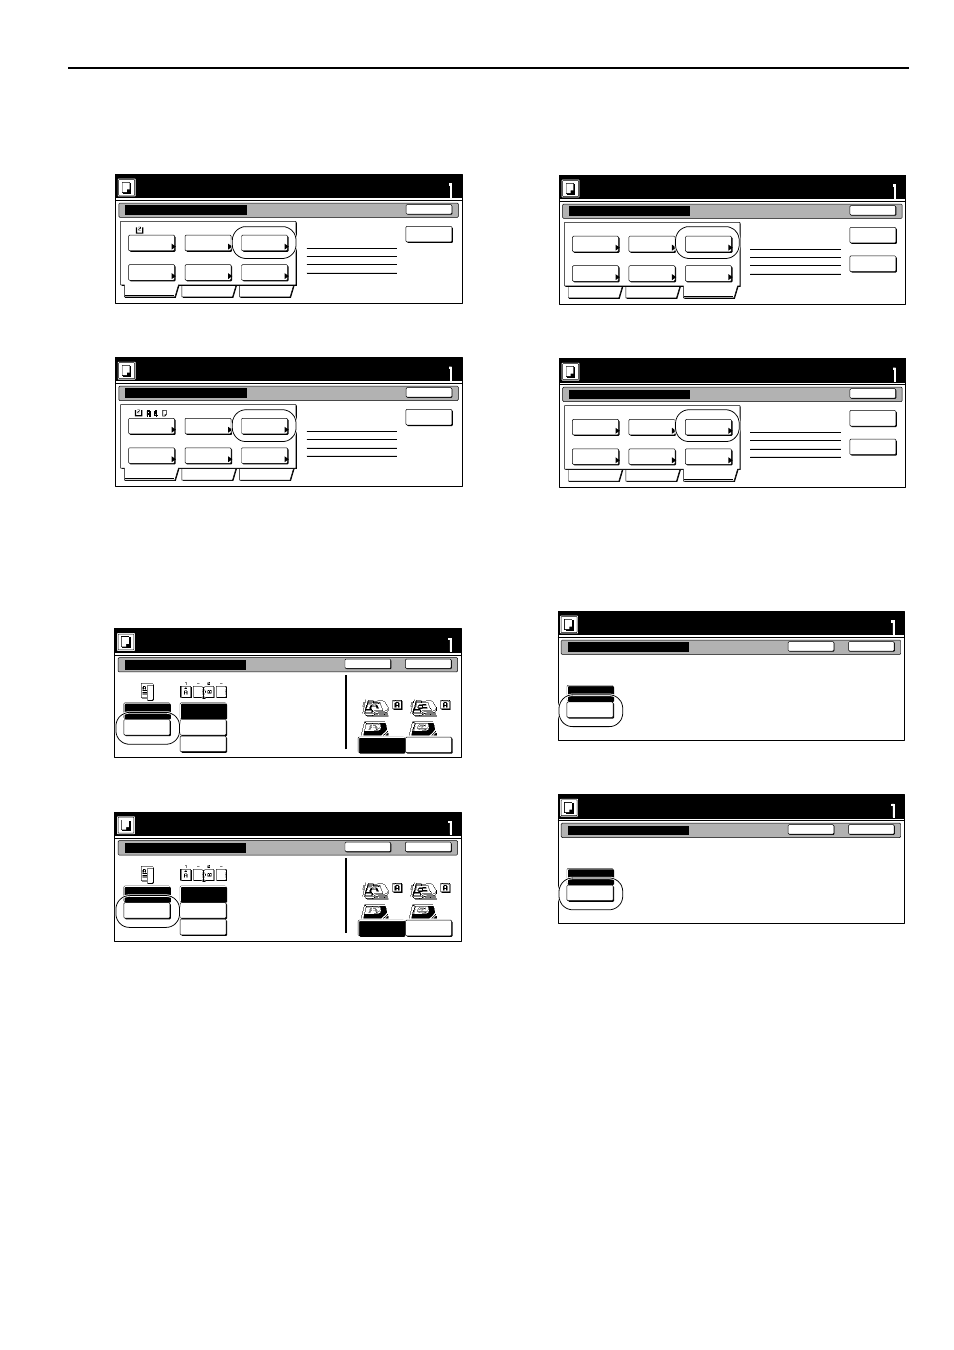
Press the “1 sided/2 sided” [“1-sided/2-sided”] key.
The “1 sided/2 sided” [“1-sided/2-sided”] screen will be
displayed.
Inch specifications
Metric specifications
3
Press the “2 sided copy” [“2-sided Copy”] key and then press
the “Open from left” [“Left binding”] key.
Finally, press the “Close” key. The touch panel will return
to the screen in step 2.
Inch specifications
Metric specifications
4
Press the “Edit” key.
Then, in the resulting screen, press the “Modify Copy” key.
The “Modify Copy” screen will be displayed.
Inch specifications
Metric specifications
5
Press the “On” key.
Press the “Close” key. The touch panel will return to the
screen in step 4.
Inch specifications
Metric specifications
1 sided
1 sided copy
Offset
Basic
Quality
Edit
AMS
Back Edge
Select
paper
Original
type
1 sided/
2 sided
Finished
Reduce
/Enlarge
Orig. set
direction
Insert
page
1 sided copy-Left
Finished page #: 0
Ready to Job build.(Full-color)
Place originals then press Start key.
set
Job Build - Step 1
End
11x8
1
/
2
1-sided
1-sided Copy
Group
Basic
Quality
Edit
AMS
Back Edge
Select
paper
Original
type
1-sided/
2-sided
Finished
Reduce/
Enlarge
Orig. set
direction
Insert
blank page
1-sided Copy-Left
Finished page #: 0
Ready to Job build.(Full Col.)
Set original. Press Start key.
set
Job Build - Step 1
End
r
Check direction
Check direction of
original top side.
1 sided
copy
2 sided
copy
Open from
left
Open from
right
Open from
top
Finished
Rear
Left top
corner
Set
Back
Close
Place originals then press Start key.
1 sided/2 sided copy
Ready to Job build.(Full-color)
r
Check direction
Check direction of
original.
1-sided
Copy
2-sided
Copy
Left
binding
Right
binding
Top
binding
Finished
Back Edge
Left top
corner
Set
Back
Close
Set original. Press Start key.
1-sided/2-sided Copy
Ready to Job build.(Full Col.)
Ready to Job build.(Full-color)
Place originals then press Start key.
set
End
Job Build - Step 1
Auto
Off
Off
None
None
Top tray
Border
Erase
Modify
Copy
Select
orig. size
Select of
Output
Page #
Margin/
Centering
Insert
page
2 sided copy-Left
Finished page #: 0
Print from
Rear page
Basic
Quality
Edit
Ready to Job build.(Full Col.)
Set original. Press Start key.
set
End
Job Build - Step 1
Auto
Off
Off
None
None
Top tray
Erase
Mode
Modify
copy
Select
size. orig
Select of
Output
Page
numbering
Margin/
Imag. shift
Insert
blank page
2-sided Copy-Left
Finished page #: 0
Print from
rear page
Basic
Quality
Edit
Ready to Job build.(Full-color)
set
Back
Modify Copy
Close
Place originals then press Start key.
When select [On], data can be saved.
You can recall and re-print at anytime.
Select password to secure a
stored document.
Off
On
Ready to Job build.(Full Col.)
set
Back
Modify copy
Close
Set original. Press Start key.
When select [On], job can be saved.
You can recall and re-print at anytime.
You can set a password to secure saved
document.
Off
On