Registering a digital certificate on the projector – Epson LightScene EV-115 2200-Lumen WXGA Laser 3LCD Projector (Black) User Manual
Page 69
69
1.
Open the Epson Web Control from your Web browser.
2.
Select
Developer's Menu
.
3.
Set the
Enable API
setting to
On
.
4.
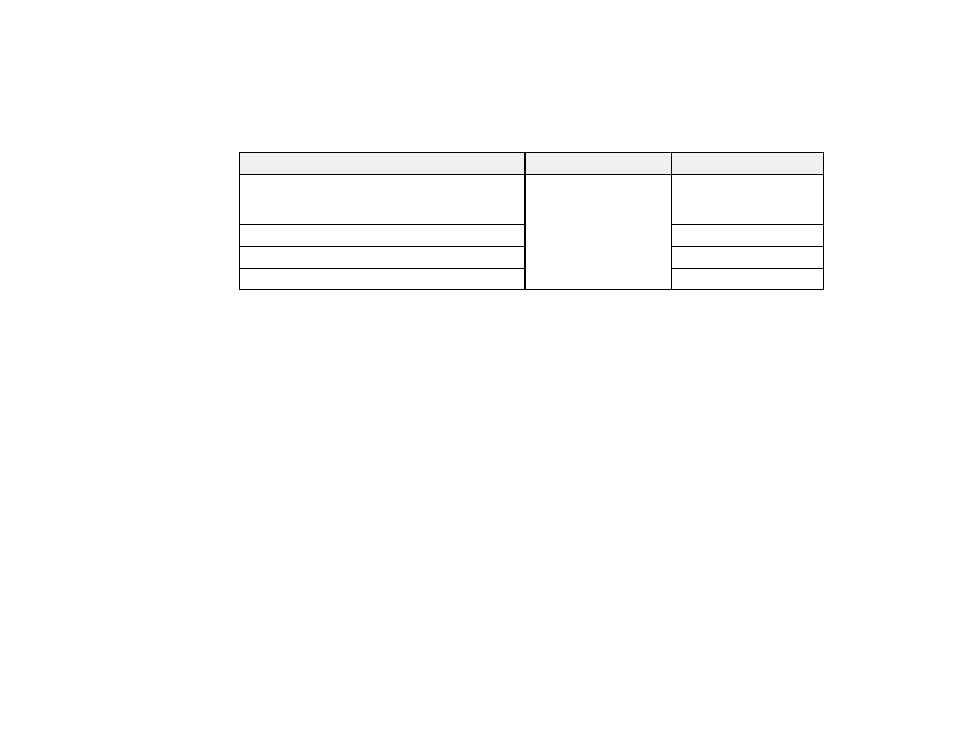
Enter one of the following Web APIs to operate the projector:
URL
Supported methods
Description
http://<ip>/api/v01/contentmgr/remote/power/on GET/POST/PUT
Turns the projector on
(WebAPI may not
respond immediately)
http://<ip>/api/v01/contentmgr/remote/power/off
0 to 63 (default is 128)
http://<ip>/api/v01/contentmgr/playlist/play/:id
0 to 7 (default is 0)
http://<ip>/api/v01/contentmgr/playlist/stop
0 to 31 (default is 128)
Note:
In the above URLs, enter the IP address for the projector in the <ip> field. For example, a URL
instructing a projector with the IP address 192.168.0.2 to playback playlist ID 3 would look like this:
http://192.168.0.2/api/v01/contentmgr/playlist/play/3
If secure HTTP is enabled, change the http in the URL to https.
Parent topic:
Using the Projector on a Network
Related tasks
Controlling a Networked Projector Using a Web Browser
Registering a Digital Certificate on the Projector
Follow the instructions here if you need to install a digital certificate on the projector to provide security
for your presentation files.
Note:
You can register a digital certificate over a network. However, be sure to register just once or the
certificate may not install correctly.
Importing a Web Server Certificate Using the Projector Menus
Registering Digital Certificates from a Web Browser
Digital Certificate Types
Parent topic: