Chapter 2 establishing communications & control, Figure 1: starutil toolbar, Figure 2: pc port configuration – NavCom StarUtil Rev.E User Manual
Page 10: Figure 3: pc port status bar
STARUTIL User Guide Rev. E
Chapter 2
Establishing Communications & Control
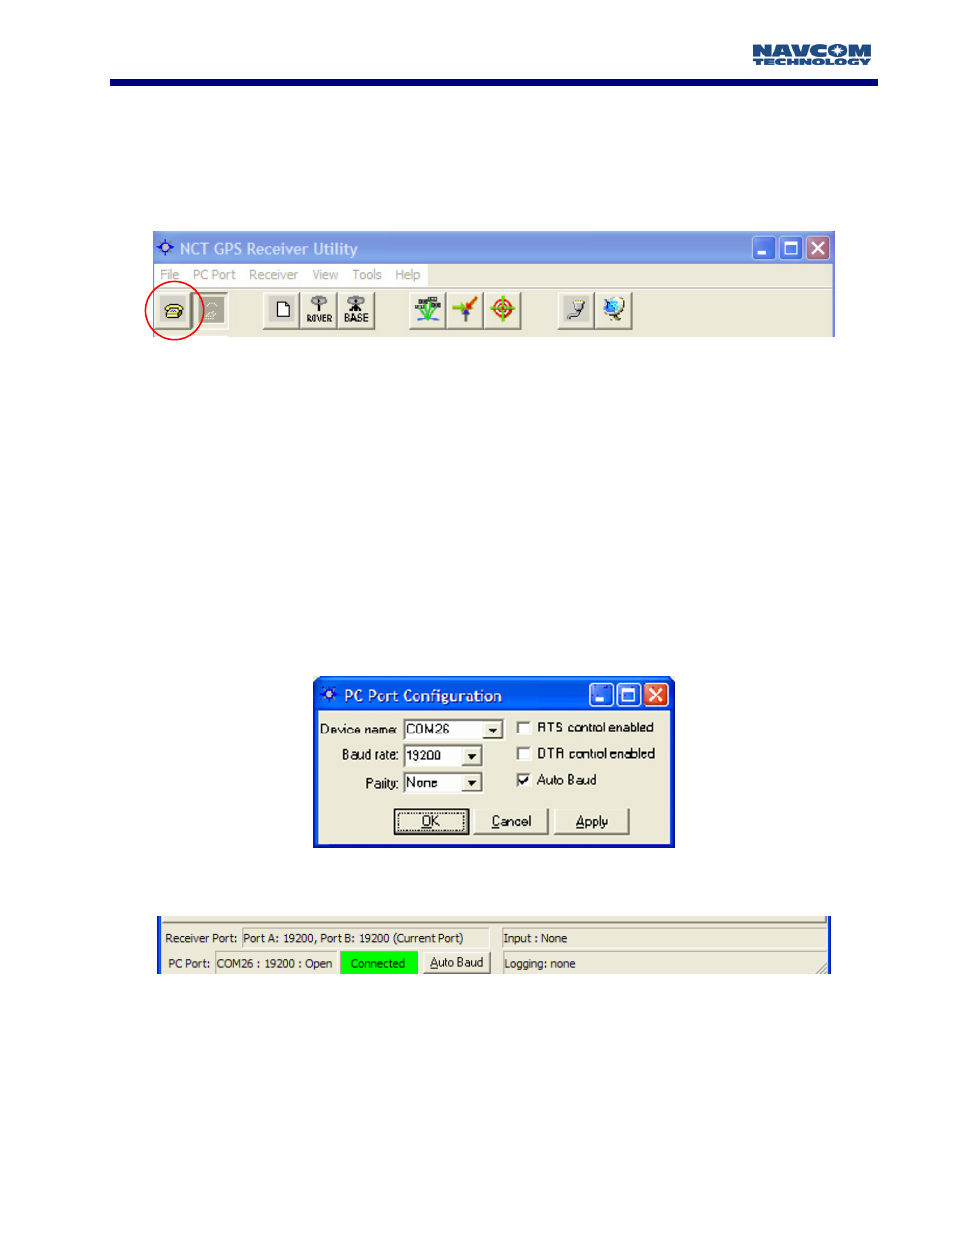
In order to execute StarUtil double click on the icon. Once StarUtil is active, communications with
the GPS system must be established by pressing the Configure Com Port button on the main
StarUtil window toolbar, see Figure 1. This can also be accomplished via the Menu bar by clicking
PC Port\Configure PC COM Port.
Figure 1: StarUtil Toolbar
A new window will appear as in Figure 2. StarUtil includes an Auto Baud Detect feature that will
allow for quick protocol connection between the PC, and the GPS receiver. You are also given an
opt-out if you choose to manually pick a baud rate. Check the Auto Baud box to initiate automatic
detection, uncheck the box to choose a baud rate from the pop-up window.
StarUtil automatically reads the available serial ports (i.e. RS-232 ports) from the Windows
®
registry,
and displays them in a pop-up window. Choose the Com Port that you will be using to control the
GPS receiver. Typically RTS/DTR and Parity options will remain in the default states unless your
system requires that these options be changed. Once the connection is established the PC COM
Port Status Bar at the bottom of the main StarUtil window will provide connection information as
shown in Figure 3. Information provided is PC COM port baud rate, GPS receiver port baud rate for
both Com Ports, Data Logging Status, and any Input activity. There is also an Auto Baud button,
which only becomes active after the initial connection has been established.
Figure 2: PC Port Configuration
Figure 3: PC Port Status Bar
2 - 9