Sbas, Starfire tm, Waas/egnos – NavCom StarUtil Rev.E User Manual
Page 32: Starfire, Figure 31: l1 sbas selection window
STARUTIL User Guide Rev. E
Go to the Rover Navigation & Tracking window shown in Figure 15; in the dGPS Corrections area
click the “USE” button adjacent to CMR Input.
Enabling CMR input will allow CMR+ or CMR
corrections to be applied
. Click “Apply” and then “Retrieve” to ensure your choices have been saved
at the receiver.
Ensure that an input port for your corrections has been established in the Unit Ports Configuration
window as shown in Figure 30.
Once the corrections have been successfully received and applied, the resulting RTK Navigation
indicators can be viewed in the dGPS Mode area of the B1 Solution display shown in Figure 18.
In all of the above examples if an external radio is used, connect the data cable from the GPS
receiver’s Data Port to the data port of the radio Depending on the radio’s output port
configu ation, a null modem may be required.
.
r
SBAS
StarFire™
The StarFire™ corrections are automatically applied to the position solution when the “USE” button
adjacent to RTG Input or WCT Input is chosen in the Rover Navigation & Tracking window, see
Figure 15.
WAAS/EGNOS
The WAAS/EGNOS corrections are automatically applied to the measurements when the “USE”
button adjacent to WAAS/EGNOS is chosen in the Rover Navigation & Tracking window see Figure
15.
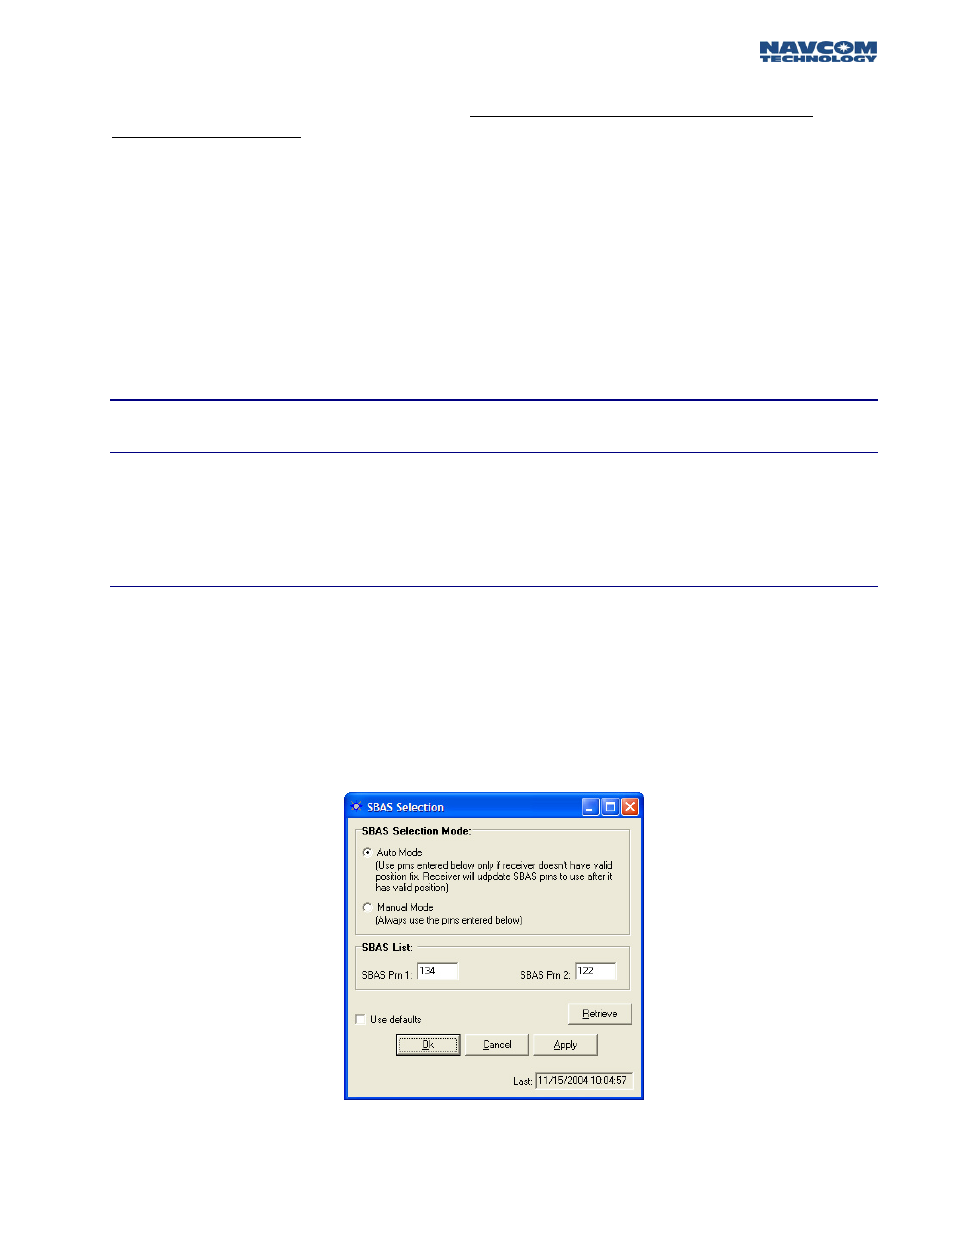
A new feature has been added that will allow the user to choose the L1 SBAS satellite PRN that
corrections will be received from, or allow the receiver to choose for you. The window in Figure 32
can be accessed by clicking RECEIVER\SETUP\SELECT SBAS PRNS.
Figure 32: L1 SBAS Selection Window
5 - 29