Figure 138 – Grass Valley Kayak HD Installation v.6.9.4 Jun 02 2011 User Manual
Page 187
Kayak HD — Installation and Service Manual
187
Additional Kayak Panel FRUs
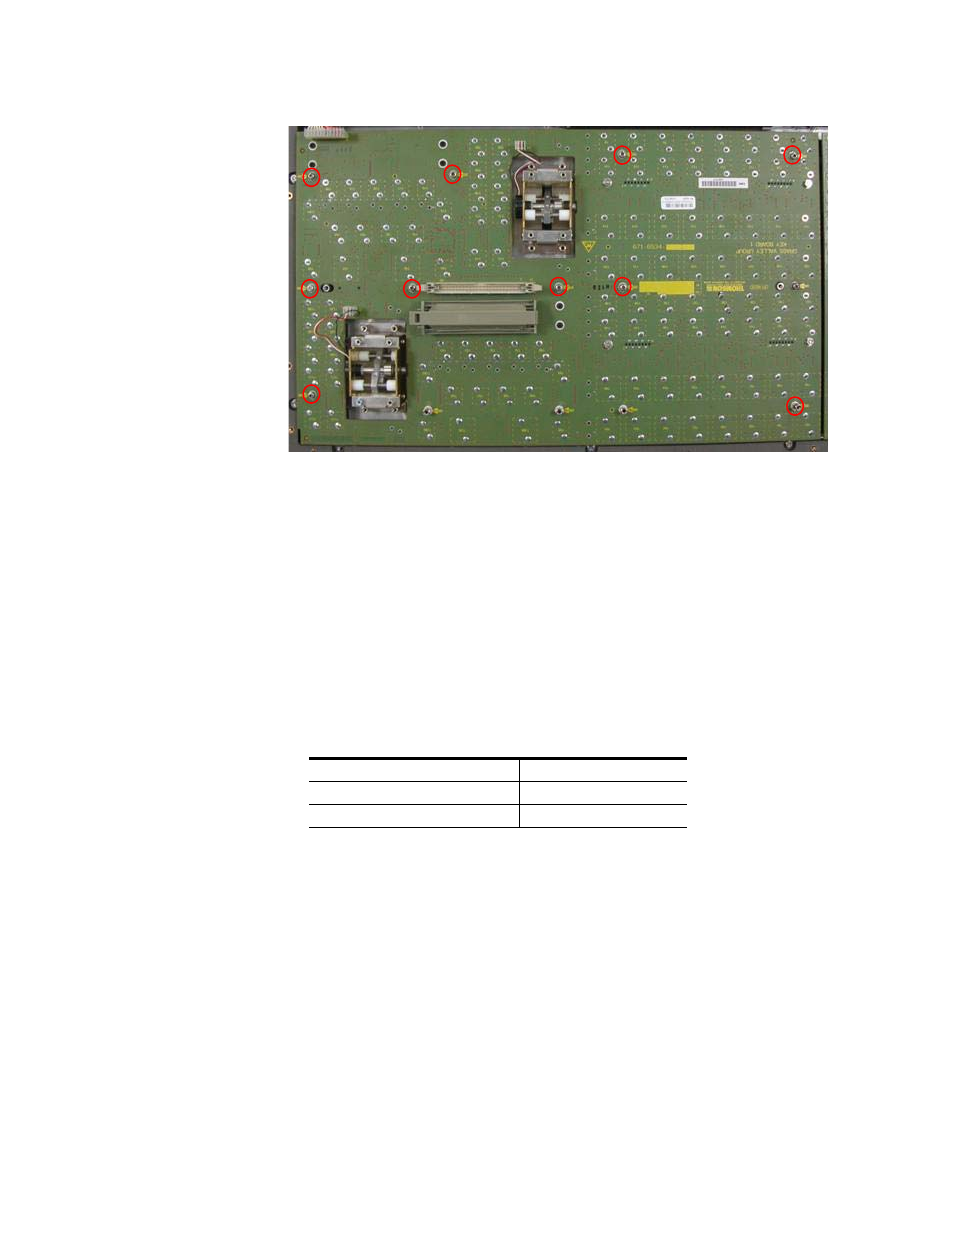
Figure 138. Kayak Keyboard 1—Screw Removal
6.
Insert the new
Keyboard 1
and reassemble referring to these instructions
(also refer to
).
Replacing Keyboard 2 (2-M/E only)
To replace
Keyboard 2
, complete the following steps:
1.
Carefully separate the top of the control panel enclosure from the
bottom (see
Removing the Top of the Control Panel Enclosure on page 168
2.
Disconnect all ribbon cables from
Keyboard 2
. For detailed information,
refer to
.
3.
Remove the stiffener covering
Keyboard 2
.
4.
Remove the four hex columns revealed when the stiffener was
removed.
5.
Remove the eight screws fastening
Keyboard 2
to the Control Panel
enclosure, as shown in
.
Table 15. Kayak Keyboard 2—Connection Reference
From
To
RY4551/J1/50 Pin | RY4040/J1/50 Pin
RY4511/J21/50 Pin
RY4030/J1/50 Pin
RY4511/J17/50 Pin