Cable, as shown in, Figure 143 – Grass Valley Kayak HD Installation v.6.9.4 Jun 02 2011 User Manual
Page 191
Advertising
Kayak HD — Installation and Service Manual
191
Additional Kayak Panel FRUs
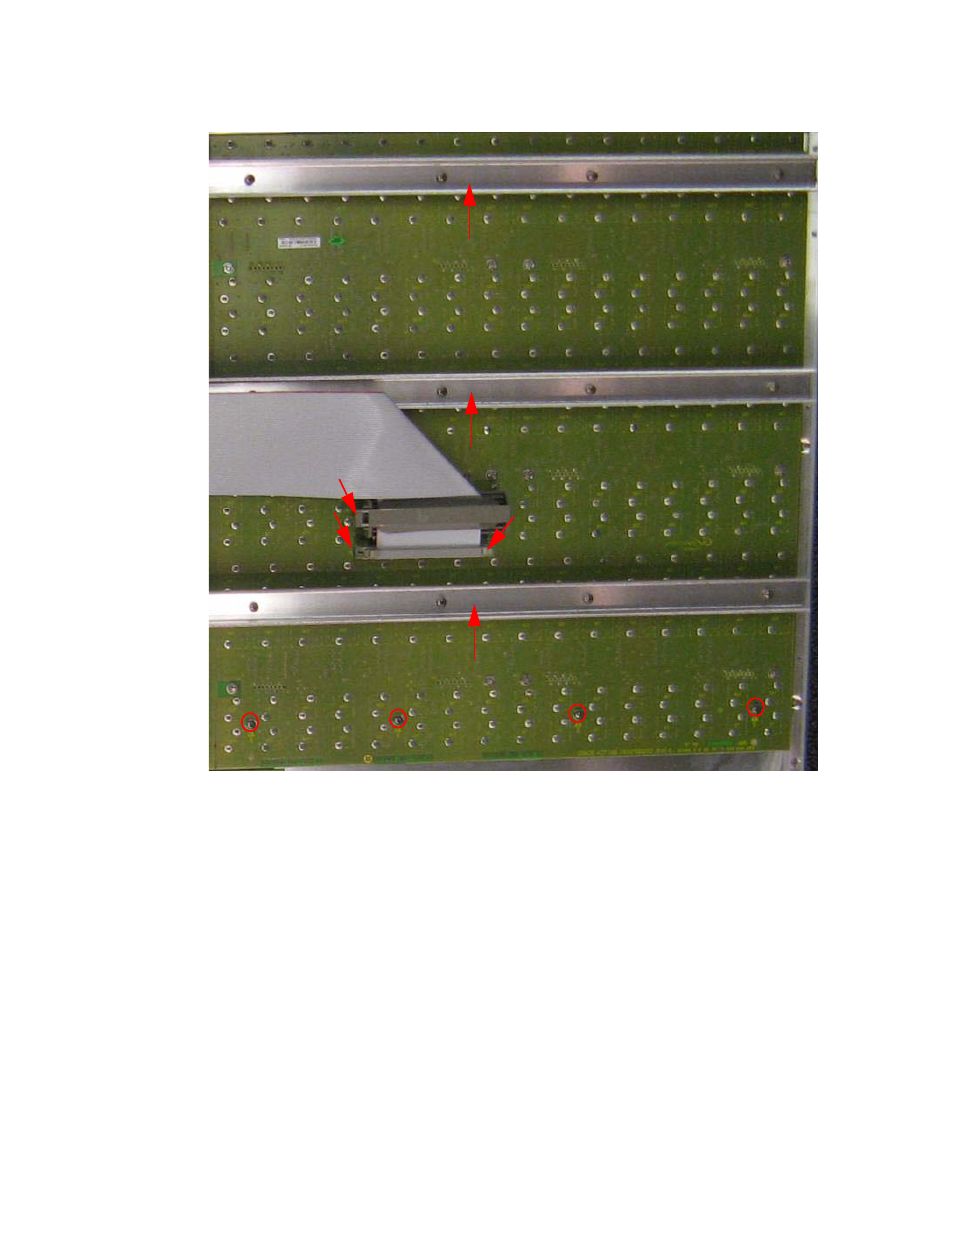
Figure 143. Keyak Control Panel—XPT Switchboard—Left
Replacing the XPT Switchboard—Center (3-M/E only)
1.
Disconnect the Ribbon Cable, as shown in
.
Note
This may require disconnecting the ribbon cable harness from XPT Switch-
board—Left, see
.
2.
Remove the three stiffeners across all boards, as shown in
.
3.
Remove all screws holding XPT Switchboard—Center to the Control
Panel enclosure.
4.
Insert the new XPT Switchboard—Center referring to these
instructions.
Advertising
This manual is related to the following products: