How to create multiple levels, How to delete a level, Configuring router levels – Grass Valley NVISION Compact CQX User Manual
Page 41
Compact Router System Configurator • User’s Guide
29
5. Configuring Router Levels
Overview
c In the row, in the ‘Physical Output Start’ column, enter the starting output number.
d In the same row, in the ‘Physical Output End’ column, enter the ending output number.
5 In the ‘Controller Input Start’ and ‘Controller Destination Start’ columns, assign a starting point
to the partitions. In the example in Figure 5-3, inputs and outputs are numbered from 1 to 32 in
both partitions, even though the partitions use different parts of the router.
The numbers entered in the ‘Controller Source Start’ and ‘Controller Destination Start’ fields
are used for the destination and source buttons in the ‘Program Remote Panels’ page. See
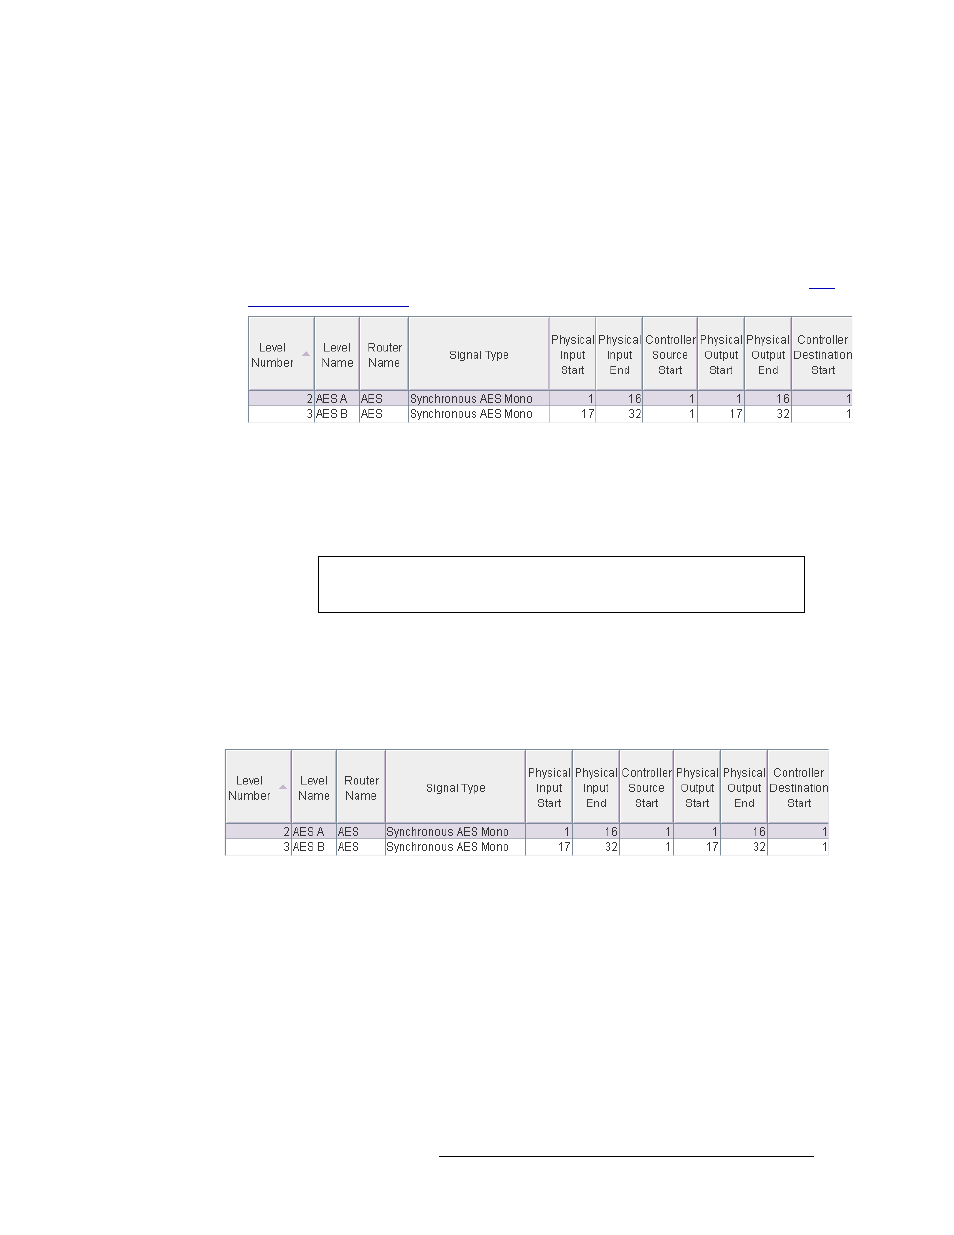
Figure 5-3. Example of Levels for AES Signals
6 When you have finished defining levels, click
Update Router Levels
to send the partition data to
the routers.
How to Create Multiple Levels
To create multiple levels for a router, add levels that reference the same router. For example, a
CR3232-AES router might have two partitions:
Level 2, 32 inputs × 32 outputs, numbered from 1 to 32
Level 3, 32 inputs × 32 outputs, numbered from 33 to 64
The resulting configuration would resemble Figure 5-4.
Figure 5-4. Example of Levels for AES Signals
How to Delete a Level
1 From the left-hand navigation area, expand the ‘CR Series Network Setup’ pane and click
‘Configure Router Levels’.
2 On the ‘Configure Router Levels’ page, click on the row listing the level and click
Delete Level
.
3 Click
Update Router Levels
to send the updated partition data to the routers.
Important
CQX Routers are not designed to use levels. For proper functioning, do not
configure levels in a CQX router.