Button functions, Destination, Programming remote panels – Grass Valley NVISION Compact CQX User Manual
Page 54
42
Rev 2.0 • 29 Mar 10
7. Programming Remote Panels
Overview
• Read from File
—
Retrieves a configuration from your PC’s file system.
• Save to File
—
Saves the configuration in your PC’s file system. The extension for panel config-
uration files is.pfg.
Button Functions
Any button on any remote panel can be configured to perform one of five functions: destination,
level, salvo, source or unused.
Destination
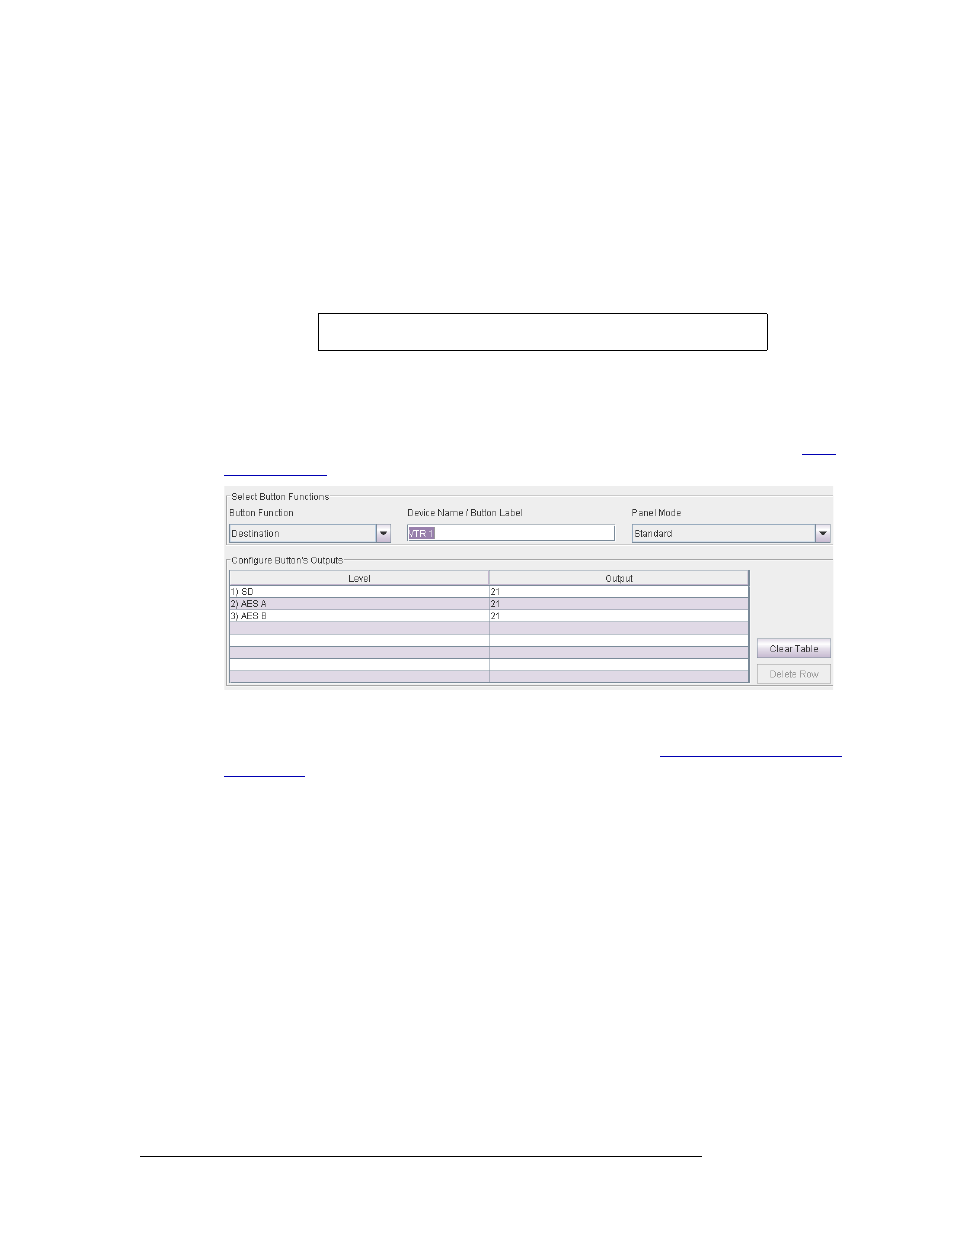
To configure a button as a destination button, choose ‘Destination’ from the ‘Button Function’
drop-down list. A configuration table appears in the ‘Configure Button’s Outputs’ section. It has 8
rows. Each row is a level/output pair. Remember that a level is equivalent to a partition. See
Figure 7-2. Example of Destination Button Fields
The table identifies the output ports that belong to the destination. The outputs you specify are rel-
ative to the level specified in the ‘Configure Router Levels’ page. See
For example, suppose a 32×32 AES router is divided into 4 equal partitions:
Level A = outputs 1–8, Level B = 9–16, Level C = 17–24, Level D = 25–32 where each level
starts counting at output 1.
When entering an output on level C, you specify an output in the range 1–8, not 17–24. Output 3 of
level C is router output 19 (in this example). You would specify (level C, output 3) in the table and
run cable to the router’s output BNC numbered 19.
Entries in the ‘Level’ column are drop-down lists and list all available levels. The number of
choices diminishes as you add levels to the destination button’s list. CRSC does not allow you to
represent the same level more than once.
How you organize levels is up to you. It is recommended that you place as the first entry in the list,
the level you want to be considered the primary level. Typically this would be an SD or HD video
level.
Important
CQX panels are not configurable through CRSC at this time.