Setup nv9000 remote panel – Grass Valley NVISION Compact CQX User Manual
Page 72
60
Rev 2.0 • 29 Mar 10
11. Setup NV9000 Remote Panel
Discussion
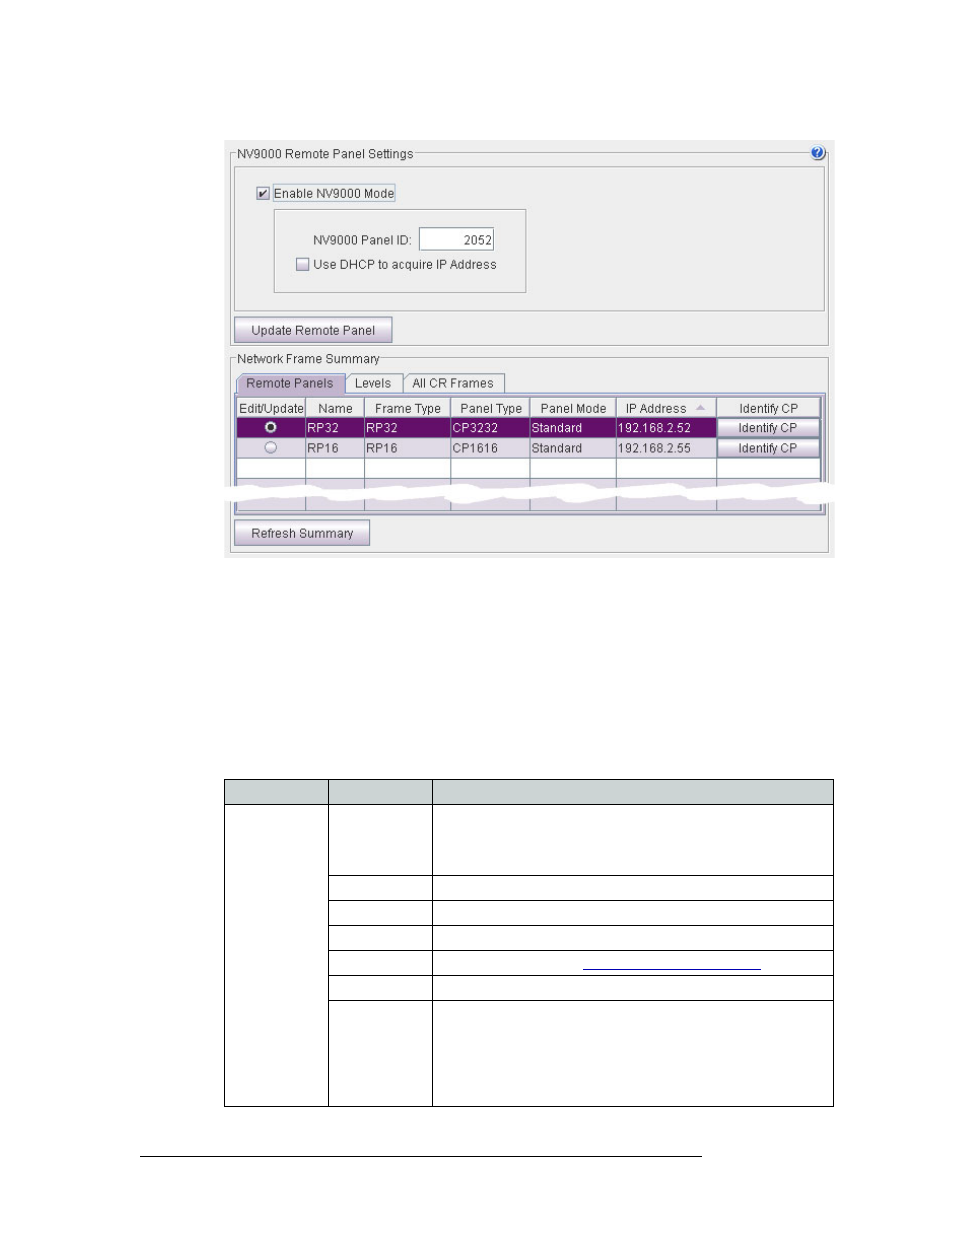
Figure 11-1. Setup NV9000 Remote Panel Page
When a panel is selected in the ‘Network Frame Summary’ section, the ‘Enable NV9000 Mode’
check box becomes active. Once checked, a panel ID can be entered and whether the IP address
should be acquired using a DHCP or the currently assigned IP address be used.
Dynamic Host Configuration Protocol (DHCP) is an IP standard for allowing dynamic assignment
of IP address to a device from a DHCP server. Because every computer on a TCP/IP network must
have a unique IP address, DHCP provides an easy way to assign an IP address when moving a
device to a different subnet.
The ‘Network Frame Summary’ presents the following option and information:
Tab
Column
Description
Remote Panels
Edit/Update
Click the radio button on the row displaying the remote panel you
want to update. All details of the panel display in the ‘Remote Panel’
and ‘Select Button Functions’ sections. Once selected, panel
information can be updated.
Name
Name of the remote panel.
Frame Type
Type of remote panel module by model number.
Panel Type
Type of control panel by model number.
Panel Mode
Lists the panel mode. See
IP Address
IP address currently assigned to the device.
Identify CP
When you click Identify CP, the remote panel listed on that row
identifies itself by displaying a moving pattern of button lights.
This feature is helpful if you forget which panel of possibly many is
represented by the particular IP address.
The moving button lights continue indefinitely. To turn off the pattern,
click any button on the panel or click Identify CP again.