Original placement indicator – TA Triumph-Adler DCC 2725 User Manual
Page 71
Preparation before Use
2-35
2
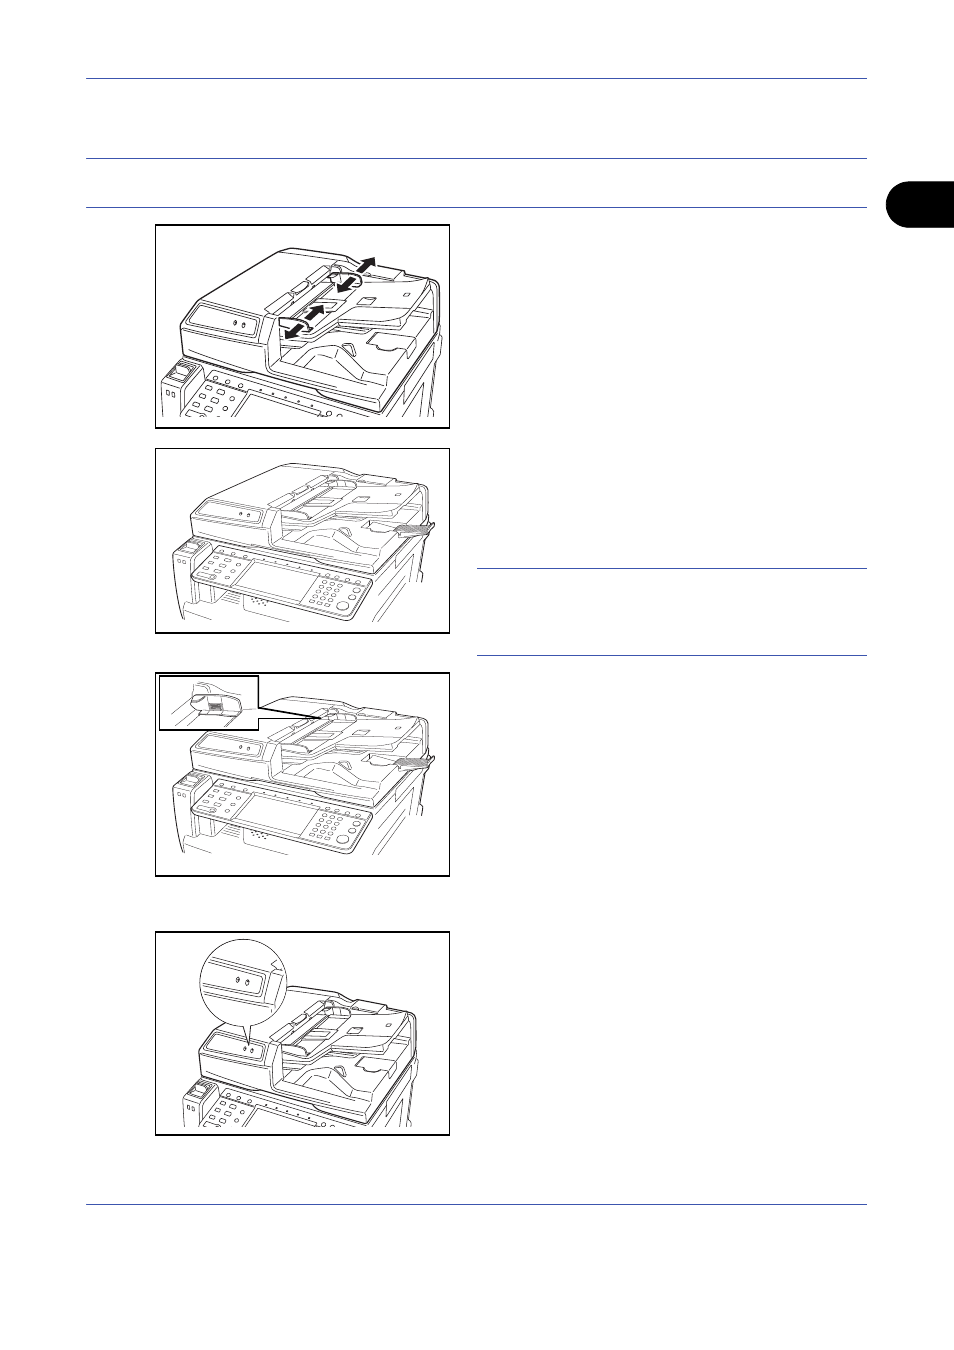
How to Load Originals
IMPORTANT:
Before loading originals, be sure that there are no originals left on the original eject table.
Originals left on the original eject table may cause the new originals to jam.
1
Adjust the original width guides to fit the originals.
2
Place the originals. Put the side to be scanned (or
the first side of two-sided originals) face-up. Slide
the leading edge into the document processor as
far as it will go. The original placement indicator will
be lit.
IMPORTANT:
Confirm that the original width guides
exactly fit the originals. If there is a gap, readjust the
original width guides. The gap may cause the originals
to jam.
Ensure that loaded originals do not exceed the
level indicator. Exceeding the maximum level may
cause the originals to jam (see the figure).
Originals with punched holes or perforated lines
should be placed in such a way that the holes or
perforations will be scanned last (not first).
Original placement indicator
The original placement indicator is lit or unlit depending
on how originals are placed.
Indications and their status are as follows.
•
Green (left indicator) lit: Original is placed
properly.
•
Green (left indicator) blinking: Original is not
placed properly. Remove and place again.
•
Red (right indicator) blinking: Original is jammed.
Remove the jammed original and place it properly.