3 remote control unit (rcu) connection, 4 control unit valve connection, Remote control unit (rcu) connection – ARAG Bravo 400S Crop sprayer User Manual
Page 10: Control unit valve connection, Installation
10
6.3
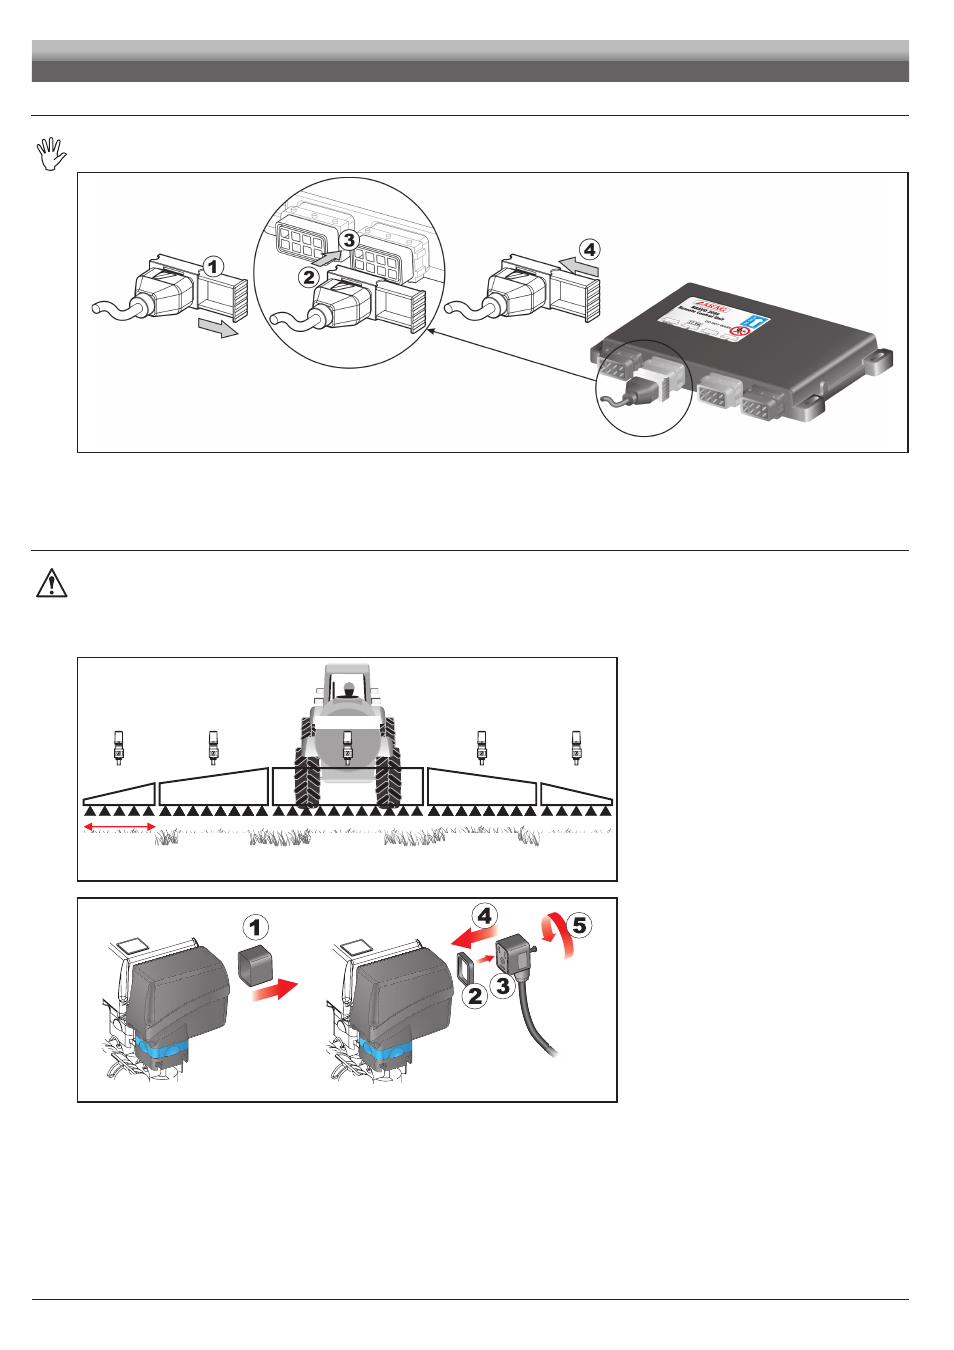
Remote Control Unit (RCU) connection
Connect harnesses as specified in par. 5.2; each one of them shall be connected to the corresponding socket on the remote control unit.
If they prove hard to insert, do not force them, but check the shown position.
Fig. 10
• Open connector slide (
1
• To position connector (
2
), insert it inside socket (
3
), then press:
during this operation, take care not to bend the electric contacts.
• Close slide (
4
) until it locks in place.
6.4
Control unit valve connection
•
The sequential control computer only works if connected to the 3-wire type valves.
• Use ARAG valves: use of unsuitable valves not provided by ARAG automatically voids the warranty.
ARAG is not liable for damage to the equipment, persons or animals caused by failure to observe the above instructions.
• All valve connectors must be provided with seals before being connected (Fig. 12).
• Make sure the seals are correctly fitted to avoid water infiltration when using the control unit.
Boom
section 1
Boom
section 2
Boom
section 3
Boom
section 4
Boom
section 5
Valve 1
Valve 2
Valve 3
Valve 4
Valve 5
Fig. 11
Connector 1 shall control the valve which in turn is
connected to the boom section 1, and so on with
the other valves.
Connect "connector 1" to "valve 1", and then the
other connectors with increasing numbers from left
to right
the boom section 1 is the furthest from
the machine on the left, looking at the machine
from the rear side (Fig. 11).
Fig. 12
Fix the connectors to the relevant valves according
to the initials indicated in your assembly general
diagram
(par. 5.1 System recommended composition)
• Remove the protection cap (
1, Fig. 12) from the
electric valve.
• Place the seal (
2) onto the connector (3), and push
the connector fully on (
4): be careful not to bend
the contacts upon insertion on the valve.
• Tighten the screw (
5) fully home.
INSTALLATION