8 power supply connection, Power supply connection, Installation – ARAG Bravo 400S Crop sprayer User Manual
Page 13
13
6.8
Power supply connection
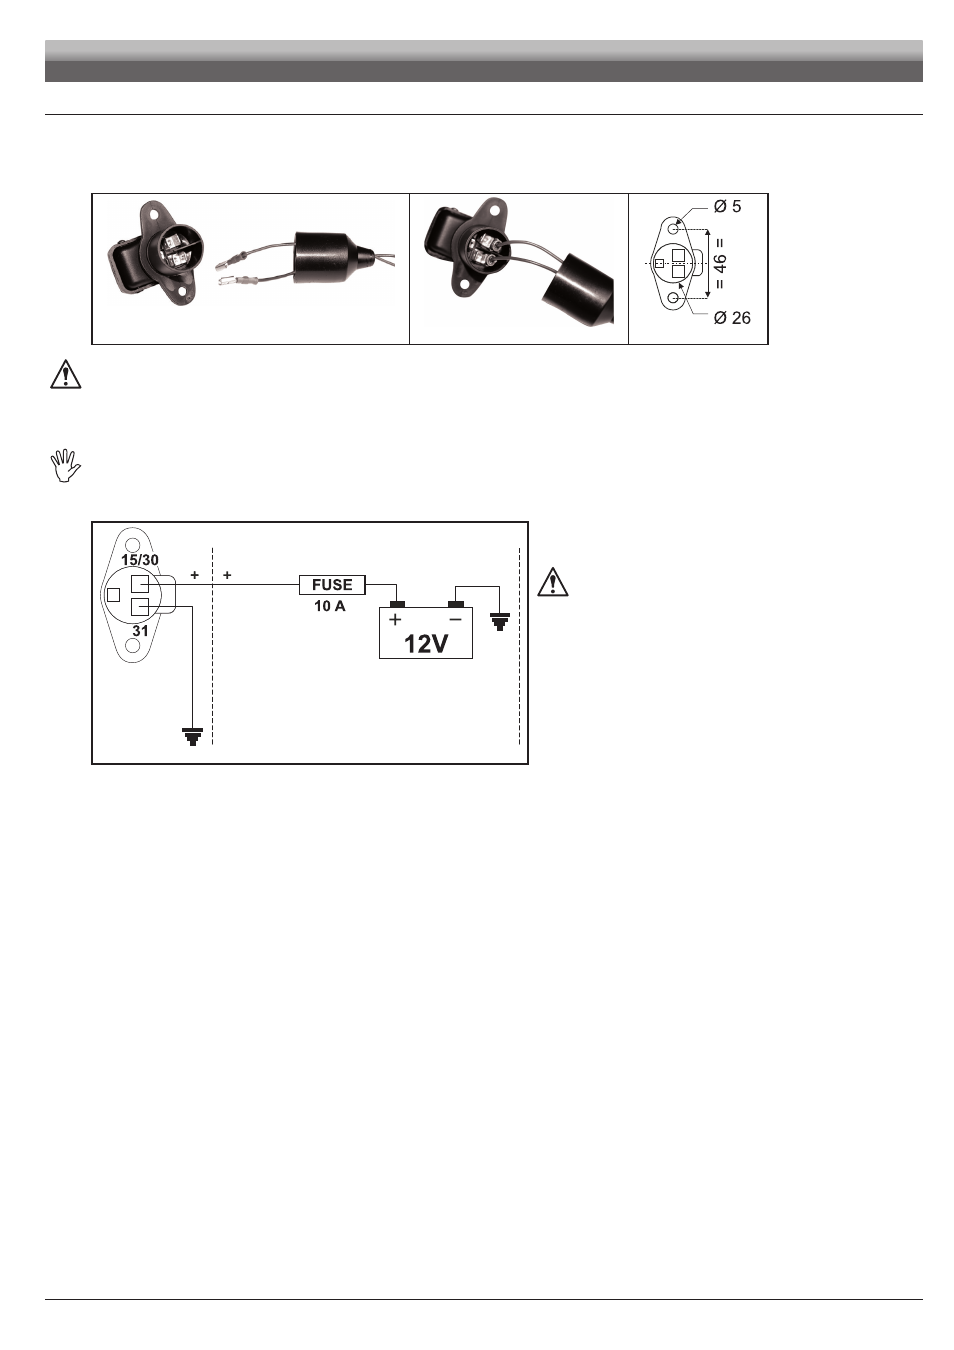
The package includes the power connector (component
7
, Fig. 1) to be connected to the farming machine battery
Fig. 18 shows the drilling template of the power connector.
Connect the power connector to the battery wires using two 6-mm faston connectors, as indicated in Fig. 16 and Fig. 17.
Use the cable provided with the package (position
3c
, Fig. 1) to connect the computer to the power supply.
Fig. 16
Fig. 17
Fig. 18
WARNING:
To avoid short circuits, do not connect the power cables to battery before the installation is completed.
Before powering up the computer and control unit, make sure the battery voltage is as specified (12 Vdc).
BRAVO 400S is supplied directly by the farming machine battery (12 Vdc): ALWAYS switch on the computer through the monitor, and then remember
to switch it off using the specific key on the control panel.
If BRAVO 400S remains on for a long time with the machine off, the tractor battery could run flat: in case of prolonged breaks of
the machine with engine off, make sure the computer is off, too.
The power source must be connected as indicated in Fig. 19:
the computer must be connected directly to the farming machine battery.
DO NOT connect the computer to key-operated switch (15/54).
Fig. 19
WARNING:
• The power circuit shall ALWAYS be protected by a 10 A fuse
like the ones for automotive applications.
• All cables connected to the battery shall have a minimum cross-
section of 2.5 sq. mm.
To avoid short-circuits, connect the power cable connector only
after completing installation.
• Use cables with suitable terminals ensuring correct connection
of all wires.
INSTALLATION