6 archive – Rugged Cams HD Megapixel User Manual
Page 74
74
Drag a partition on to the screen, then the partition will enlarge as a full screen.
Double click the left button of mouse to exit the zoom-in screen.
5.6 Archive
The Backup function will allow user to copy the recorded video (moving images and still images) from a storage device (USB
memory stick, DVD-RW).
Please execute Backup Live or playback.
Follow the backup procedure.
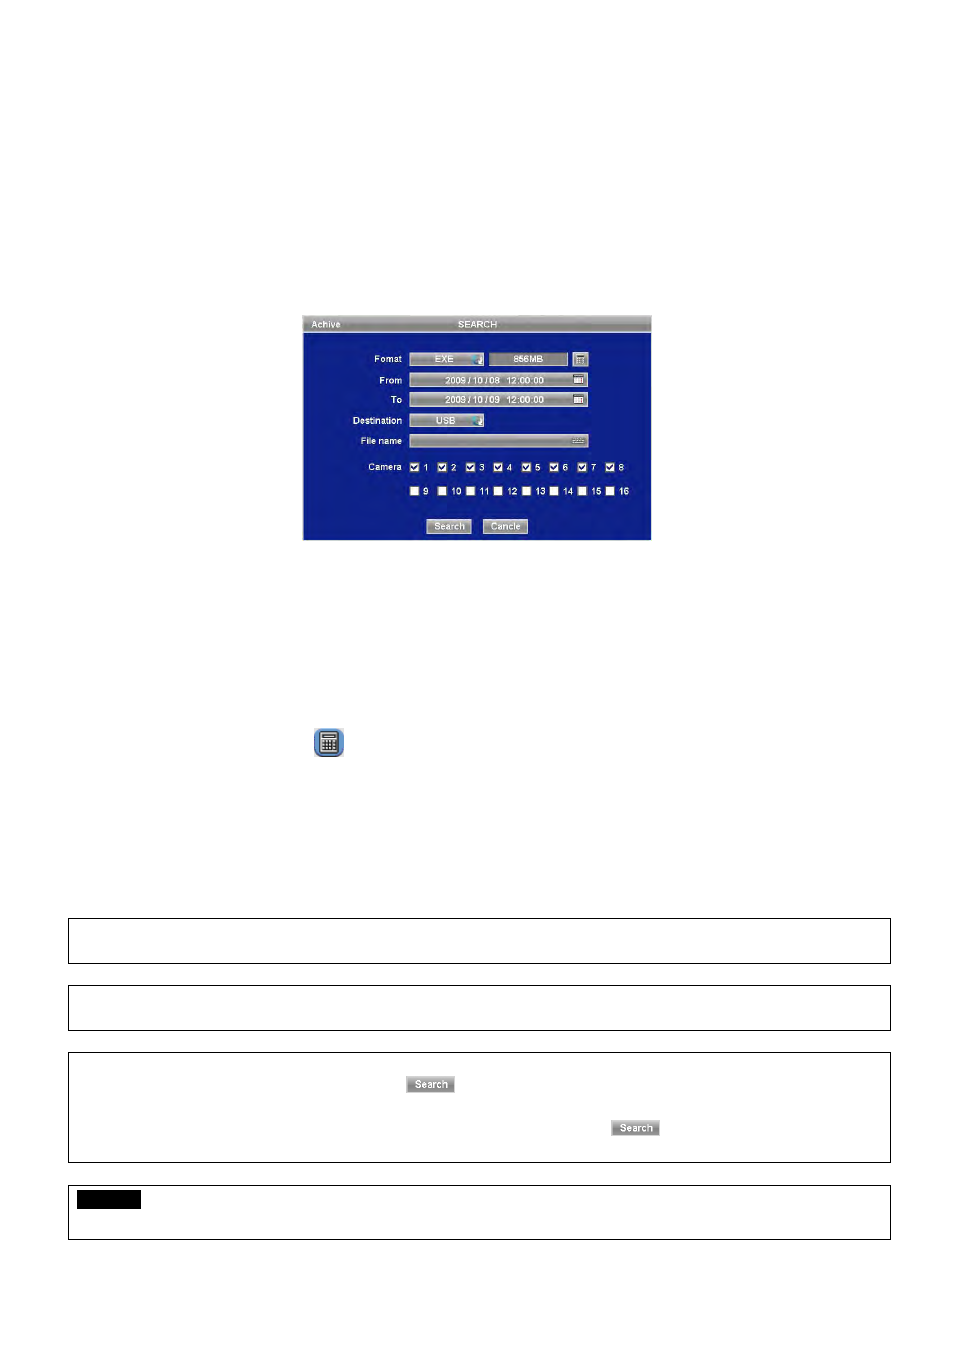
① Press ARCHIVE key. In case of using a mouse, please press the mouse right button and click in Archive. Then, the
following screen will appear.
② Click (
) Format frame to select EXE or JPEG. Choose EXE for storing moving images; and JPEG for still images.
③ Click (
) the keyboard display on the right-hand side of FROM frame to set the storage start time.
④ Click (
) the keyboard display on the right-hand side of TO frame to set the storage end time.
⑤ Click (
) Destination frame to select a storage device out of USB and DVD-RW.
⑥ Click (
) the keyboard display on the right-hand side of File Name frame to input a file name. User does not need to
input extension (exe, jpeg). Please note that the file is not going to be stored unless user inputs a name.
⑦ Check a check box next to a camera with the video that want to store. User can archive multi channel at the same
time.
⑧ Click (
) the Calculator button
on the rightmost side of Format line to check the data capacity for backup. The
capacity will show only for EXE Archive.
⑨ Click (
) Start button. Then, Progress bar will appear and the storage process proceeds. The progress bar does not
show actual progress time. Depending on to the file size, it will appear again even after it shows 100%. It is important not
to detach storage device until DVR displays “Archive Success” message.
⑩ If the storage is done properly, Archive Success message will pop up. Please choose ‘OK’ to confirm. If the storage fails,
Archive Fail message will pop up. In this case, user must try again.
(NOTE)
PLEASE DO NOT USE JPEG FORMAT SELECTING WHILE ARCHIVING IN LIVE MODE.
(NOTE)
PLEASE DO NOT CHANGE THE SETTINGS BY DVR OR CMS, WHILE BACKUP.
(NOTE)
WHEN THE TARGET FILE SIZE IS OVER 2GB, PRESS “
” BUTTON ON THE RIGHT AGAIN AFTER THE FIRST “ARCHIVE
SUCCESS”. AND DVR WILL CONTINUE TO ARCHIVE TO ANOTHER FILE WITH THE EXTENSION OF “-002” AUTOMATICALLY ADDED.
IN CASE OF DVD MEDIA, CHANGE IT AFTER THE FIRST FILE IS FINISHED AND PRESS “
” TO CONTINUE TO THE REST OF
PROGESS.
CAUTION
PLEASE DO NOT USE THE SPACE WHEN ENTER BACKUP FILE NAME.