Canon EOS-1D X Mark II DSLR Camera (Body Only) User Manual
Page 412
d
Transferring Images to a Computer
412
Sel.Image
1
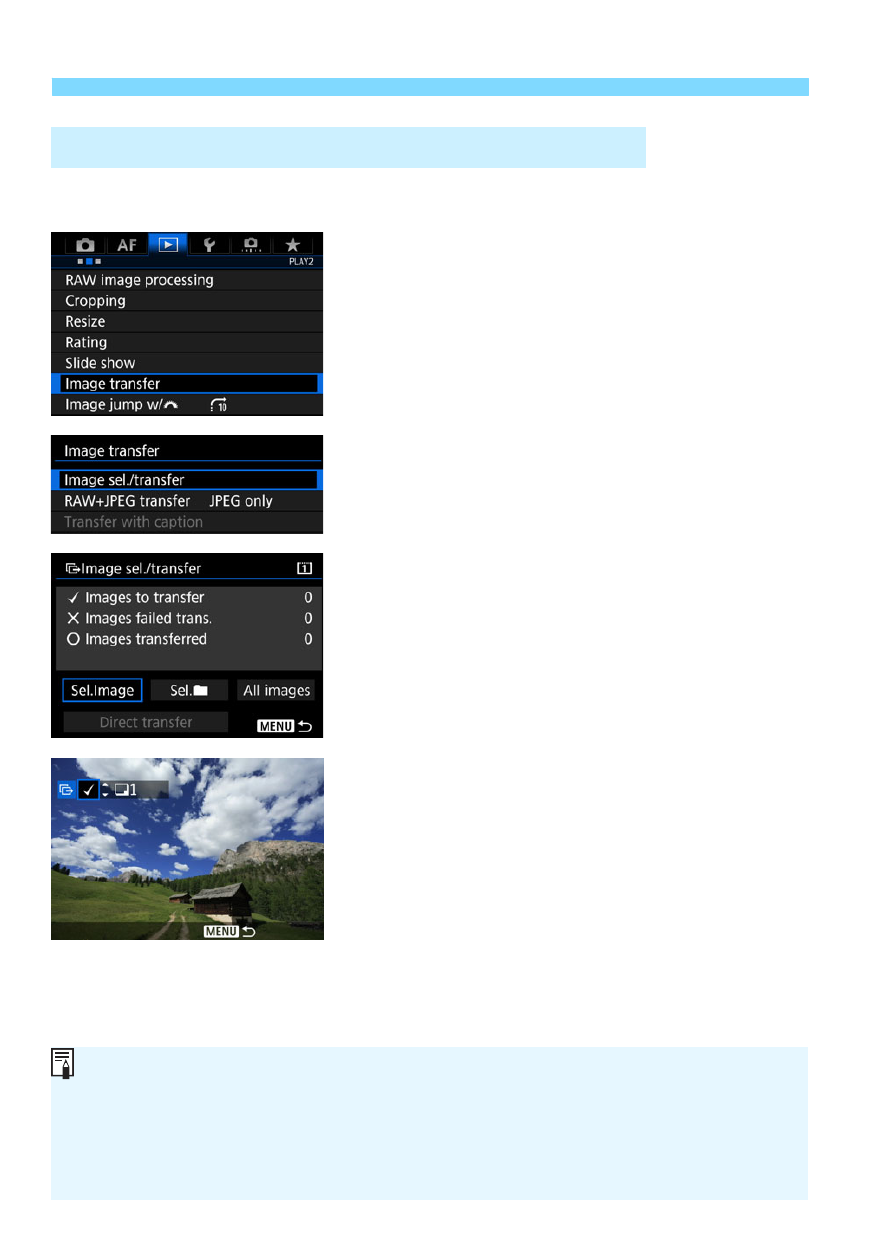
Select [Image transfer].
Under the [
3
2
] tab, select [
Image
transfer
], then press <
0
>.
2
Select [Image sel./transfer].
3
Select [Sel.Image].
4
Select the images to be
transferred.
Turn the <
5
> dial to select the
image to be transferred, then press
<
0
>.
Turn the <
5
> dial to display the [
X
]
on the screen’s upper left, then press
<
0
>.
If you press the <
u
> button and turn
the <
6
> dial counterclockwise, you
can select an image from a three-image
display. To return to the single-image
display, turn the <
6
> dial clockwise.
To select another image to be
transferred, repeat step 4.
3
Selecting the Images to be Transferred
When [
Sel.Image
] is selected, you can check the image’s transfer status
on the upper left of the screen: No mark: Not selected.
X
: Selected for
transfer.
l
: Transfer failed.
k
: Transfer succeeded.
The procedures for [
RAW+JPEG transfer
] (p.411) and steps 1 to 4 above
can also be performed while the camera is not connected to a computer.