413 w, Transfer the image – Canon EOS-1D X Mark II DSLR Camera (Body Only) User Manual
Page 413
413
d
Transferring Images to a Computer
5
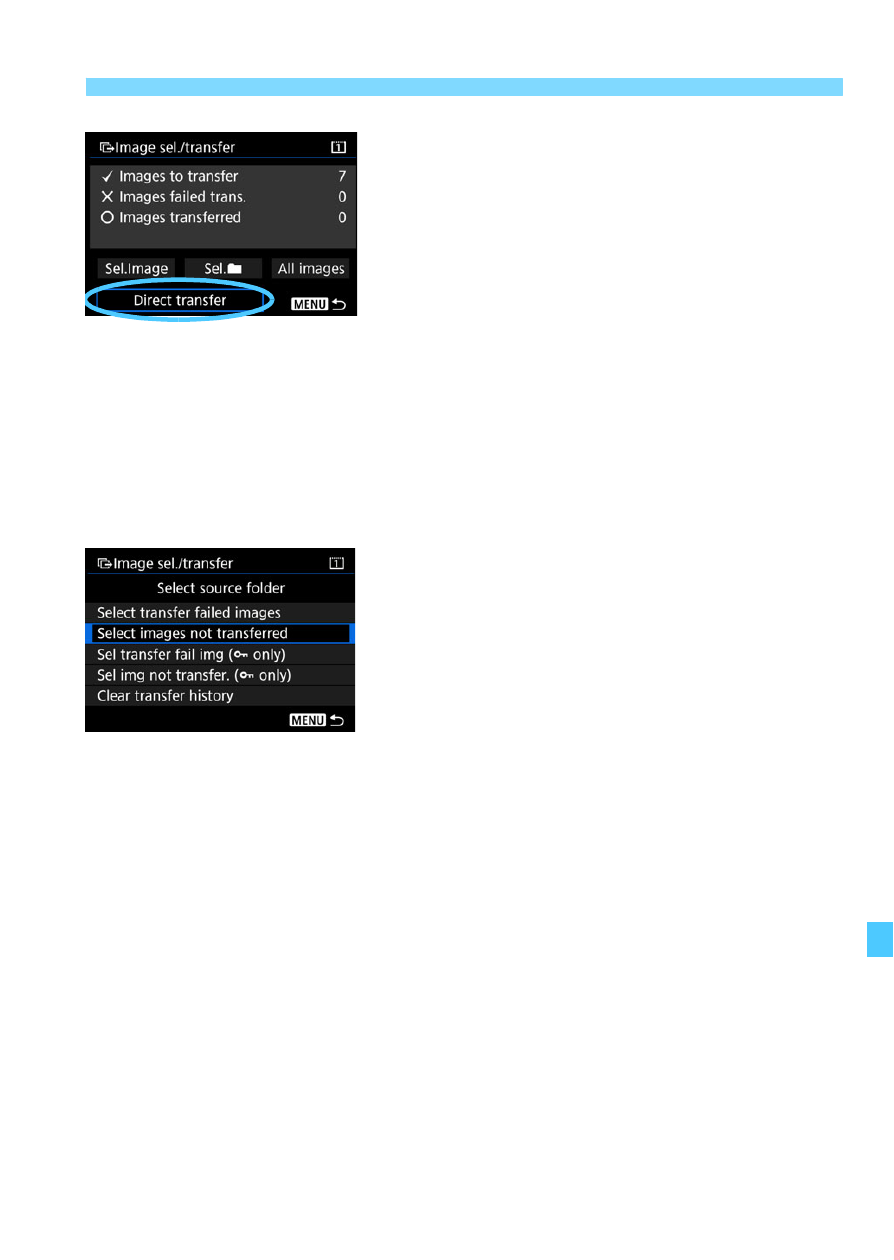
Transfer the image.
On the computer screen, check that
EOS Utility’s main window is
displayed.
Select [
Direct transfer
], then press
<
0
>.
On the confirmation dialog, select
[
OK
] to transfer the images to the
computer.
Images selected with [
Sel.
n
] and
[
All images
] can also be transferred
in this way.
Sel.
n
Select [
Sel.
n
] and select [
Select
images not transferred
]. When you
select a folder, all the images in that
folder not yet transferred to a computer
will be selected.
When you select [
Sel img not transfer.
(
J
only)
] and select a folder, the
protected images in that folder not yet
transferred to a computer will be
selected.
Selecting [
Select transfer failed images
] will select the selected
folder’s images that failed to be transferred.
Selecting [
Sel transfer fail img (
J
only)
] will select the selected
folder’s protected images that failed to be transferred.
Selecting [
Clear transfer history
] will clear the transfer history of the
images in the selected folder. After clearing the transfer history, you can
select [
Select images not transferred
] or [
Sel img not transfer. (
J
only)
] and transfer all the images or the protected images in the folder
again.