Procedure for creating 200-240 vac cable, Installing ac power cable to mb-40r/emb-40r – Adept s350 Cobra User Manual
Page 32
Chapter 3: System Cable Installation
NOTE: The AC power cable is not supplied with the system, but is available in the
optional Power Cable kit. See Table 3-1.
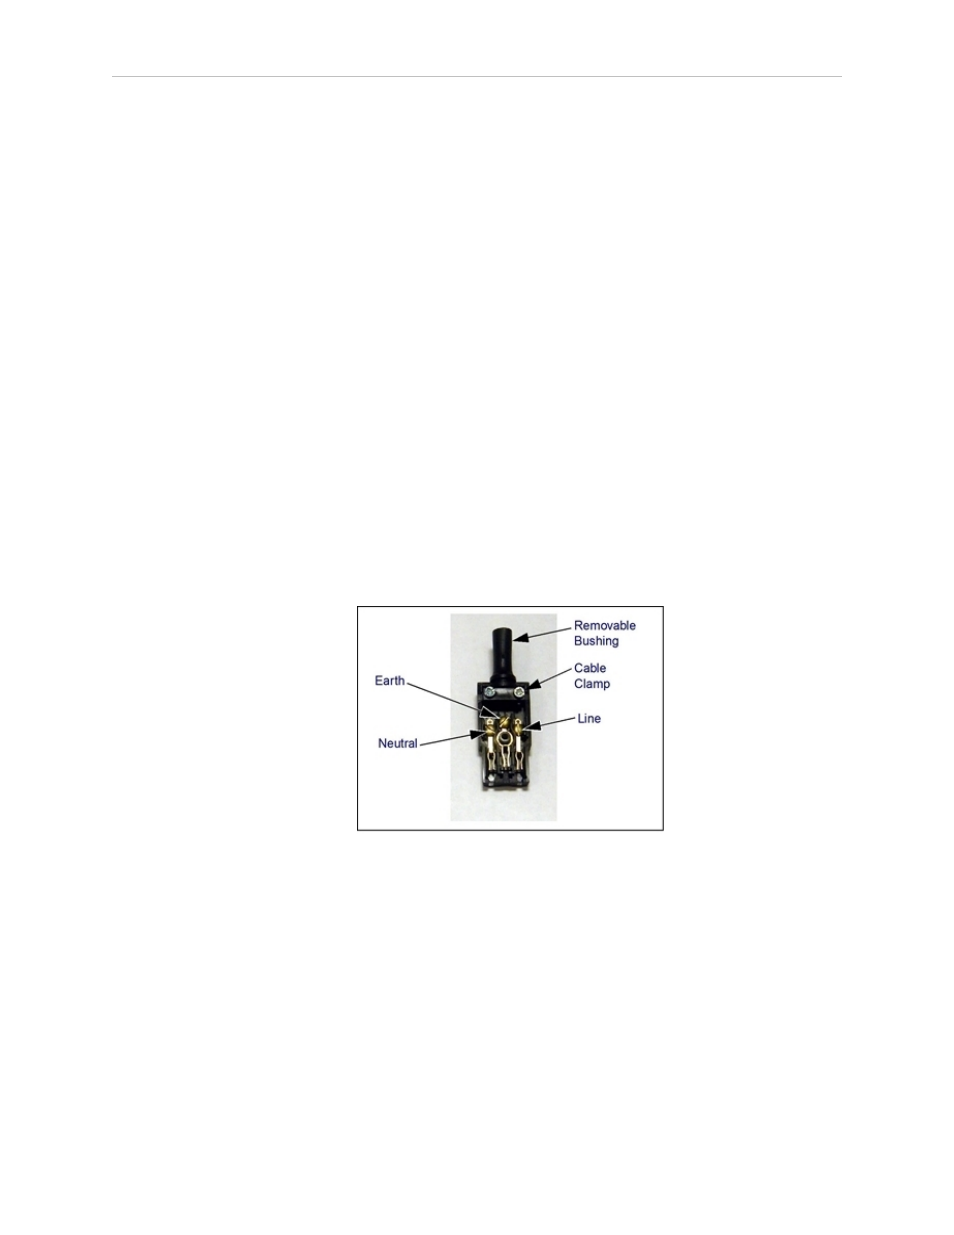
Procedure for Creating 200-240 VAC Cable
1. Locate the AC mating connector shown in Table 3-6.
2. Open the connector by unscrewing the screw on the shell and removing the cover.
3. Loosen the two screws on the cable clamp. See Figure 3-5 for details.
4. Use 18 AWG wire to create the AC power cable. Select the wire length to safely reach
from the user-supplied AC power source to the MB-40R/eMB-40R base.
5. Strip 18 to 24 mm of insulation from each of the three wires.
6. Insert the wires into the connector through the removable bushing.
7. Connect each wire to the correct terminal screw, and tighten the screw firmly.
8. Tighten the screws on the cable clamp.
9. Replace the cover and tighten the screw to seal the connector.
10. Prepare the opposite end of the cable for connection to the facility AC power source.
Figure 3-5. AC Power Mating Connector
Installing AC Power Cable to MB-40R/eMB-40R
1. Connect the unterminated end of the AC power cable to your facility AC power source.
See Figure 3-3 and Figure 3-4 for details. Do not turn on AC power at this time.
2. Plug the AC connector into the AC power connector on the interface panel on the MB-
40R/eMB-40R.
3. Secure the AC connector with the locking latch.
Adept Cobra s350 User's Guide, Rev. D
Page 32 of 94