Ready to job build, Metric specifications – TA Triumph-Adler DC 2075 User Manual
Page 113
Section 5 OTHER CONVENIENT FUNCTIONS
5-67
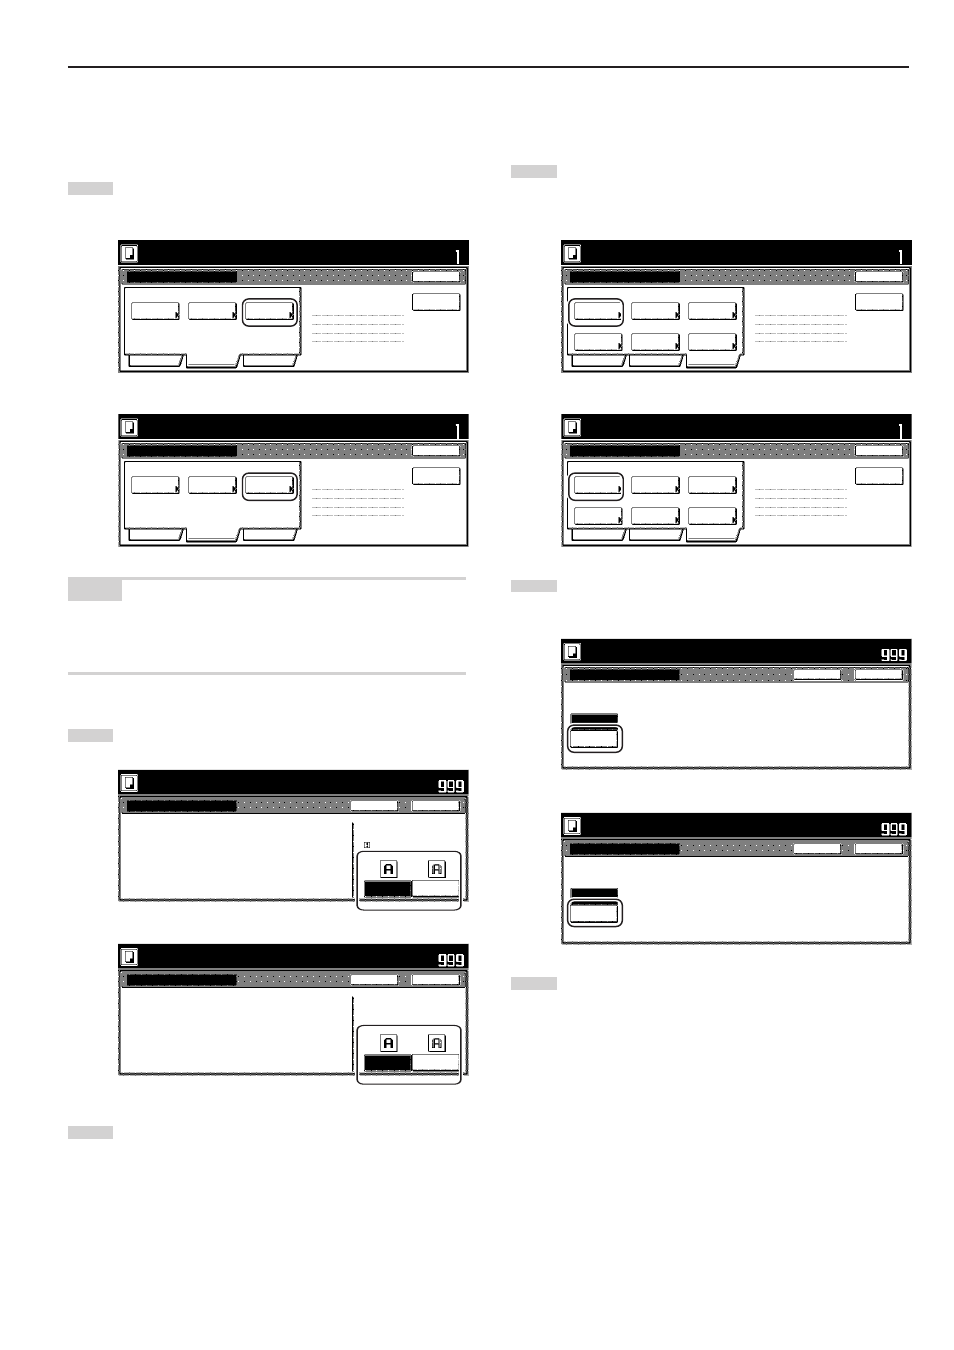
9 Turning the eco print mode ON
This procedure allows you to turn the eco print mode ON in order to
save on toner use.
1
Touch the “Quality” key. Then, in the resulting screen, touch
the “Eco Print” key. The “Eco Print” screen will be displayed.
Inch specifications
Exposure
mode
Text+Photo
Density 4
Off
Eco Print
1 sided copy-Left
Finished page # : 0
Orig. image
quality
Basic
Quality
Edit
Job Build - Step1
End
Insert
page
Ready to Job build.
Place originals then press Start key.
Set
Metric specifications
Exposure
mode
Text + Photo
Manual 4
Off
Eco Print
1-sided Copy-Left
Finished page #: 0
Image
quality
Basic
Quality
Edit
Job Build - Step1
End
Ready to Job build.
Set original. Press Start key.
Set
Insert
blank page
NOTE
The setting in regard to whether or not to use the eco print mode can
only be made in the first step of the job build mode and will apply to all
steps in the copy job.
2
Touch the “On” key to turn the eco print mode ON.
Inch specifications
Eco Print
Off
On
Eco Print
I t i s p o s s i bl e t o r e d u c e
t o n e r c o n s u m p t i o n .
I m a g e i s a l i t t l e l i g h t .
Eco Print
i s s av i n g t o n e r c o n s u m p t i o n , a n d i t
i s e c o n o m i c a l l y.
Ready to Job build.
Place originals then press Start key.
Close
Back
Set
Metric specifications
Eco Print
Off
On
E c o P r i n t
To n e r c o n s u m p t i o n
c a n b e r e d u c e d .
I m a g e r e s o l u t i o n r e d u c e d .
E c o P r i n t e n a bl e s t o n e r c o n s u m p t i o n
r e d u c t i o n .
Ready to Job build.
Set original. Press Start key.
Close
Back
Set
3
Touch the “Close” key. The touch panel will return to the
screen in step 1.
0 Selecting the sheet erase mode
This procedure selects the sheet erase mode in order to erase the
shadows, lines, etc., that can occur around the edges of copies.
1
Touch the “Edit” key. Then, in the resulting screen, touch the
“Border Erase” [“Erase Mode”] key. The “Border Erase”
[“Erase Mode”] screen will be displayed.
Inch specifications
Border
Erase
Auto
Tray A
Modify
Copy
Select
orig.size
Select of
Output
None
Page #
Margin/
Centering
None
Off
Off
2 sided copy-Left
Finished page # : 0
Basic
Quality
Edit
Job Build - Step1
End
Insert page
Ready to Job build.
Place originals then press Start key.
Set
Print from
Rear page
Metric specifications
Erase
Mode
Auto
None
Off
Tray A
Modify
copy
Select of
Output
Select
size orig.
None
None
Page
numbering
Margin/
Imag.shift
2-sided Copy-Left
Finished page #: 0
Basic
Quality
Edit
Job Build - Step1
End
Ready to Job build.
Set original. Press Start key.
Set
Insert
blank page
Print from
Rear page
2
Touch the “Sheet Erase” [“Border erase”] key and then set
the desired border width.
Inch specifications
Ready to Job build.
Place originals then press Start key.
Border Erase
None
Sheet
Erase
Set
Close
Back
Erase the border shadow of original.
Metric specifications
Erase Mode
None
Border
erase
E ra s e e d g e o f o r i g i n a l c o py.
Ready to Job build.
Set original. Press Start key.
Close
Back
Set
3
Touch the “Close” key. The touch panel will return to the
screen in step 1.