Ready to copy, Metric specifications, Press the [start] key. copying will start – TA Triumph-Adler DC 2075 User Manual
Page 52
Section 5 OTHER CONVENIENT FUNCTIONS
5-8
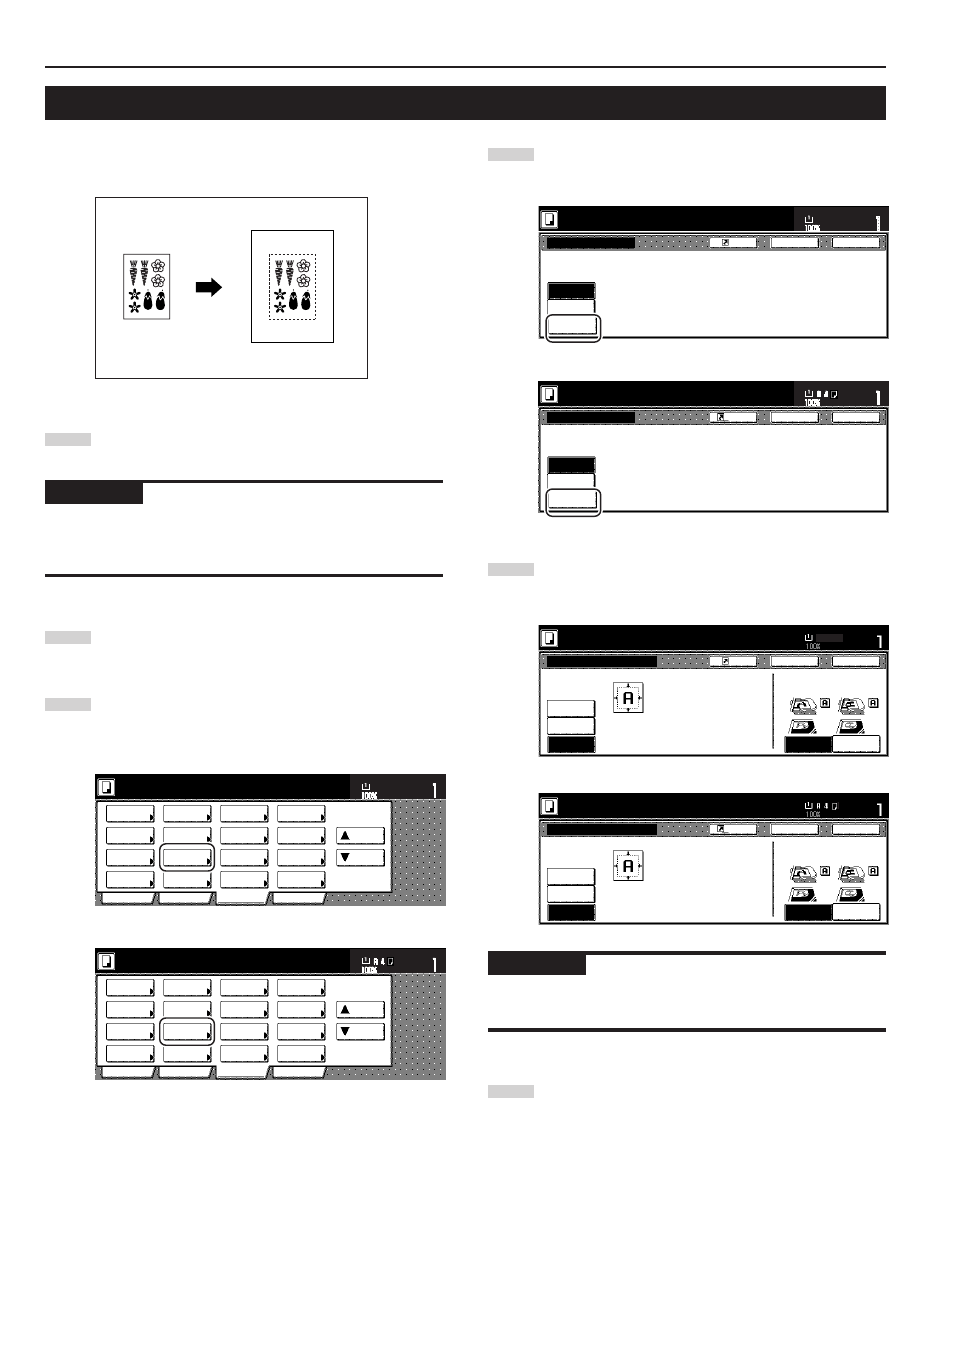
4. Centering the copy image [Centering/Image shift mode]
With this mode you can center the image on the copy paper when you
copy onto a paper size that is larger than that of the original.
1
Set the originals to be copied.
IMPORTANT!
Set originals so that the top edge is facing either the back or the left of
the copier. Setting them in the wrong direction may cause the image
to be copied in the incorrect position.
2
Touch the “Function” tab. The content of the “Function” tab
will be displayed.
3
Touch the “Margin/Centering” [“Margin/Imag.shift”] key. The
“Margin/Centering” [“Margin/Image shift”] screen will be
displayed.
Inch specifications
2 sided/
Separation
Select
paper
Combine
Reduce
/Enlarge
Margin/
Centering
Forms
Overlay
Page #
Function
Basic
User choice
Program
Cover
Mode
Booklet
Sort/
Finished
Border
Erase
Exposure
mode
Orig.image
quality
Ready to copy.
Select
orig. size
Auto
Selection
Batch
scanning
Up
Down
Set
Paper size
11x8
1
/
2
"
Metric specifications
Select
paper
2-sided/
Split
Merge copy
Reduce/
Enlarge
Margin/
Imag. shift
Page
numbering
Function
Basic
User choice
Program
Cover
Mode
Booklet
Erase
Mode
Exposure
mode
Image
quality
Sort/
Finished
Ready to copy.
Select
size orig.
Auto
selection
Large # of
originals
Form
overlay
Up
Down
Set
Paper size
4
Touch the “Centering” [“Imag.shift”] key. The “Centering”
[“Imag.shift”] screen will be displayed.
Inch specifications
Margin/Centering
Reposition image to left/right or
top/bottom, and also center image
on paper.
None
Margin
Centering
Ready to copy.
Register
Back
Close
11x8
1
/
2
"
Set
Paper size
Metric specifications
None
Back
Close
Ready to copy.
Register
Set
Paper size
Margin/Image shift
R e p o s i t i o n i m a g e t o l e f t / r i g h t o r
t o p / b o t t o m a n d c e n t e r i m a g e o n p a p e r.
Margin
Image
shift
5
Follow the instructions on the right side of the touch panel
and verify the direction in which the originals were set.
Inch specifications
Able to center scanned image on paper.
Centering
None
Margin
Margin/Centering
Ready to copy.
Register
Back
Close
11x8
1
/
2
"
Set
Paper size
Rear
Check direction
Left top
corner
Check direction of
original top side.
Metric specifications
Margin/Image shift
None
Margin
Image
shift
C h e ck d i r e c t i o n
C h e ck d i r e c t i o n o f
o r i g i n a l .
A bl e t o c e n t e r s c a n n e d i m a g e o n p a p e r.
Back
Close
Ready to copy.
Register
Set
Paper size
Back Edge
Left top
corner
IMPORTANT!
If the designation for the direction that the originals are set is not
correct, copying may be accomplished incorrectly.
6
Press the [Start] key.
Copying will start.