6 sequence – PLANET HDVR-1600 User Manual
Page 39
Purple buttons are HCMS menu controls including: Playback, HCMS Player, Emap, Schedule
Record, Setting, and Lock.
Gray buttons are site controls including: ReConnect/DisConnect, Record, Configuration, Event
Search, and Camera Setting.
Yellow buttons are camera controls including: Sequence, Rename, Dome Setting, Dome Control,
Remove, and Sound Notification.
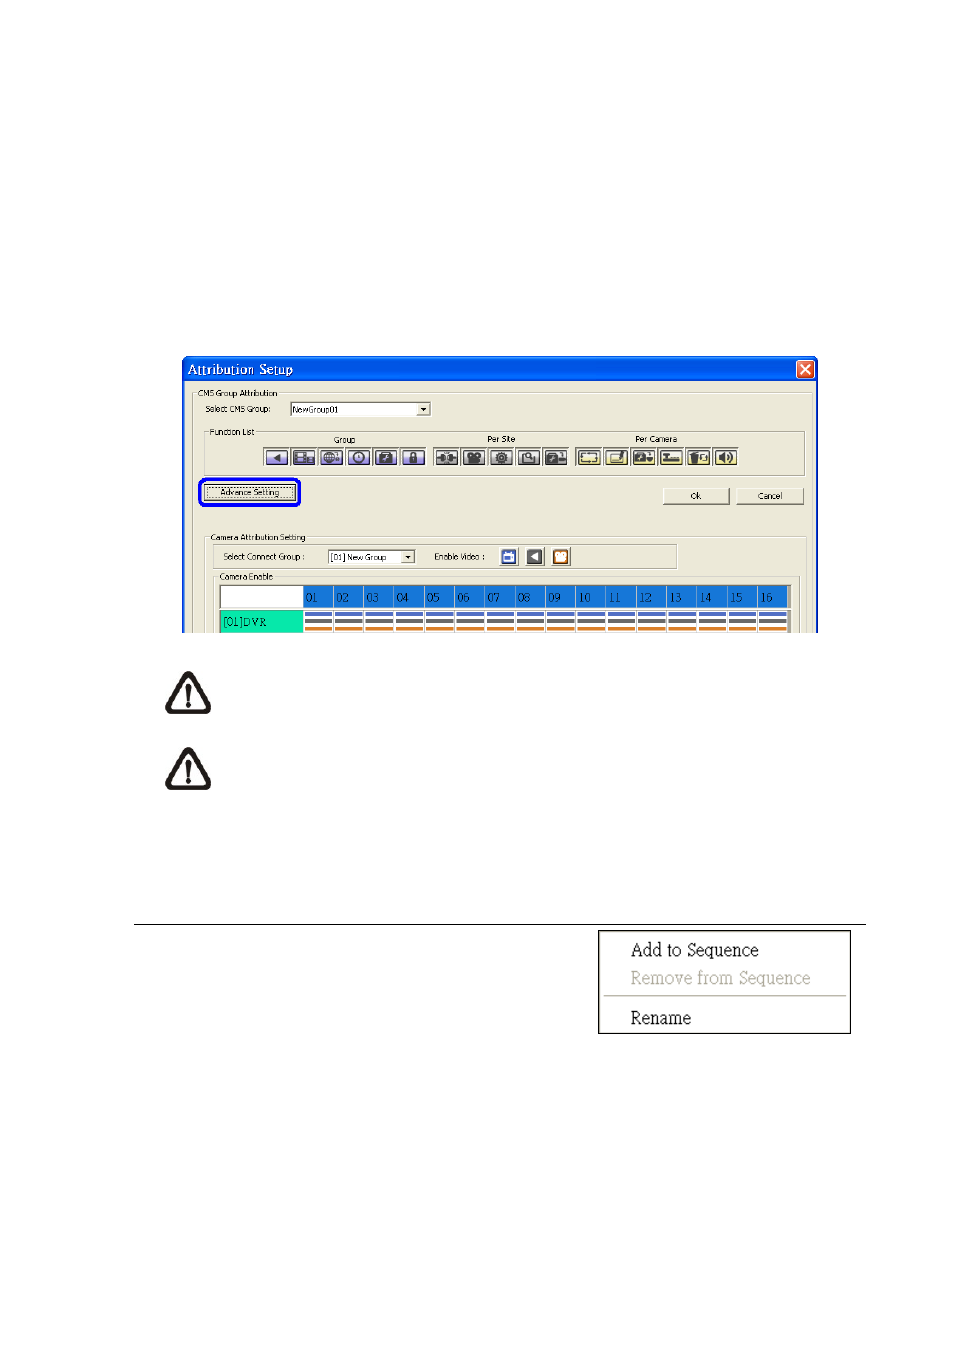
Each camera can be set to enable/disable Live, Play, or Record function individually after clicked on
<Advance Setting>. Refer to the following figure for details.
NOTE:
The preset is 16 cameras for all sites. The real number of cameras per each site
will not be detected.
NOTE:
These settings will affect the whole operation of the HCMS. Please be very
careful while configuring the settings.
Next time when you login, you can choose to enter the HCMS either as the admin or the user.
6.6 Sequence
This function is used to set the displaying sequence. Before
starting sequence display, you need to add channels to the
sequence list. Right click on any channel and select <Add to
Sequence> to add, or <Remove from Sequence> to remove.
Note that when the channel is added to the sequence, a
capital “S” will be shown on the icon.
After the channels are added to the sequence, click on the <Setting> icon and choose <Sequence> to
setup the sequence. Under the <Sequence Setup> option, you can setup the dwell time (1 to 120
seconds), and split mode (2*2, 3*3, 4*4, or 5*5). <Sequence Order> lists the channels that have been
added to the list in order. Click <OK> to save the settings.
-
39
-