Arranging clips in the expert view timeline – Adobe Premiere Elements 12 User Manual
Page 74
Arranging clips in the Expert view timeline
Expert view timeline overview
Add clips to the Expert view timeline
Replace a clip in the Expert View timeline
Select, move, align, and delete clips in the Expert view timeline
Create a duplicate clip in the Expert view timeline
View the duration of selected clips in the Expert view timeline
Customize Expert view timeline tracks
The video tutorial provides an overview of using the Expert view timeline in Adobe Premiere Elements 11.
Expert view timeline overview
The Expert view timeline graphically represents your movie project as video and audio clips arranged in vertically stacked tracks. When you
capture video from a digital video device, the clips appear sequentially as they occur.
The Expert view timeline uses a time ruler to display the components of your movie and their relation with each other over time. You can trim and
add scenes, indicate important frames with markers, add transitions, and control how clips are blended or superimposed.
The zoom controls on the Expert view timeline let you zoom out to see your entire video, or zoom in to see clips in more detail. You can also
change how the clips appear in the tracks, and resize the tracks and the header area.
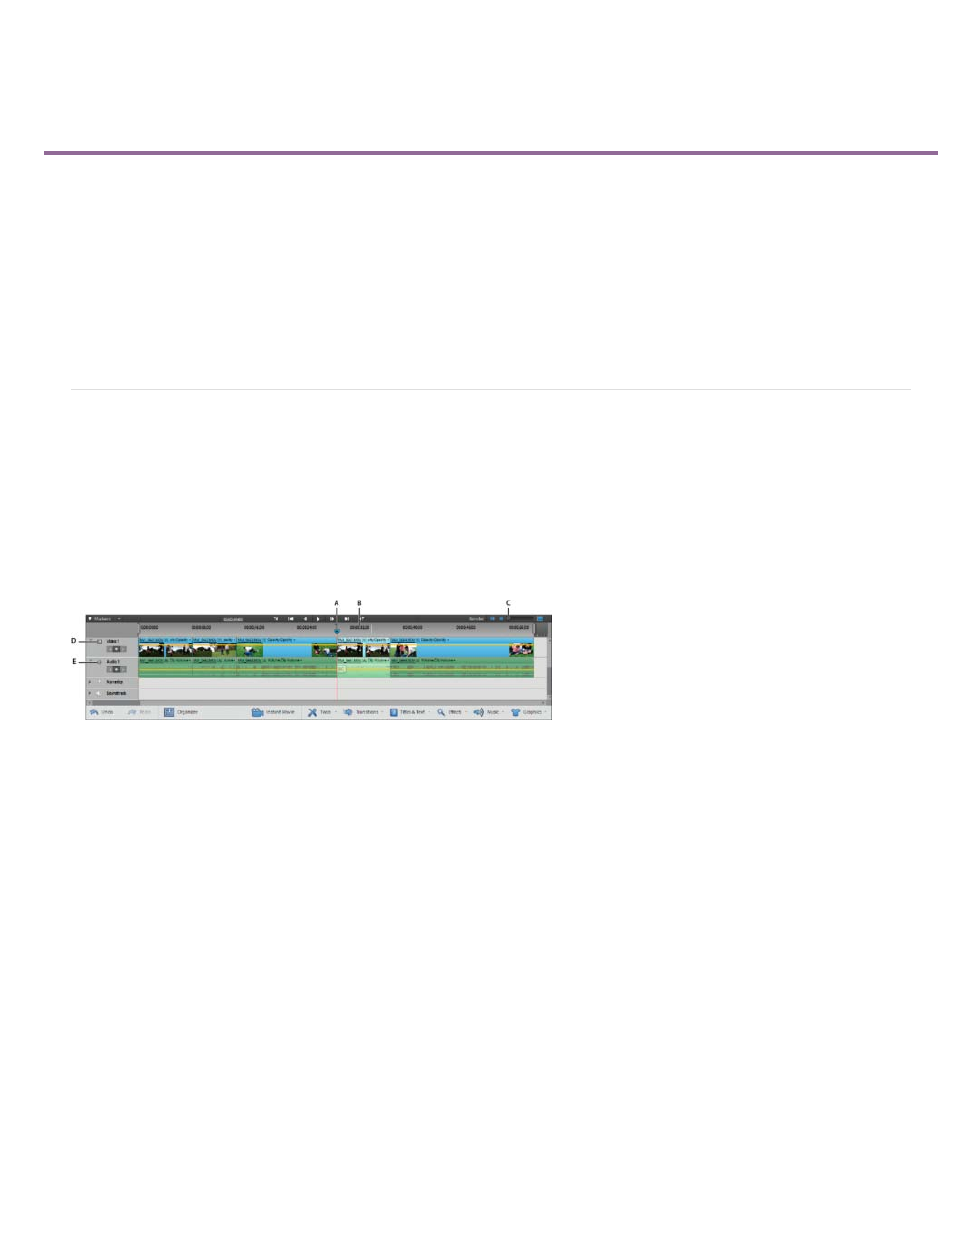
Expert view timeline
A. Current-time indicator B. Time ruler C. Zoom control D. Video track E. Audio track
Tracks in the Expert view timeline
Tracks let you layer video or audio and add compositing effects, picture-in-picture effects, overlay titles, soundtracks, and more. With multiple
audio tracks, you can add a narration to one track and background music to another track. The final movie combines all the video and audio
tracks.
By default, the Expert view timeline contains three tracks for video (or images) and audio, a narration track, and a sound track. You can drag
linked clips (clips that include both audio and video) to a track.
For linked clips, the video and audio components appear together (video directly above audio) in their respective tracks (such as Video1 and
Audio1). To see all of the tracks, you may have to scroll up or down the Expert view timeline.
A new track is inserted if you drag and release a clip above the topmost video track. There is no limit to the number of tracks a project can
contain. You can add or delete tracks at any time, even before adding clips.
A movie must contain at least one of each type of track (the track can be empty). The video track order is important because any clip located in
Video 2 also overlays the Video 1 track. Audio tracks are combined in playback so the track order is not relevant.
Tip: You can specify the default number and type of tracks in new movies.
70