ACTi XNR-4200 V1.02.13 User Manual
Page 28
XNR-4200 User’s Manual 1.02.13
may vary in degree or designs depending on the manufacturer. In general, manufacturers do
not recommend installing desktop class hard drives for RAID environment.
Desktop class hard drives are designed for balanced performance and reliability for everyday
use (8 hours/day, 5 days/week), while Enterprise class hard drives are designed especially for
RAID system environment which requires higher performance for 24 hours/day, 7 days/week
mission critical applications.
Note: Any other hard disk that is not bigger than 2TB will theoretically also work, however, in
such cases ACTi does not guarantee the performance of those uncertified hard drives.
Note: Hard disks with capacity bigger than 2TB are not supported!
First-time Hard Disk Installation
Once you have the hard disks ready, do the following to install them to your XNR-4200.
1. Shut down the device.
2. Remove the HDD trays, lock the disks on them.
3. Insert those HDD trays back into the device
4. Start the device.
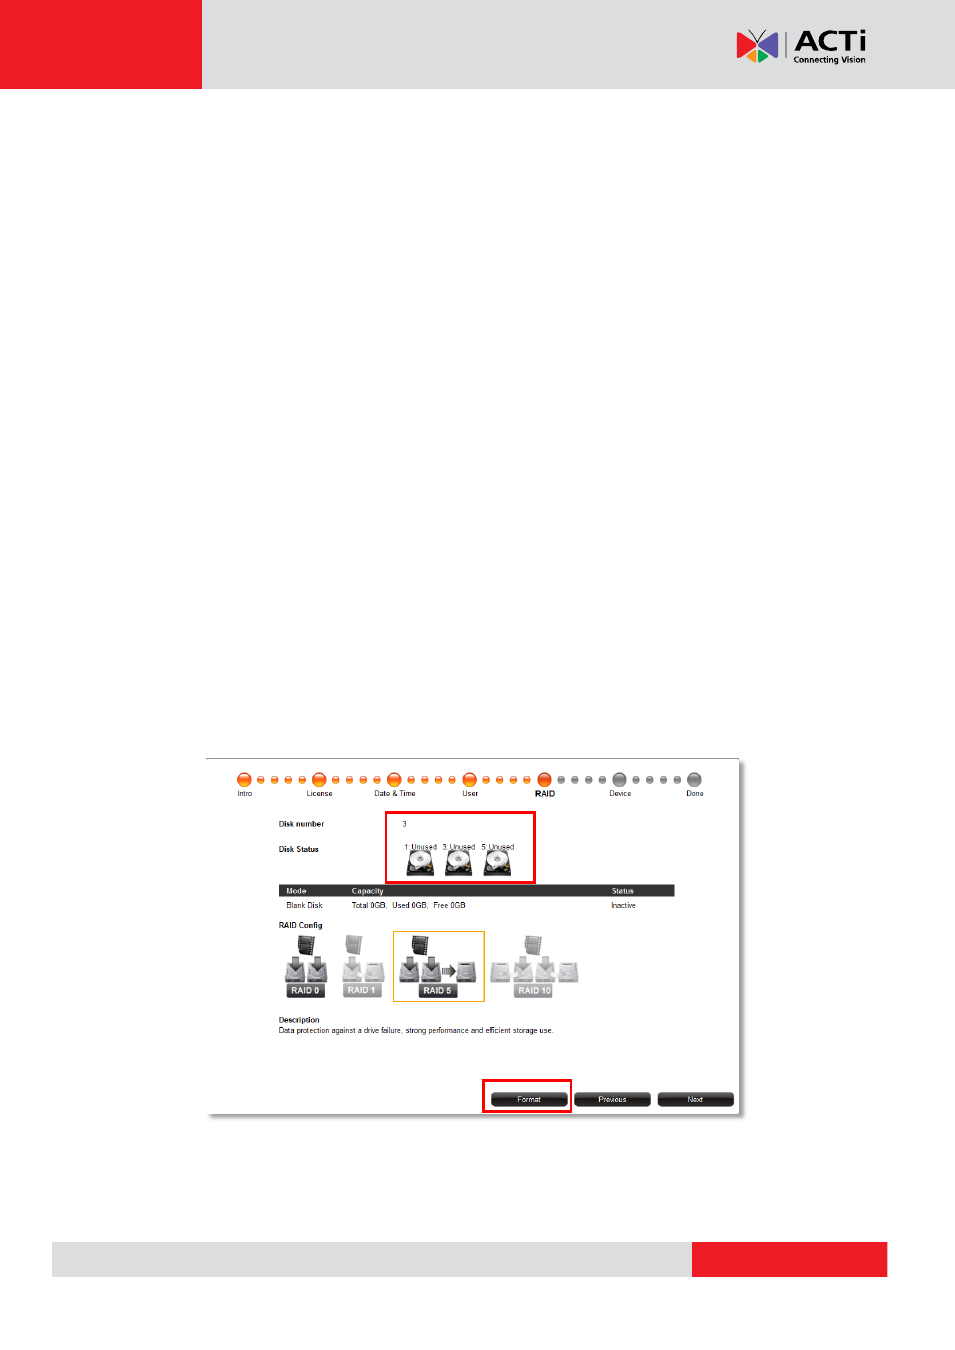
5. As the Setup Wizard runs to RAID setting stage, you will see the number of disks
appear as “Unused” status. Choose the RAID type and click “Format”, this will erase
the disks to get ready for building the RAID.
6.
Once formatting completes, the disks status turns to “Normal”, and the device
continues to ReSync to build the RAID file system until the Mode Statues displays
“Active”. Your RAID system is ready for recording.