Positioning the snap arm, Aligning the ribbon mounting pins – Compuprint 4247-Z03 User Manual
Page 30
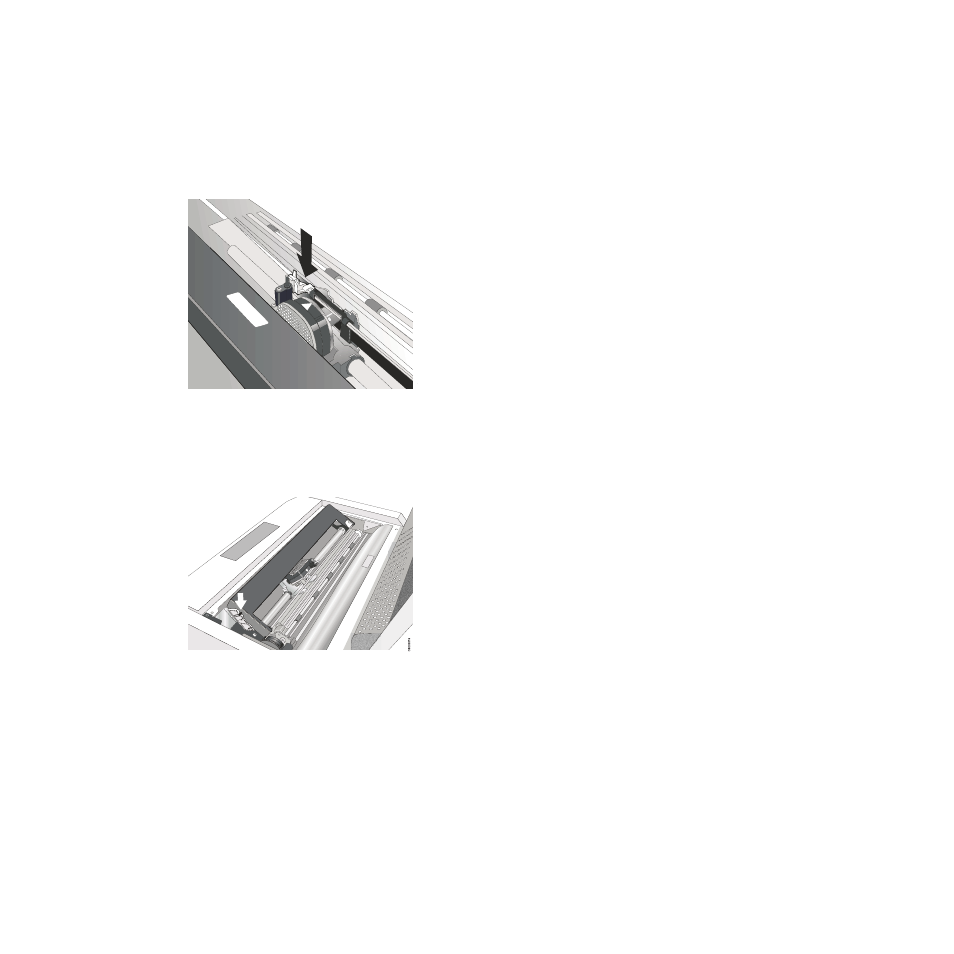
8.
Position the snap arm with the small lever up onto the ribbon lift assembly.
Push the snap arm down onto the ribbon lift assembly until it snaps into
place.
9.
Align the ribbon mounting pins on the left and right side of the ribbon
cartridge with the slots in the cartridge supports. Snap the ribbon cartridge
down into place.
10.
Turn the ribbon advance knob again in the direction of the arrow to take up
any slack in the ribbon, as you slide the printhead back and forth to ensure
that the ribbon guide runs freely along the ribbon.
11.
If the ribbon is not running freely, or to ensure that you have installed the
ribbon cartridge correctly, ensure that:
a.
The left and right ribbon mounting pins are securely snapped into the
cartridge supports.
b.
There are no twists or folds in the ribbon.
c.
The ribbon is not catching on the printhead.
d.
The ribbon moves when you turn the ribbon advance knob in the direction
of the arrow. If the ribbon does not move, replace the ribbon cartridge.
Contact your place of ribbon cartridge purchase if you believe that the
ribbon is faulty.
12.
Close the upper printer cover.
e61a2018
Figure 18. Positioning the snap arm
Figure 19. Aligning the ribbon mounting pins
14
User's Guide