Setting the head locking system, Setting the head locking system -7 – QuickLabel 482 Pronto! User Manual
Page 81
Pronto! 482/486/682/863
6-7
The rewinder is fully spread, thus gripping the liner firmly.
6
Turn rewinder (2) counterclockwise to tighten the liner.
7
Slightly loosen top fixing screw at the locking system with hexagonal
wrench and position the pinch roller (4) centrally to the liner (see
Removing and installing the locking system on page 6-13).
8
Close the locking system and tighten top fixing screw at the locking
system.
9
Turn lever (7) clockwise to lock the printhead. The label roll is loaded for
use in Peel-Off mode.
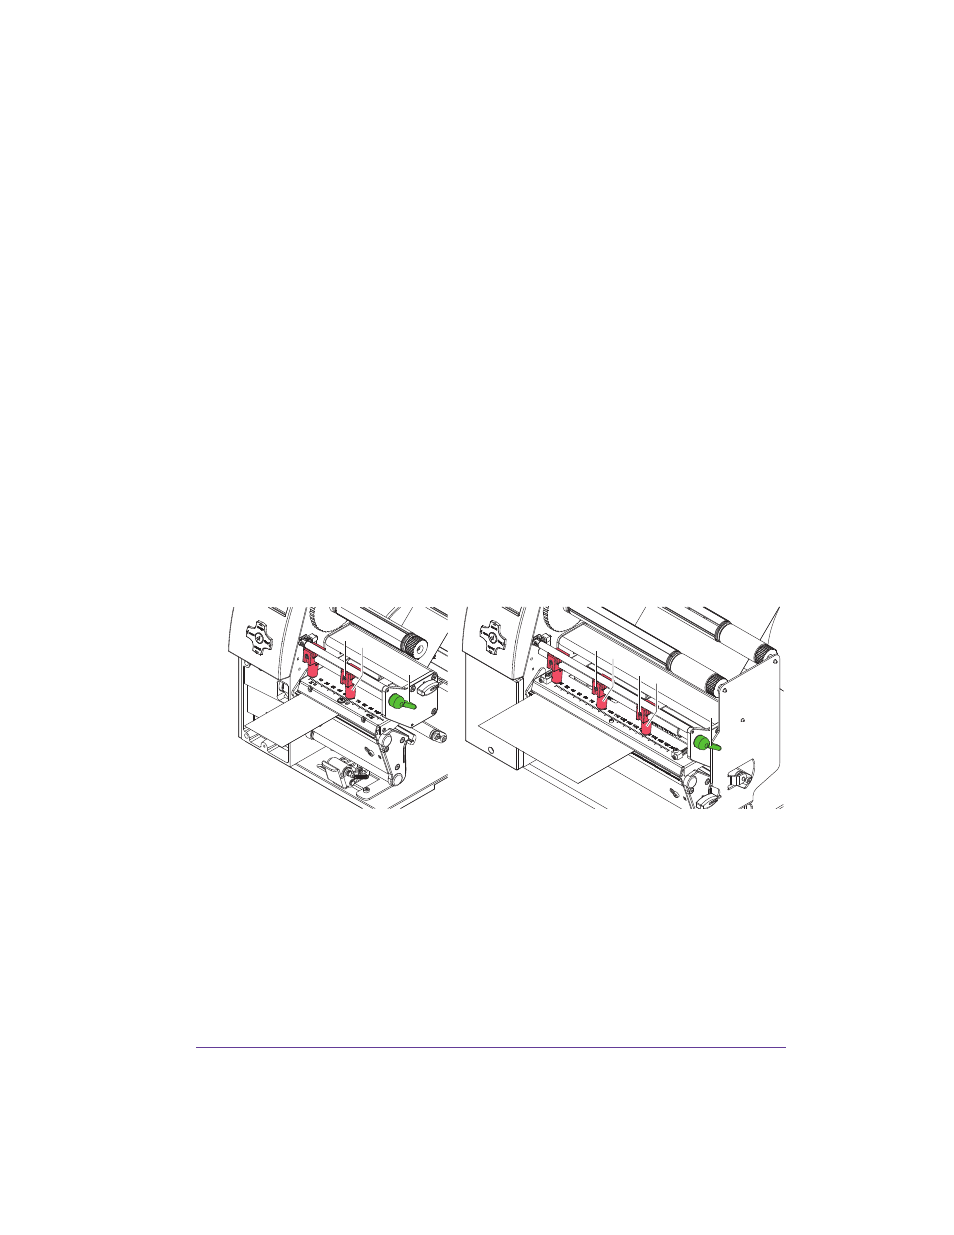
Setting the head locking system
The printhead is pushed on via two plungers (on Pronto! 863 three plungers).
The location of the outer plunger must be set to the width of the label
medium used so as to
•
achieve even print quality across the entire label width
•
prevent wrinkles in the feed path of the transfer ribbon
•
prevent premature wearing of the print roller and printhead
1
Turn lever (3) clockwise to lock the printhead.
2
Loosen threaded pin (1) at outer plunger (2) with hexagonal wrench.
3
Position outer plunger (2) above the outer label edge and tighten
threaded pin (1).
4
On Pronto! 863 align the middle plunger to the middle of the labels.
1
2
3
1
2
3
1
4