Recording an overdub, 4–recording – Teac DR-2D User Manual
Page 42
42
TASCAM DR-2d
4–Recording
TIP
By making the above settings, in addition to overdubbing,
you can use a recorded (or copied) audio track for instrument
practice or karaoke.
NOTE
You cannot change the input monitoring setting during
recording or when in recording standby.
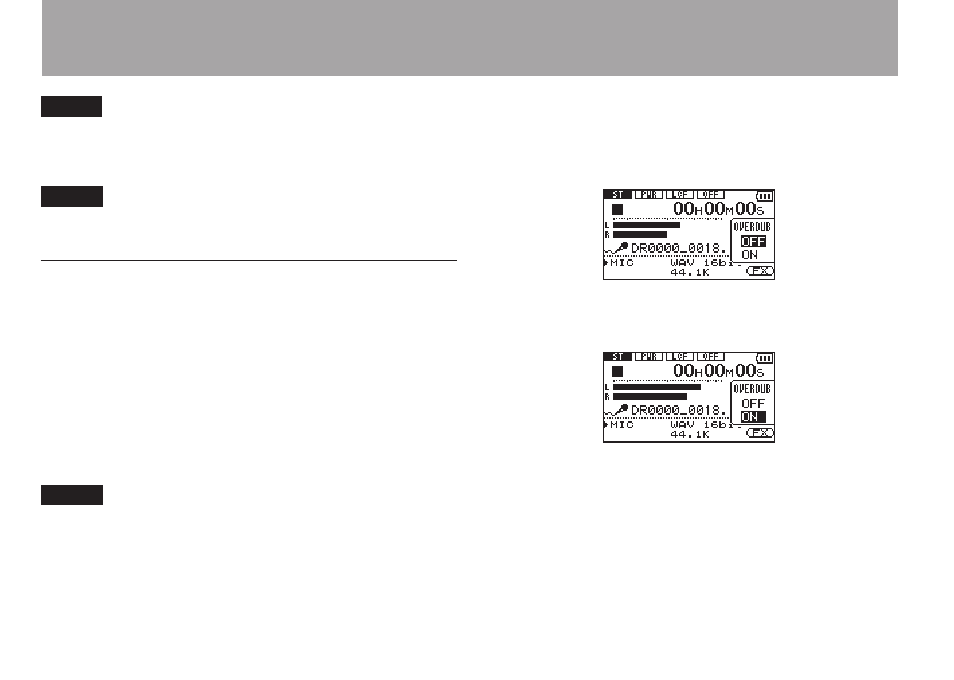
Recording an overdub
1 Use the  and ¯ keys and the
BROWSE
screen to
select that files that you want to overdub.
2 Press the PLAY/PAUSE
[
Á/π
]
key to start playback,
and check the volume balance between the playback and
the input sounds.
3 Use the INPUT LEVEL (+, –) keys to adjust the input
volume level, and use the
PB
INPUT
item on the
MONITOR
screen to adjust the playback volume level.
NOTE
When input monitoring is ON (and during overdub recording)
the PEAK indicator shows the maximum level of the combined
input and playback signals.
4 Press the RECORD (º) key to set the unit to record
standby.
The screen overdubbing ON/OFF pop-up appears.
The recording file name, input source, recording audio file
type and sampling frequency also appear so that you can
confirm them before you start recording.
5 Use the wheel to select
ON
from the overdubbing ON/OFF
pop-up.
6 Press the RECORD (º) key to start overdubbing.
When recording starts, the record indicator lights and the
display shows the elapsed and remaining recording times.
The lower part of the screen shows the name of the playing
file that is being mixed in the overdub.