Setting the time of the built-in clock, Lock function, Ee “lock function” on – Teac HS-20 User Manual
Page 24: 3 – preparation
24
TASCAM HS-20
3 – Preparation
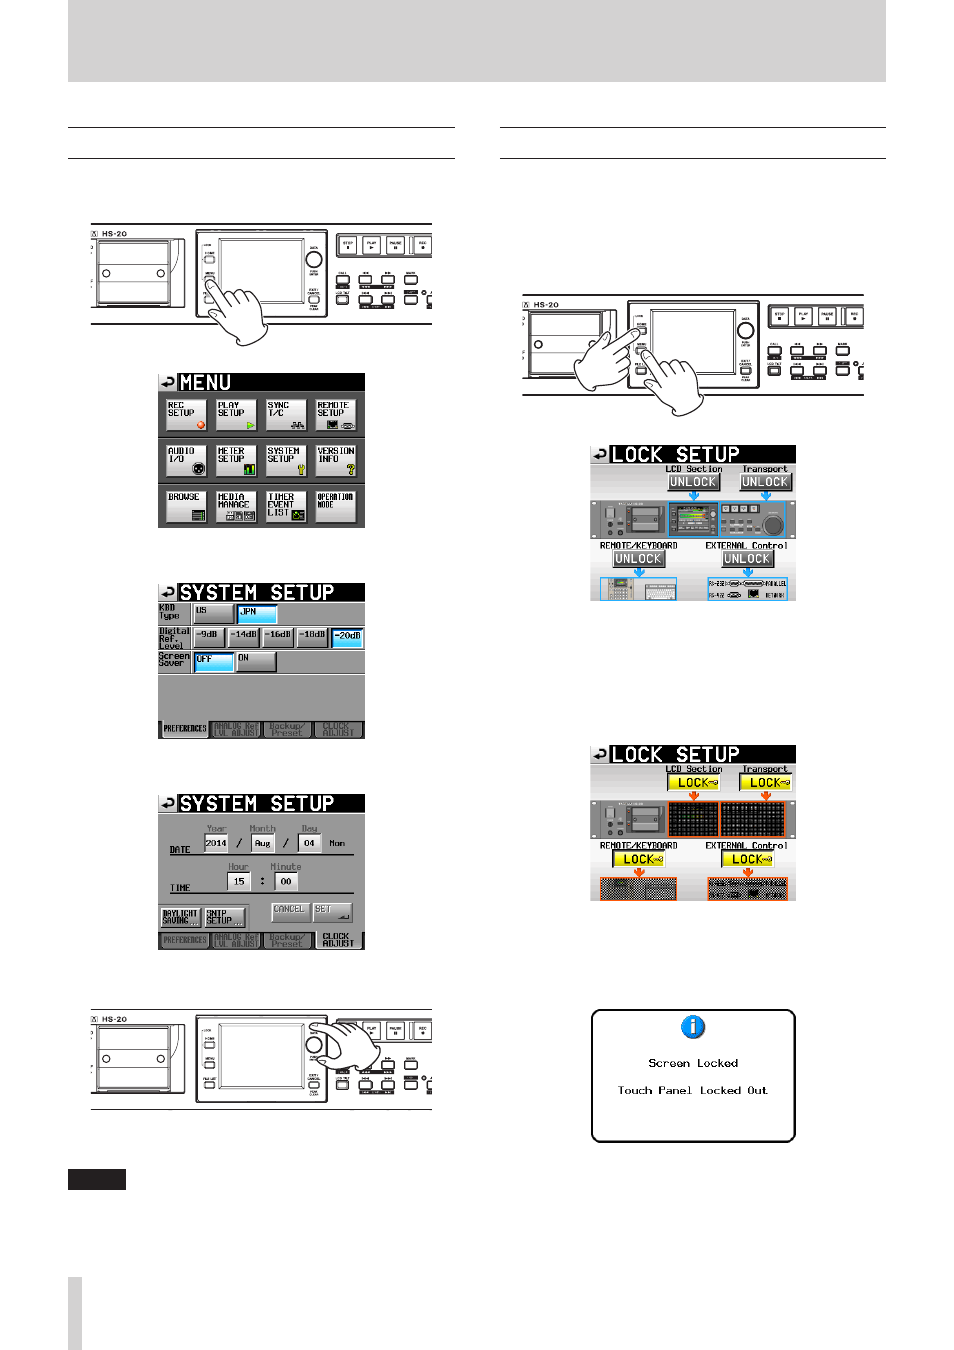
Setting the time of the built-in clock
1. Press the MENU key on the front panel to open the MENU
screen.
2. Touch the SYSTEM SETUP button to open the SYSTEM SETUP
screen.
3. Touch the CLOCK ADJUST tab to open the CLOCK ADJUST
page where you can set the built-in clock.
4. Touch the item that you want to change, and use the DATA
dial on the front panel to change the value.
5. Touch the SET button or push the DATA dial to confirm the
setting.
NOTE
After purchasing this unit, set the clock before making your
first recording. If you do not set the clock, the time stamps
on recorded files will be incorrect.
Lock function
Press the MENU key while pressing and holding the HOME key
on the front of the unit to open the LOCK SETUP screen. On
this screen you can turn on/off the lock function that disables
operation from the front panel and external devices.
The front panel is divided into two sections, which can be locked
and unlocked separately.
Types of external devices are also divided into two categories,
which can be locked and unlocked separately.
If you press the button for a section, it changes from UNLOCK to
LOCK (with a yellow background) and the locked area appears
dimmed.
Locked on LOCK SETUP screen
• When the LCD section is set to LOCK:
o
If the display is touched, the following pop-up message
appears when the display panel is locked.
Display panel locked