Inserting the data of the copy buffer, Insert file), 7 – timeline mode – Teac HS-20 User Manual
Page 49
TASCAM HS-20
49
7 – Timeline mode
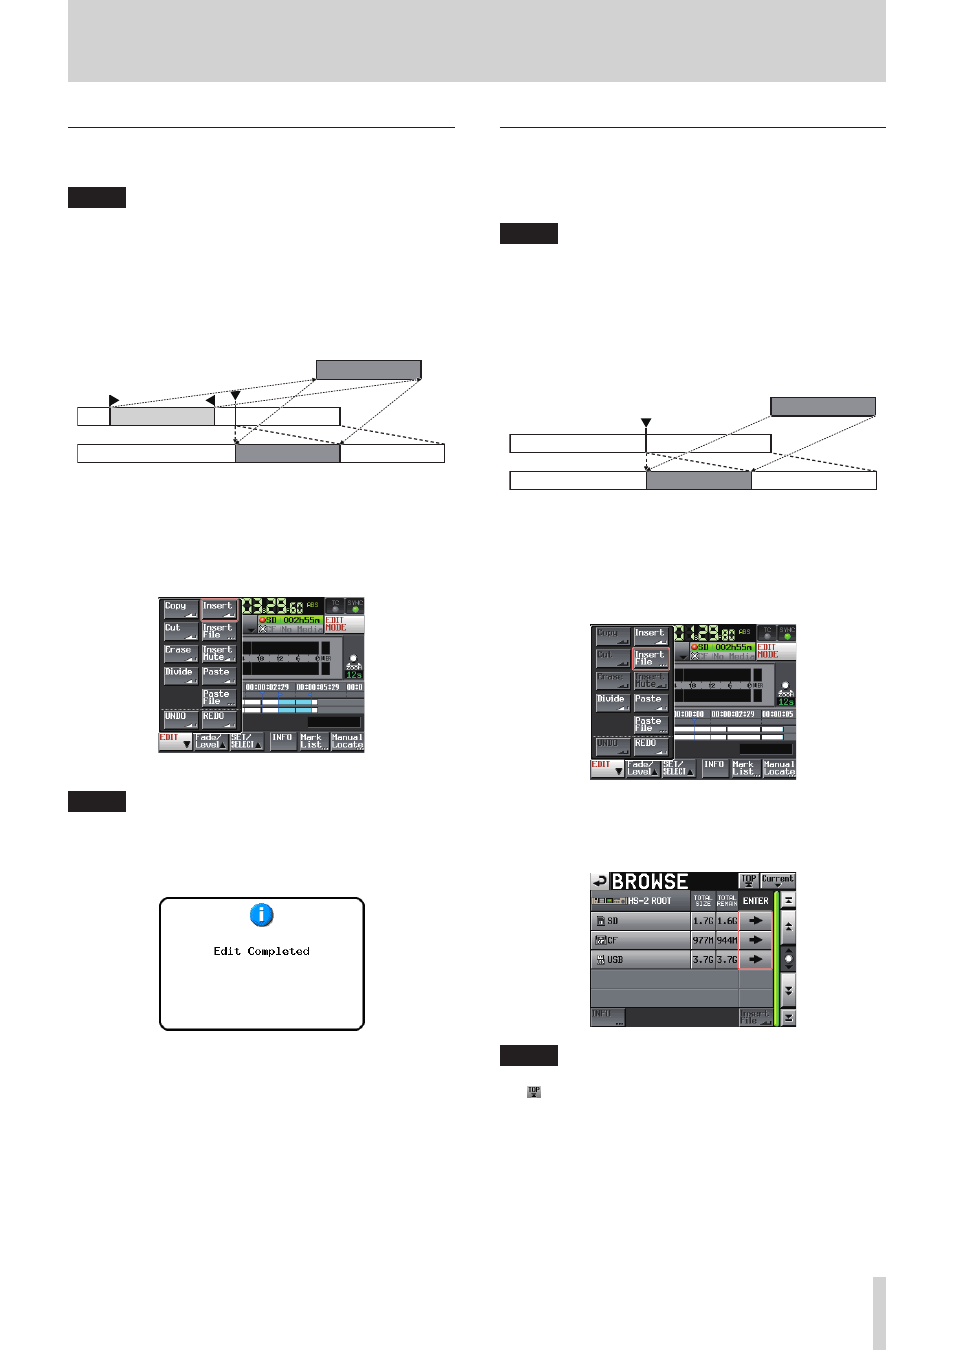
Inserting the data of the copy buffer at the
set position (Insert)
NOTE
• All regions following the insertion point will move backward
by the time of the data inserted.
• When inserting into a region, three regions will be created:
the part of the region that was before the timeline cursor,
the content of the copy buffer, and the part of the region
that was after the timeline cursor.
• If the set position is located in a fade-in or fade-out, that
fade information will be cleared.
Copy buffer
1. Press the HOME key on the front of the unit to open the
Home screen.
2. Touch the EDIT MODE button to enter edit mode.
3. Move the timeline cursor to the position where you want to
insert data.
4. Touch the EDIT button to open the pull-up menu.
Touch the Insert button on the pull-up menu.
NOTE
The Insert button is available only when the copy buffer
contains data.
5. When insertion is complete, the Home Screen will open after
a pop-up window is shown.
In this case, the EDIT pull-up menu will remain open.
Inserting a selected file into the set position
(Insert File)
You can insert the entire contents of a 2-channel BWF/WAV file
at the set position.
NOTE
• All regions following the insertion point will move backward
by the time of the file inserted.
• When inserting into a region, three regions will be created:
the part of the region that was before the timeline cursor,
the content of the copy buffer, and the part of the region
that was after the timeline cursor.
• If the set position is located in a fade-in or fade-out, that
fade information will be cleared.
bwf file
1. Press the HOME key on the front of the unit to open the
Home screen.
2. Touch the EDIT MODE button to enter edit mode.
3. Move the timeline cursor to the position where you want to
insert a file.
4. Touch the EDIT button to open the pull-up menu.
Touch the Insert File button on the pull-up menu to open
the BROWSE screen.
5. Touch the e button for the media containing the file to
insert on the BROWSE screen.
NOTE
If the top page of the BROWSE screen is not displayed, touch
on the screen. The media selection screen appears.