System setting backup and preset functions, 10 – internal settings, Analog ref lvl adjust page – Teac HS-20 User Manual
Page 92: Clock adjust page
92
TASCAM HS-20
10 – Internal settings
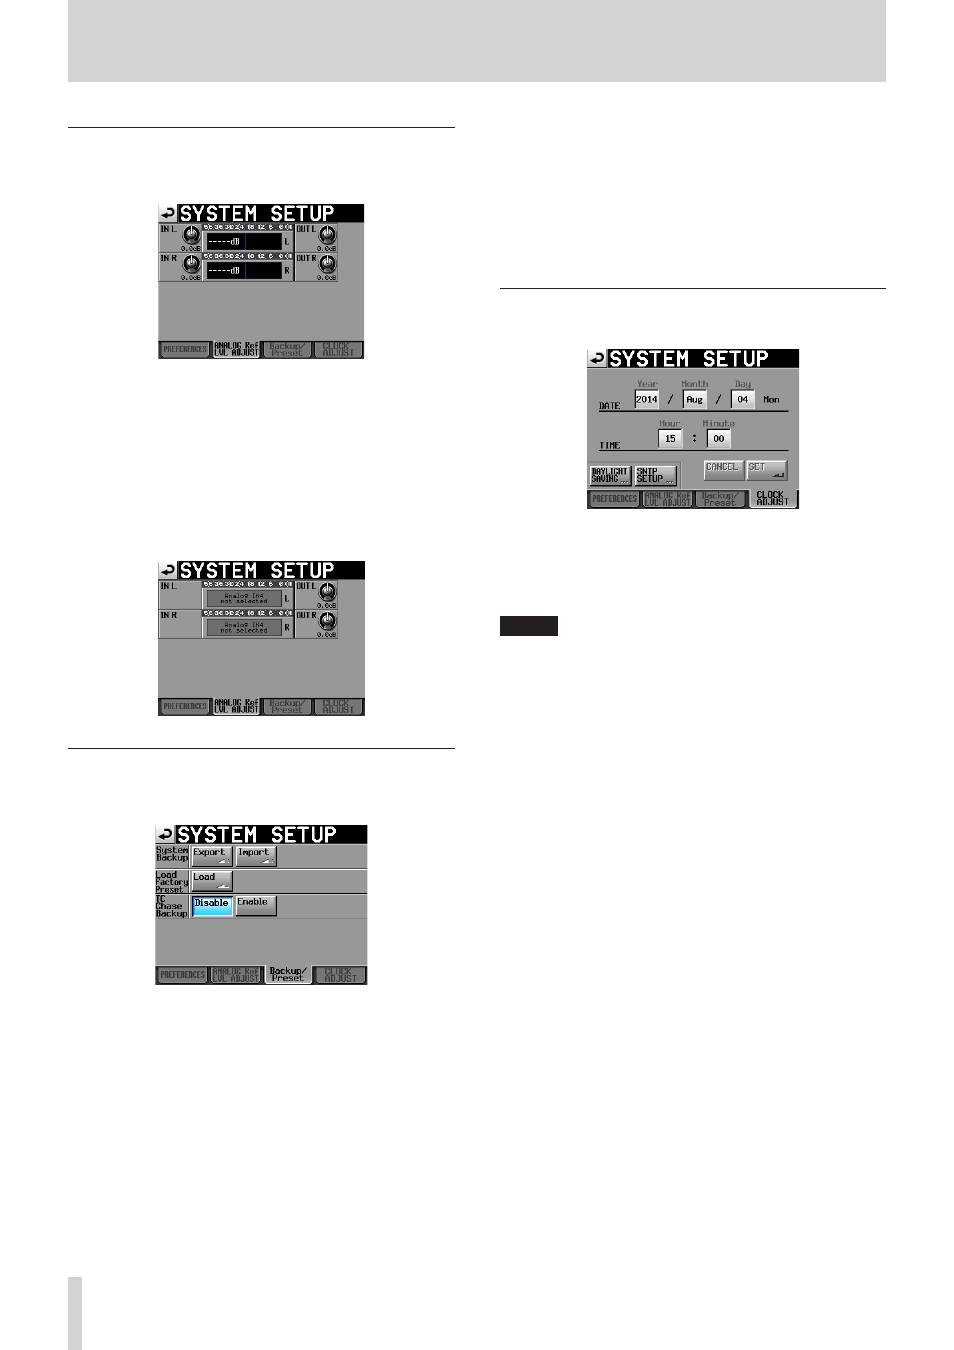
ANALOG Ref LVL ADJUST page
Use these to adjust the analog input and output reference levels
of each channel.
Use “IN x” to adjust the analog input level, and use “OUT x” to
adjust the analog output level (“x” is L or R).
Touch a knob to select it, making the background yellow, and
turn the DATA dial to set the level.
Turn the DATA dial to change it in 0.1dB increments, or press
and turn it to change it in 1dB increments. The values appear
beneath each knob.
Range: −6dB to +6dB (default value: 0dB)
If an analog input has not been set, a knob will not be shown
and “Analog IN not selected” will appear in the meter area.
System setting backup and preset functions
You can import/export system files and load factory settings
using the Backup/Preset page of the SYSTEM SETUP screen.
System Backup
o
You can write System Backup data to the selected card
using the Export button.
o
You can read System Backup data on the selected card
using the Import button and write it to the built-in
memory.
If there are no System Backup files, a pop-up window
indicating that the import cannot be performed is shown.
Load Factory Preset
Touch the Load button to load Factory Preset data (the
setting values when shipped from the factory).
TC Chase Backup
Use to set whether or not the TC Chase setting is backed up.
Setting buttons
o
Disable (default): The TC Chase setting is not backed
up. Every time the unit is turned
on, TC Chase will be set to OFF.
o
Enable:
The TC Chase setting is backed up.
The TC Chase setting in use before
the unit was turned off will be
restored when it is turned on
CLOCK ADJUST page
Set the time of the built-in clock.
Touch the item that you want to set, and use the DATA dial to
adjust the item. (See “Setting the time of the built-in clock” on
page 24.)
Touch the SET button on the CLOCK ADJUST page or press the
DATA dial to confirm the setting.
NOTE
While setting the time, the clock stops and the “:” does not
blink.
When you touch the SET button, the clock starts again and
the “:” blinks.
DAYLIGHT SAVING button
Touch to open the DAYLIGHT SAVING TIME SETUP page.
SNTP SETUP button
Touch to open the SNTP SETUP screen.