Printer setup, Available printers, Installed printers – Visara 1783 User Manual
Page 32: Local printer, Available, Install, Installed, Local, Properties, Remote
1783 Network Computing Terminal User’s Manual
707042-002
5-2
This chapter shows you how to install and select printers, and how to preview documents
before printing.
Printer setup
The first step in being able to print files is to select a printer from the Printer Setup dialog.
1. Click the
button (located at the lower left-hand corner of the screen).
2. Click
Printers.
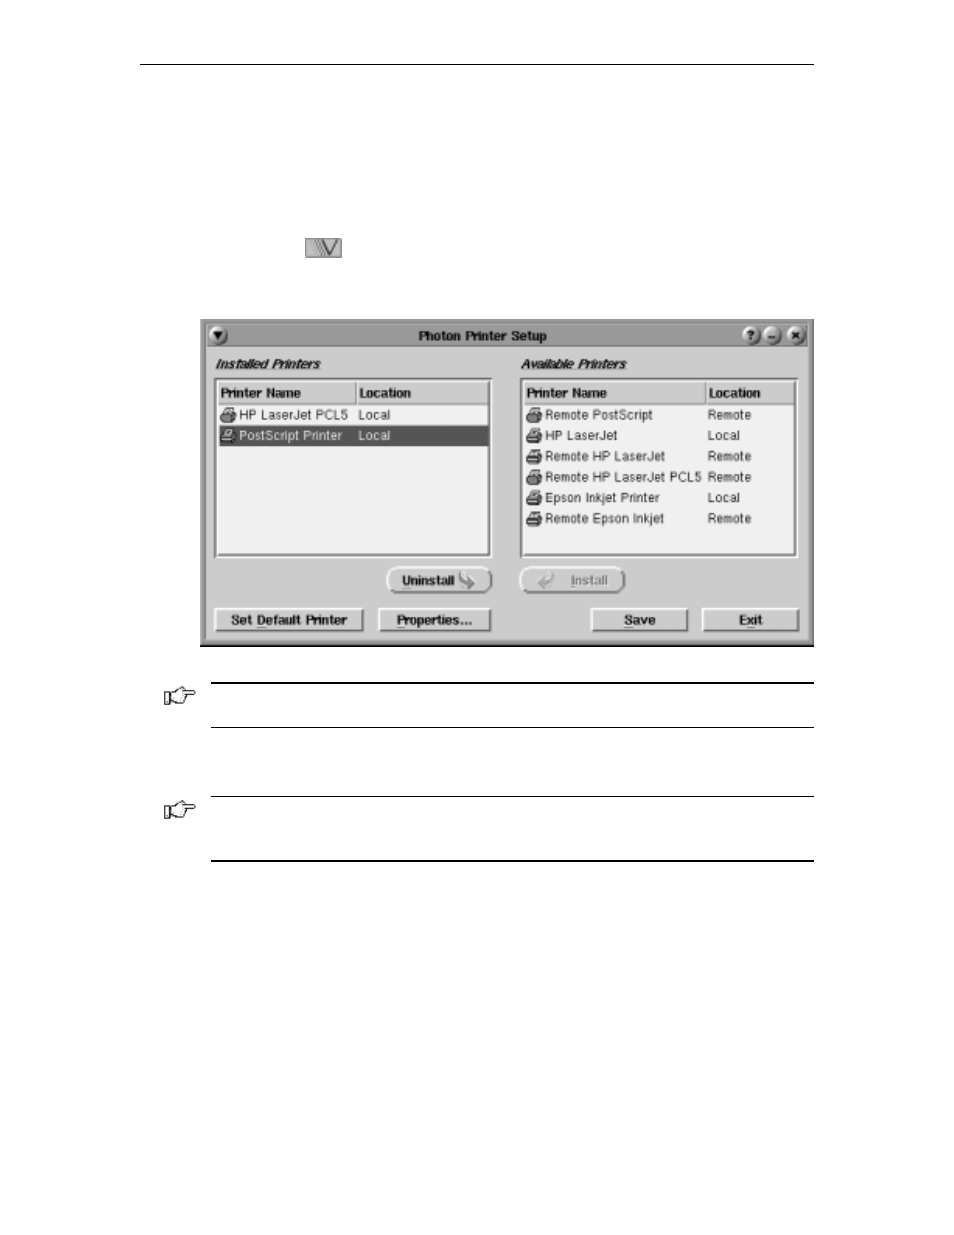
The Photon Printer Setup panel will appear:
Note: Contact your system administrator if there are no printers listed in the Available
Printers panel.
The options of the printer setup dialog are:
•
Installed Printers
– Displays the list and location of printers that are installed.
Note: Local means there is a parallel printer attached to this unit. For remote location
printers to print, they must be configured using the Remote Printers application. (See
Configuring Remote Printers, page 5-7.)
•
Available Printers
– Displays the lists and location of printers that may be installed.
Output that goes to spool devices is indicated with a printer icon.
•
Install
– Installs the printer that is selected in the list of Available Printers.
•
Uninstall
– Uninstalls the printer that is selected in the list of Installed Printers.
•
Set Default Printer
– Sets the default printer to the one selected in the Installed
Printers panel.
•
Properties
– Specify printer options such as paper size, margins, and print quality
for the printer selected in the Installed Printers panel.
•
Save
– Saves the current configuration.
•
Exit
– Closes the printer setup window.