Installing a printer, Changing the default printer, Printing when a printer has not been set up – Visara 1783 User Manual
Page 33: Add printer, Default printer, changing, Adding, Default, Installing
Chapter 5: Using print services
707042-002
5-3
Installing a printer
As many printers as necessary may be installed using the following steps:
1. Click on a printer name from the list of Available Printers in the right panel. The
printer name and location will become highlighted, and the
Install
button will be
made available for use.
2. Click
Install
. The selected printer moves to the Installed Printers panel on the left.
Changing the default printer
To change the default printer:
1. Click the printer name that should be selected as the default from the list of Installed
Printers. If it is the only printer selected, the
Set Default Printer
button will be
made available for use.
2. Click
Set Default Printer
. The printer which was selected will move to the top of
the list. The Set Default Printer Button changes to
Is Default Printer
.
When printing from an application, the printer chosen as default is displayed in the Printer
field. Before printing, you can accept the default printer, or choose from any of the printers
in the dropdown printer list.
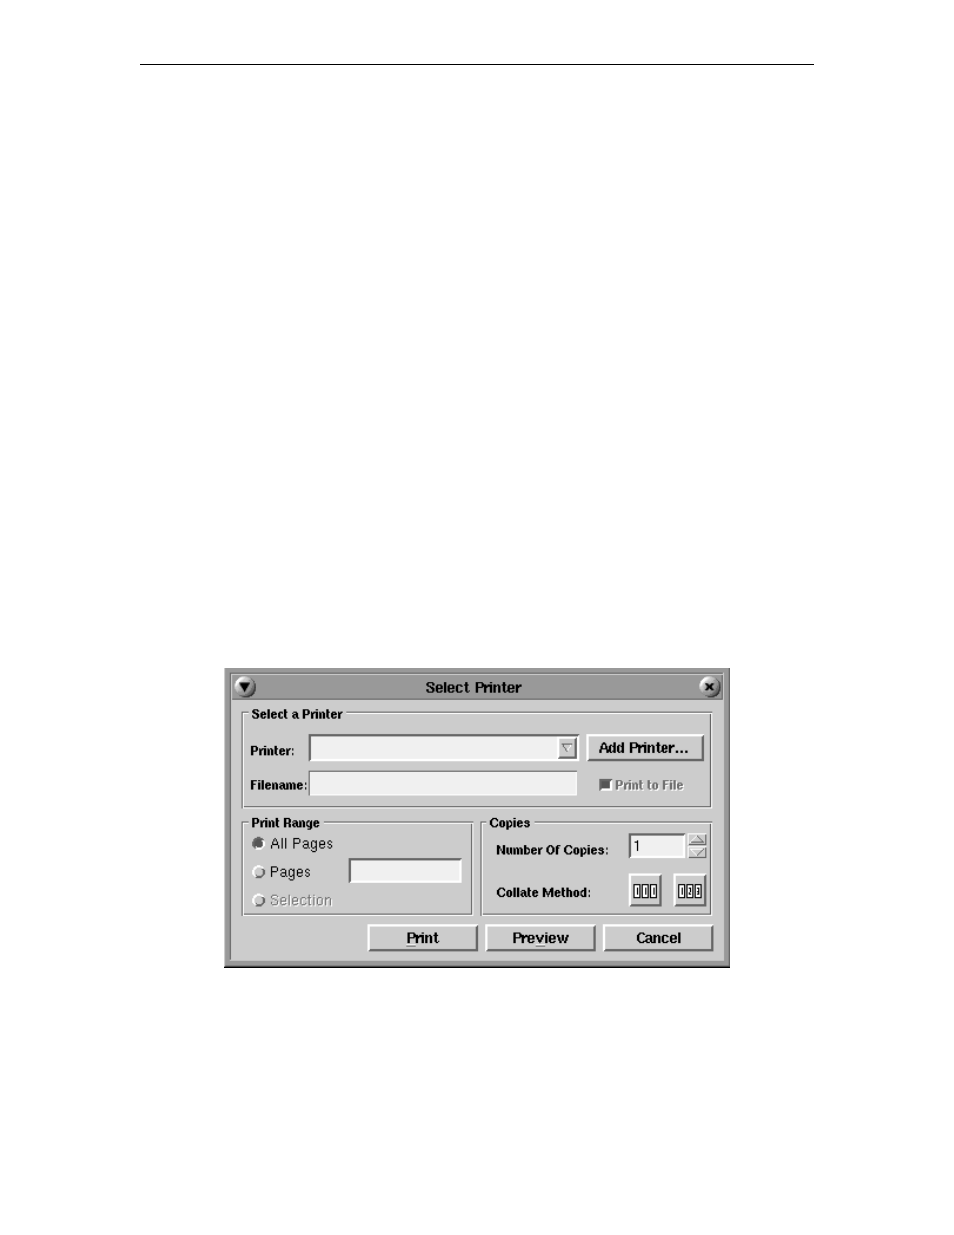
Printing when a printer has not been set up
If a printer was not installed prior to selecting the
command from an application’s
menu, you will be prompted to install a printer. The Select Printer panel will appear:
Click the
Add Printer...
button – the Photon Printer Setup panel will open. Install the
printer(s) by following the steps outlined in Installing a Printer.