Apple 27" Studio Display (Nano-Texture Glass, Tilt Adjustable Stand) User Manual
Page 35
Studio Display
073-00335-A | 35
© 2022 Apple Inc. All rights reserved.
Display (VESA Mount Adapter) | Before You Begin
• To remove the display, you must cut adhesive strips that attach the display to the rear housing.
Each strip has a foam layer surrounded by two adhesive layers. You’ll use the adhesive cutter to
cut the adhesive strips and will be cutting mostly through the foam layer.
• For models configured with the tilt-adjustable stand or tilt- and height-adjustable stand, refer to
removal and reassembly instructions.
Important
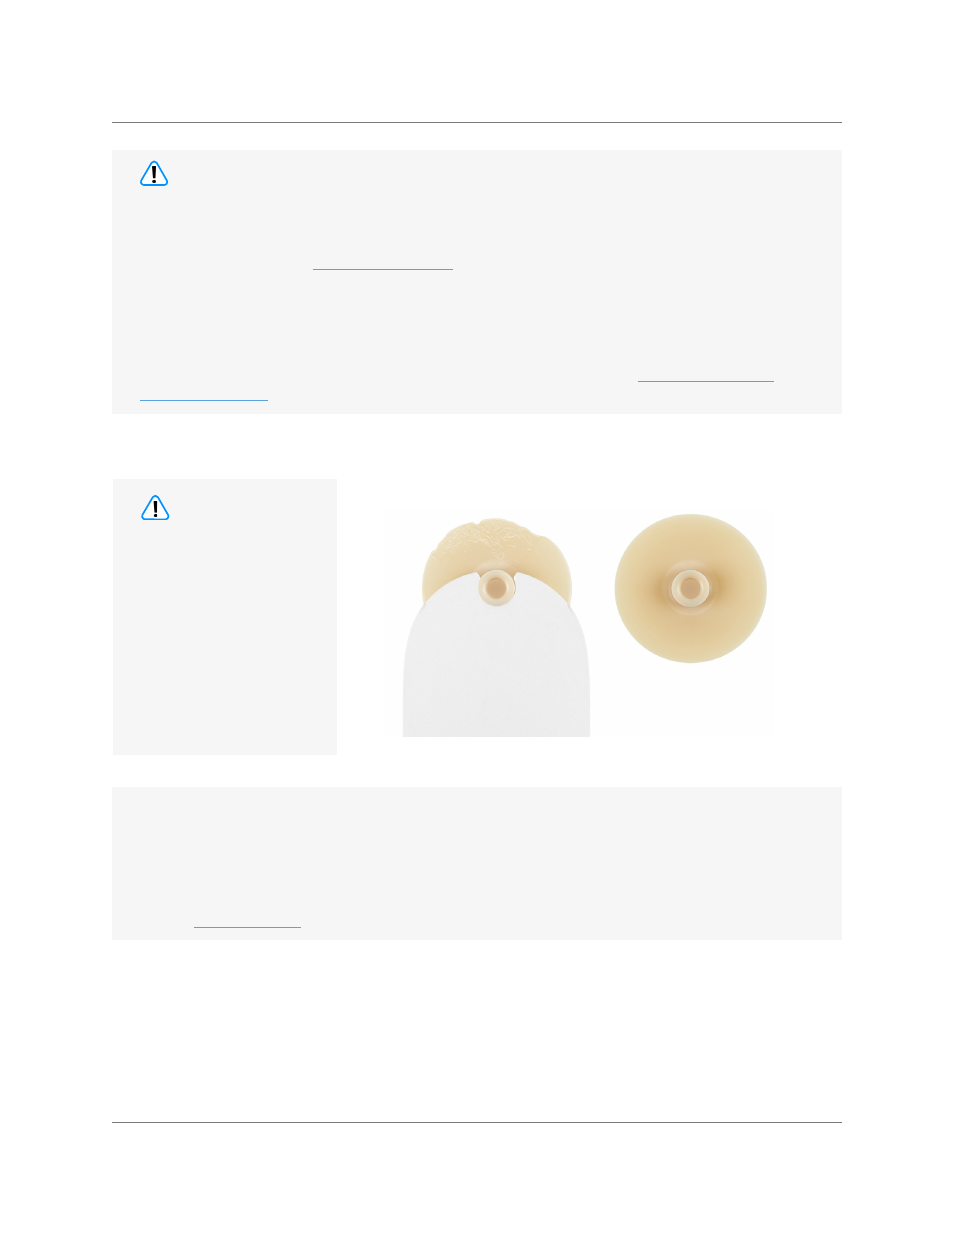
Damaged wheel New wheel
The adhesive cutter has
replacement wheels.
You will likely need to
use several wheels
because when a wheel is
chipped, dented, broken,
or no longer flat, you
must replace it. Using
a damaged wheel can
damage the polyester
tape on the display.
Caution
Note: The images in this procedure may show a display with a stand. However, the procedure is the
same for a display with a VESA mount adapter.
This procedure requires System Configuration. To perform System Configuration you will need the
following:
• The latest version of
talled on a Mac running macOS 12.4 or later
• Internet access
• A USB-C charge cable or a USB-A to USB-C cable. The USB-C cable must support both power
and data. Don’t use Thunderbolt 3 cables.
After you’ve completed all removal and reassembly steps and configured the Mac with Apple
Service Utility, learn how to initiate the System Configuration process at
Caution