Apple 27" Studio Display (Nano-Texture Glass, Tilt Adjustable Stand) User Manual
Page 83
Studio Display
073-00335-A | 83
© 2022 Apple Inc. All rights reserved.
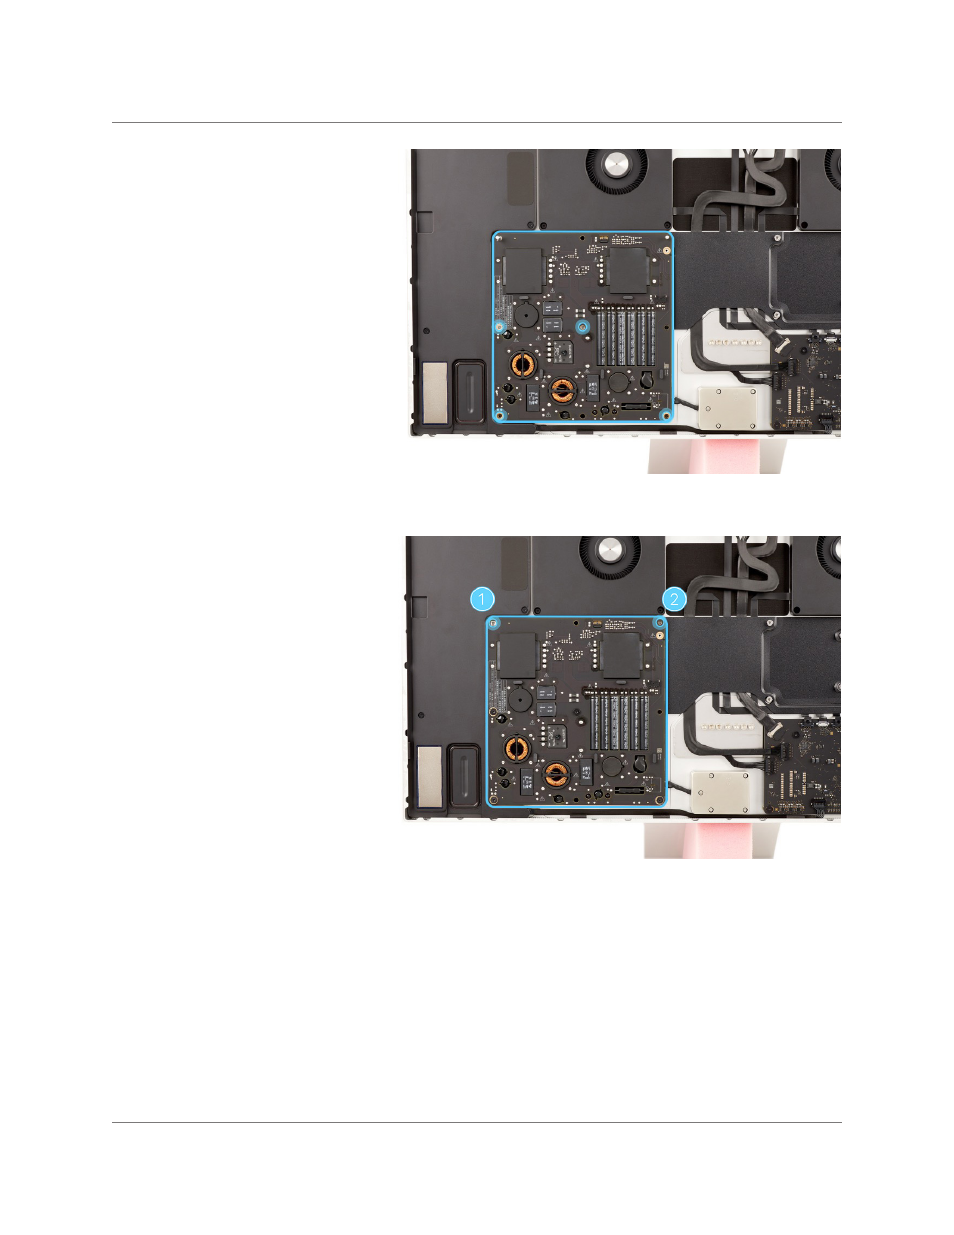
3. Position the board into the
housing using the alignment
pins. Use the T8 screwdriver
to partially reinstall the four
T8 screws (923-07143).
4. Insert the Torx T8 bit into
the 0.3–1.2 Nm adjustable
torque driver. Set the torque
value to 0.8 Nm.
6. Remove the two alignment
pins (1, 2). Then use the
T8 screwdriver to partially
reinstall two T8 screws
(923-07143) into the PFC
power supply board (1, 2).
5. Use the adjustable torque
driver and the Torx T8 bit
to fully reinstall the four T8
screws.
7. Keep the Torx T8 bit in
the 0.3–1.2 Nm adjustable
torque driver. Ensure that
the torque value is still set to
0.8 Nm.
8. Use the adjustable torque
driver and the Torx T8 bit to
fully reinstall the two T8
screws.
Power Supply Boards | Reassembly