Logic board – Apple 27" Studio Display (Nano-Texture Glass, Tilt Adjustable Stand) User Manual
Page 48
Studio Display
073-00335-A | 48
© 2022 Apple Inc. All rights reserved.
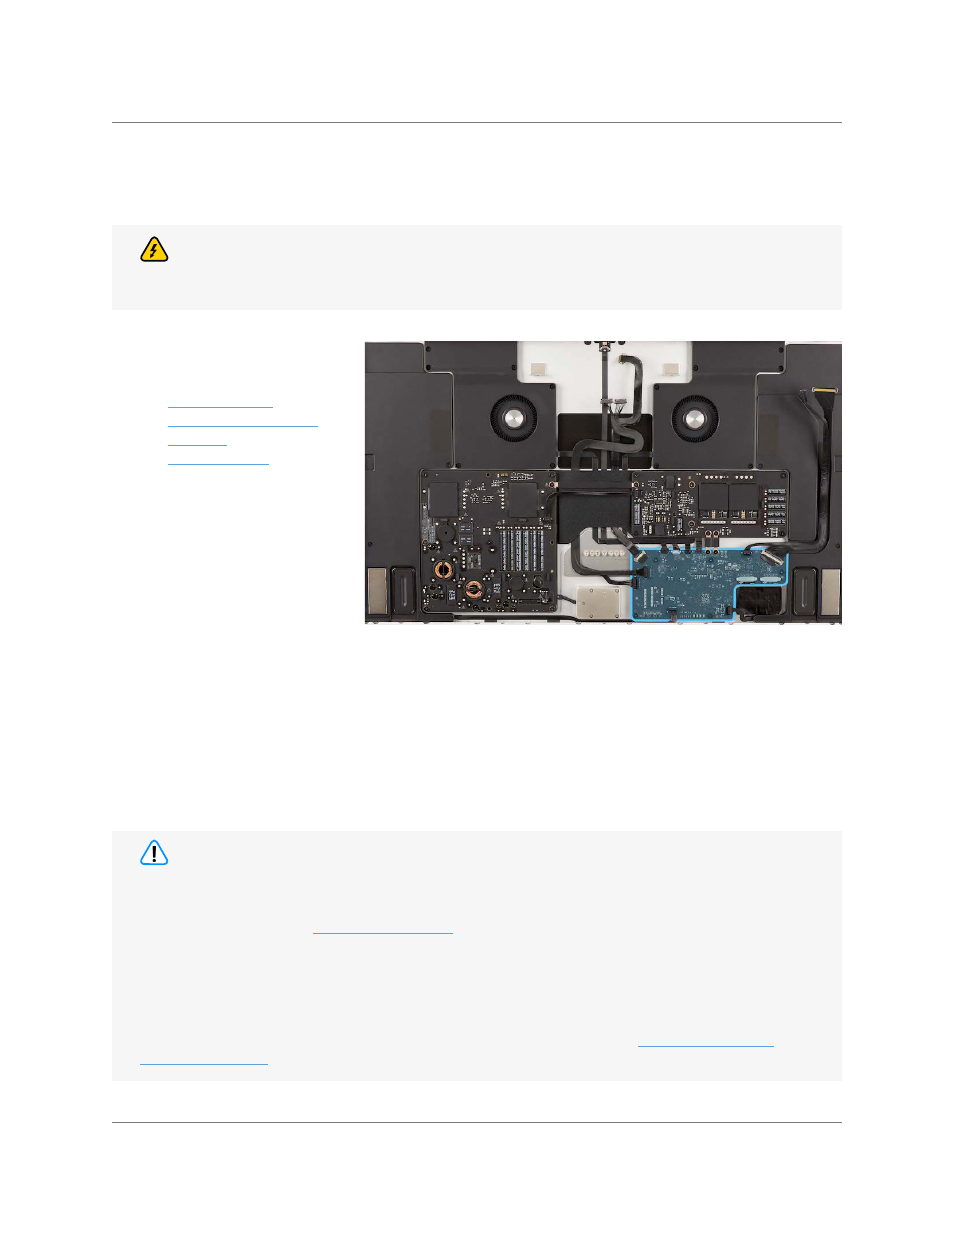
Logic Board | Before You Begin
Logic Board
• Adjustable torque driver
(10–34 Ncm)
• Adjustable torque driver
torque driver (0.3–1.2 Nm)
• Alignment pins (2 mm)
• ESD-safe tweezer
• Nylon probe (black stick)
• Support wedge for
tilt-adjustable stand
• Support wedge for tilt- and
height-adjustable stand
• Torx T6 bit
• Torx T6 screwdriver
Tools
Before You Begin
Danger
Ensure that the power cord is not plugged into an electrical outlet.
Remove the following parts
before you begin:
•
or
•
This procedure requires System Configuration. To perform System Configuration you will need the
following:
• The latest version of
talled on a Mac running macOS 12.4 or later
• Internet access
• A USB-C charge cable or a USB-A to USB-C cable. The USB-C cable must support both power
and data. Don’t use Thunderbolt 3 cables.
After you’ve completed all removal and reassembly steps and configured the Mac with Apple
Service Utility, learn how to initiate the System Configuration process at
Caution