Step 2. connecting the scanner to your computer, Step 3. installing the software – Plustek Opticpro A320E Flatbed Scanner User Manual
Page 155
10
S
S
t
t
e
e
p
p
2
2
.
.
C
C
o
o
n
n
n
n
e
e
c
c
t
t
i
i
n
n
g
g
t
t
h
h
e
e
S
S
c
c
a
a
n
n
n
n
e
e
r
r
t
t
o
o
Y
Y
o
o
u
u
r
r
C
C
o
o
m
m
p
p
u
u
t
t
e
e
r
r
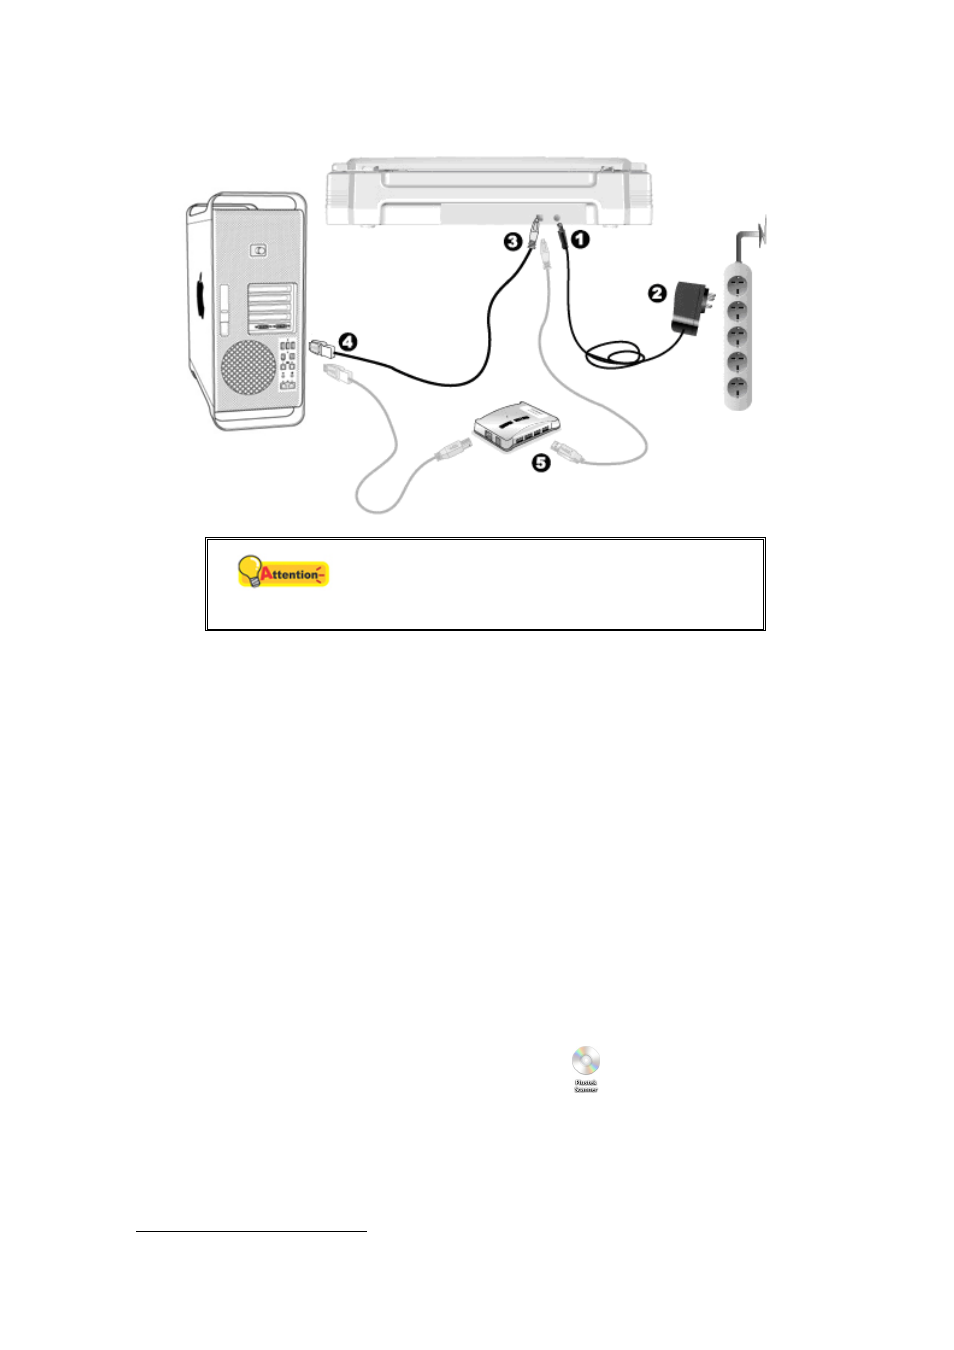
Attention
Please make sure the scanner is turned OFF
before you plug or unplug the scanner power
adapter.
1. Plug the AC adapter into the scanner’s power receptor.
2. Plug the other end of the power cable into a standard AC power outlet.
3. Plug the square end of the included USB cable to the USB port at the rear of the
scanner.
4. Plug the rectangular end of the USB cable to an available USB port on your
computer.
5. If you plan to connect your scanner to a USB hub
, make sure that the hub is
connected to the USB port in your computer. Next, connect the scanner to the USB
hub.
S
S
t
t
e
e
p
p
3
3
.
.
I
I
n
n
s
s
t
t
a
a
l
l
l
l
i
i
n
n
g
g
t
t
h
h
e
e
S
S
o
o
f
f
t
t
w
w
a
a
r
r
e
e
1. Switch on the scanner power from the side of the scanner.
2. Insert the Mac Setup/Application DVD-ROM, included with your scanner, into your
DVD-ROM drive and a
Plustek Scanner
DVD icon
will show on the desktop of
your Mac OS X.
3. Double-click on the DVD icon, and a window will pop up displaying the file folder.
4. Double-click on the setup file
Setup
, and the Scanner Installer will start to guide
4
The USB hub is not included with the scanner.