Schedule configuration – TelVue HyperCaster® User Manual
Page 84
TelVue HyperCaster
®
User Manual / v5.0 / October 2014
© 2014 TelVue Corporation 16000 Horizon Way, Suite 500, Mt. Laurel, NJ 08054
HyperCaster
®
is a registered trademark of TelVue Corporation 800-885-8886 / www.telvue.com
83
•
Credentials – choose between Anonymous and Normal.
•
Username – The name you will use to connect to the remote server. This must be a valid
username from your User Management list.
•
Password – The password you will use to connect to the remote server.
•
Password Confirm – Type the password again to make sure you have not made a mistake.
•
For an Archive server, two additional fields will appear at the bottom of the form:
o
“Share Name” and “Destination Directory” (for SMB)
o
“Destination Directory” and an “Active Mode” checkbox (for FTP)
When you have finished, click Add to add the server to the list or Cancel to exit without adding the
server. You are returned to the Remote Server Setup screen.
Edit Remote Server
To edit the settings for a remote server, click on the Edit icon in the Action column. The Edit
Remote Server screen is displayed. Edit the fields as you would when adding a remote
server. Destination Directory can be edited here. When you have finished, click Save to save any
changes or Cancel to exit the screen without making any changes. You are returned to the Remote
Server Setup screen.
Test Remote Server
To test a remote server, click the Test icon. The system uses the username and password for this
remote server to attempt to access it, and responds with a message saying whether it was successful.
Delete Remote Server
To delete a remote server, click the Delete icon. The application asks you to confirm that you want to
delete the remote server. Click Yes/OK to delete it or No/Cancel to return to the Remote Server
Setup screen without deleting the server.
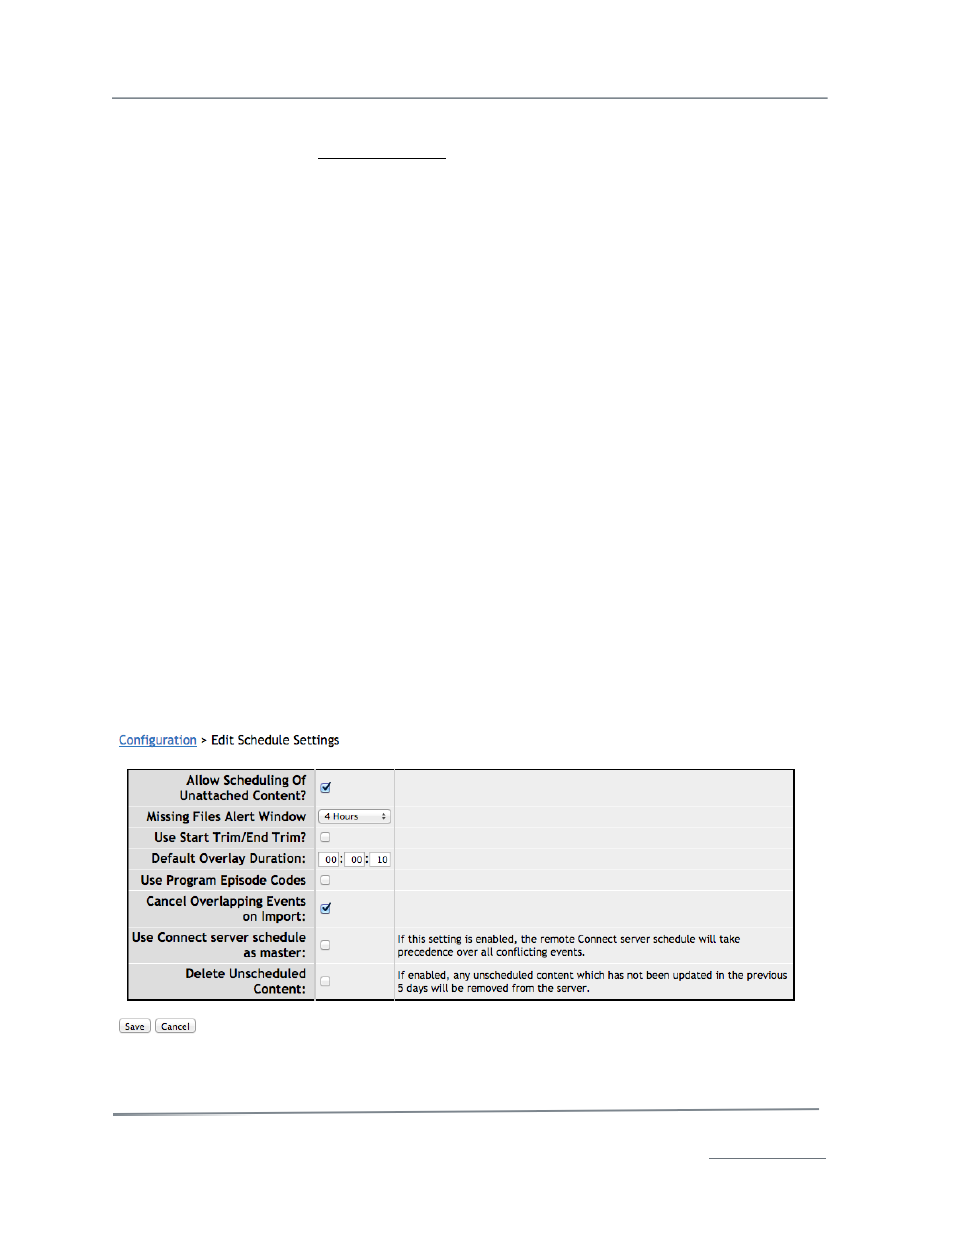
Schedule Configuration
Schedule Configuration requires admin-level privileges. The schedule settings allow you to set
defaults for the content you use in your programming. To configure schedule settings, click on the
schedule option. The application displays the Edit Schedule Settings screen.
Change the defaults by editing one or more of the following fields. To return to the Configpage
without making any changes, click the Cancel button.