Toolvox® x3, Administrator guide, User guide – Code Blue TOOLVOX X3 User Manual
Page 90
Code Blue
•
259 Hedcor Street
•
Holland, MI 49423 USA
•
800.205.7186
•
www.codeblue.com
GU-154-F
page 90 of 132
ToolVox® X3
Administrator Guide
Open the Management Client (or Management Application in some editions of XProtect). Right-click
the Toolvox node, then select “Add New...”.
ED-10046-A
The Add Toolvox form will appear.
ED-10047-A
User Guide
Code Blue
●
●
●
●
●
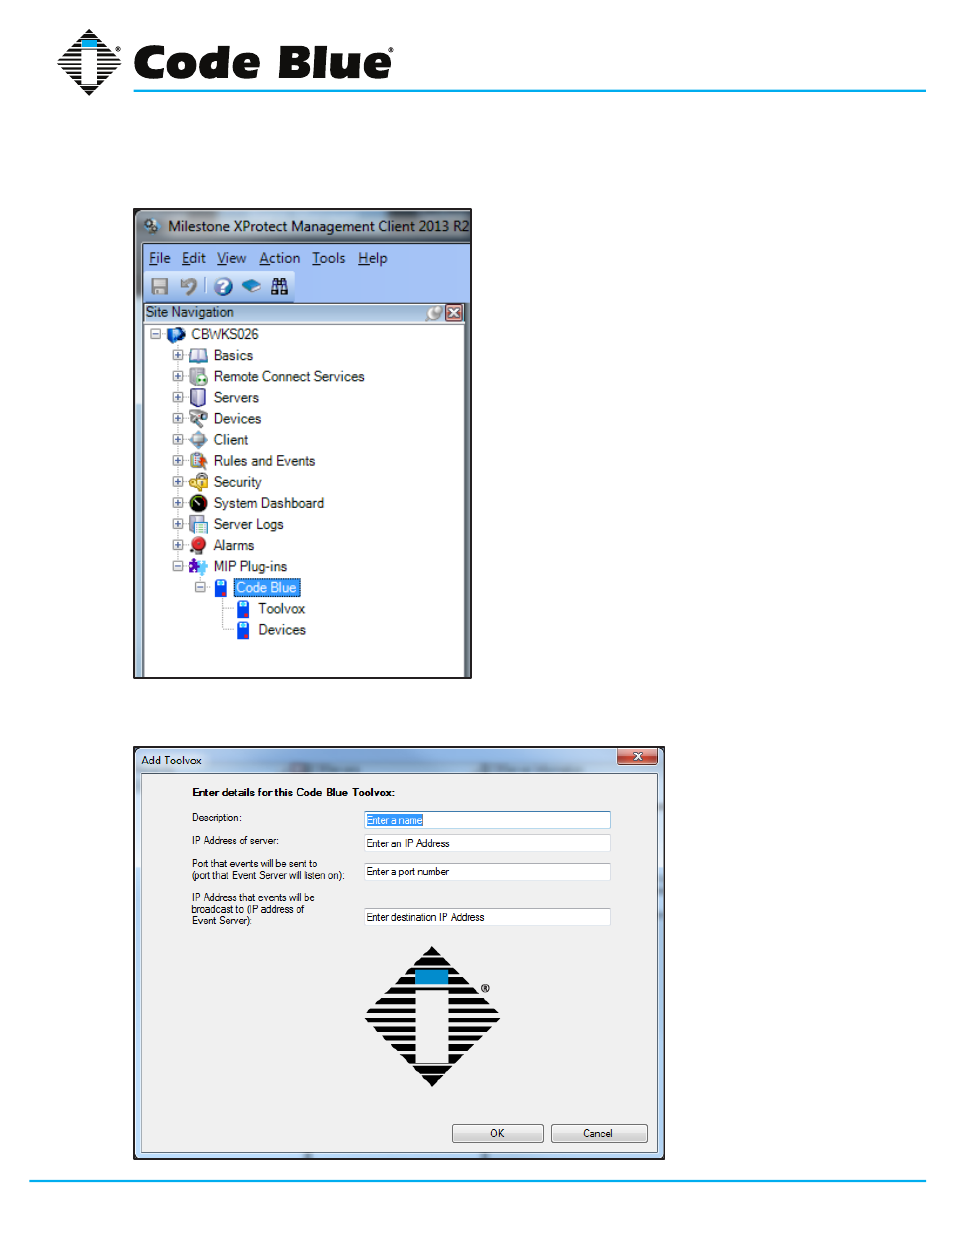
This section will explain how to add a ToolVox to the XProtect system. Screenshots are from the
Corporate Edition and may look different if you are using a different edition of XProtect.
Open Management Client (known as Management Application in some editions of XProtect).
Expand the MIP Plug-ins node in the Site Navigation tree. Expand the Code Blue node. There
are two nodes inside: ToolVox and Devices.
ED-10045-A
Open the Management Client (or Management Application in some editions of XProtect). Right-
click the ToolVox node, then select “Add New...”.
User Guide
Code Blue
●
●
●
●
●
ED-10047-A
Fill out the fields:
Description – Description of this particular ToolVox. If you have multiple ToolVox units,
enter something that will help you identify which is which.
IP Address of server – The IP Address of the ToolVox Media Gateway is displayed in
alerts and used for call event transmission.
Port that events will be sent to (port that Event Server will listen on) – Specify the port
on the computer running Milestone XProtect Event Server that events should be sent to. If
you are not sure what to enter, contact the Server Administrator and request an available
port. You will need a port that can be used in conjunction with the Event Server’s IP address
you are using.
IP Address that events will be broadcast to (IP address of Event Server) – Enter the IP
address of the Milestone XProtect Event Server. If you are not sure what the IP address of
the Event Server is, contact the Server Administrator to request an IP address that can be
used in conjunction with the port entered in the Port field.
Press the OK button to save.
ToolVox units that you have configured will show up in a list in a separate panel. In the following
screenshot, you can see there are two ToolVox units configured: ToolVox #1 and ToolVox #2.